Cold Wallet Deployment
This guide walks you through setting up your cold wallet, either on a single air-gapped machine or split across multiple machines.
⚠️ Prerequisites
Before you begin, ensure that each air-gapped machine has the following installed:
openssldockerdocker compose plugin
You will receive a cold wallet bundle via a presigned URL pointing to an S3 location.
You should follow the link and accept the file download for cold-wallet.tar.gz, and transfer it to a memory stick so that it can be moved onto one more air-gapped machine (no internet).
After transferring the bundle, you can proceed with one of the setup options below.
Option 1. Easy Setup (Single Machine Configuration)
Use this setup if you want to run both cold wallet nodes on the same air-gapped machine.
Step 1: Unpack the Bundle
Once transferred, the admin of each cold wallet node machine should unpack the cold wallet bundle using the following command:
tar -xvf cold-wallet.tar.gzStep 2: Load Docker Images
Load the cold wallet container:
docker load -i coldwallet.dockerRun the following command to load the container for the provided Redis broker:
docker load -i redis.dockerStep 3: Configure Cold Wallet Nodes
Each node admin should update their node’s configuration file (node0.yaml and node1.yaml):
- Generate a key pair for each node:
openssl genpkey -algorithm ed25519 -out node-private.pem
openssl pkey -in node-private.pem -pubout -out node-public.pem- This will generate a
.pemfile for each of the nodes' private and public keys, which should be used to fill in the placeholders:all_public_keys→ Fill in node 1 and node 2's public keysour_private_key→ This node’s private keyers_public_key→ Your Emergency Recovery System (ERS) public key.
cors:
  allow_origins:
    - "http://localhost:3001"
mode: "node"
node:
  broker:
    all_public_keys:
      0: "MCowBQYDK2VwAyEA9VgI4Nwgmk6qhAsE0JA66L64fwGTDx+SeGMIzux1uqQ="
      1: "MCowBQYDK2VwAyEA9GkEqVnQdWq0FxaTJ7g8WrZnS37xuSG+5KWysZAsL24="
    our_private_key: "MC4CAQAwBQYDK2VwBCIEIMvWGmaSMohWCV8x8s/KsuzBcNFIvwt+TZIxRArO5BrU"
    redis:
      connect_timeout: "30s"
      expire_keys: true
      max_message_receivers: 20
      max_sessions: 50
      receive_batch_size: 10
      send_batch_size: 10
      session_timeout: "10m"
      url: "redis://cold_wallet_broker_<redacted>:6379/0"
  database:
    backup_dir: "./db-backup"
    dir: "./db"
    key: "izwghq0i<redacted>"
  ers_public_key: "MIIBojANBgkqhkiG9w0BAQEFAAOCAY8AMIIBigKCAYEAq7ZMhW+PDwIbCOXdIJRcWxdAk7oWCptNtCTjxkDLTe1eDyBz6nSDkOLdFw4+RC4HQcYdcu69gEpJXwIh5OVF/wJjOOcvp7LrsuvDlnj/bJUAcu9JE4hBlDiSoLyrxtRhKyMvAKcC4NQVxWe2iSHBGbaFj5SCDzqGtffbdL4/B+7uLSSjv5wAUcnz20xB/clVNJZmdziMXeU15/zdO7A/0onVfbdMXmJReWpPNQCPR6cOgHl97fDrC3BOrG/TQUShbqocWbhoILgzOLNHkhUoPxrLNMhKYwa0RK/X7dpSQecJjlj+ut0nAU0p4C22ZG0gBqlD0h1CeCpwGcXvVyjEnEyKYOXpiBkzD3pDy1Kb0KkzD8oeCJIo089m4n2C6BtwkmHyjHQPqSjHiTGszR22uC40x8NgRX80qUXB2CjfLMa2GNFWBkgZGo+82MZVQ0UTjJmy4EOOo2MT5mdIRaQu9aCOA5A94hJlgR3tCPzTVL4sFYDMRHju3lorlhYu9WEdAgMBAAE="
  node_index: 0
  presignature_counts:
    ecdsa_secp256k1: 1000
    eddsa_ed25519: 1000
port: 8900Include only the key values, not the header or footer lines in the
.pemfiles
Step 4: Start the Cold Wallet
After completing the configuration, start the cold wallet:
docker compose upBelow is an example output from running the full stack on a single machine:

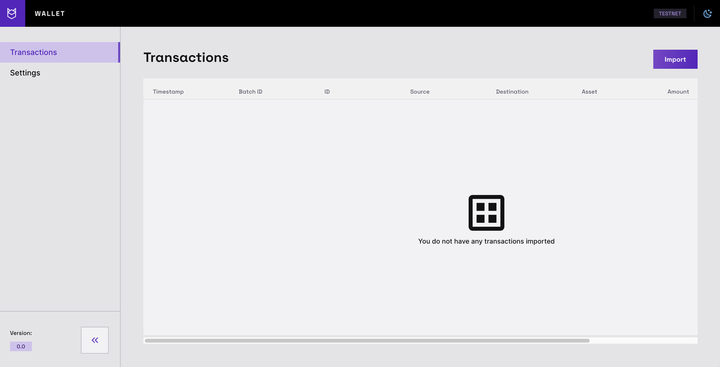
Once the setup is complete, access the Cold Wallet UI at http://localhost:8902

Option 2. Secure Setup (Multi-Machine Configuration)
Use this setup for a more secure, multi-party computation (MPC) configuration with two separate air-gapped machines.
Step 1: Unpack the bundle
On each air-gapped machine, unpack the cold wallet bundle using the following command:
tar -xvf cold-wallet.tar.gzStep 2: Load Cold Wallet Image
Load the cold wallet container with the following command:
docker load -i coldwallet.dockerStep 3: Configure Node
Each node admin should update their node’s configuration file (node0.yaml or node1.yaml):
- Each node admin should generate a key pair for their cold wallet node using the following commands:
openssl genpkey -algorithm ed25519 -out node-private.pem
openssl pkey -in node-private.pem -pubout -out node-public.pem- Use the generated keys to populate the relevant placeholders in your configuration file.
all_public_keys→ Fill in node 1 and node 2's public keysour_private_key→ This node’s private keyers_public_key→ Your Emergency Recovery System (ERS) public key.
cors:
  allow_origins:
    - "http://localhost:3001"
mode: "node"
node:
  broker:
    all_public_keys:
      0: "MCowBQYDK2VwAyEA9VgI4Nwgmk6qhAsE0JA66L64fwGTDx+SeGMIzux1uqQ="
      1: "MCowBQYDK2VwAyEA9GkEqVnQdWq0FxaTJ7g8WrZnS37xuSG+5KWysZAsL24="
    our_private_key: "MC4CAQAwBQYDK2VwBCIEIMvWGmaSMohWCV8x8s/KsuzBcNFIvwt+TZIxRArO5BrU"
    redis:
      connect_timeout: "30s"
      expire_keys: true
      max_message_receivers: 20
      max_sessions: 50
      receive_batch_size: 10
      send_batch_size: 10
      session_timeout: "10m"
      url: "redis://cold_wallet_broker_<redacted>:6379/0"
  database:
    backup_dir: "./db-backup"
    dir: "./db"
    key: "izwghq0i<redacted>"
  ers_public_key: "MIIBojANBgkqhkiG9w0BAQEFAAOCAY8AMIIBigKCAYEAq7ZMhW+PDwIbCOXdIJRcWxdAk7oWCptNtCTjxkDLTe1eDyBz6nSDkOLdFw4+RC4HQcYdcu69gEpJXwIh5OVF/wJjOOcvp7LrsuvDlnj/bJUAcu9JE4hBlDiSoLyrxtRhKyMvAKcC4NQVxWe2iSHBGbaFj5SCDzqGtffbdL4/B+7uLSSjv5wAUcnz20xB/clVNJZmdziMXeU15/zdO7A/0onVfbdMXmJReWpPNQCPR6cOgHl97fDrC3BOrG/TQUShbqocWbhoILgzOLNHkhUoPxrLNMhKYwa0RK/X7dpSQecJjlj+ut0nAU0p4C22ZG0gBqlD0h1CeCpwGcXvVyjEnEyKYOXpiBkzD3pDy1Kb0KkzD8oeCJIo089m4n2C6BtwkmHyjHQPqSjHiTGszR22uC40x8NgRX80qUXB2CjfLMa2GNFWBkgZGo+82MZVQ0UTjJmy4EOOo2MT5mdIRaQu9aCOA5A94hJlgR3tCPzTVL4sFYDMRHju3lorlhYu9WEdAgMBAAE="
  node_index: 0
  presignature_counts:
    ecdsa_secp256k1: 1000
    eddsa_ed25519: 1000
port: 8900Share your public key only with the other node admin so they can include it in their configuration.
Never share your private key.
Step 4: Redis Broker Setup
If using the provided Redis broker
One of the node admins should run the broker on their machine. To load the image for the Redis broker, run the following command:
docker load -i redis.dockerIf using an existing Redis OSS standard broker
The node admins should modify the docker-compose.yml:
- Remove the entire of
cold_wallet_broker_rediscomponent. - Remove
depends_onfrom the other components. - Update the Redis configuration in both
node0.yamlandnode1.yamlto match your broker setup.
Step 5: Update docker-compose.yml per Machine
Update each machine’s docker-compose.yml to include only the components that it should run.
✅ Include |
|
❌ Remove |
|
Step 6: Start the Cold Wallet
Start Docker Compose on both machines.
docker compose up
InfoIf you're using the included Redis broker, run
docker compose upfirst and wait until the container is healthy before starting the other node.
Updated about 19 hours ago
