Stake Assets
🪙 Find out how to stake assets with Cold Wallet.
Overview
Institutional Cold Wallet offers a staking feature, allowing users to validate and confirm transactions on blockchain networks directly through the Cold Wallet(offline).
Note:
- This feature currently support ETH token.
- ETH covers the transaction fees for all token transactions in the Institutional Vault. Before performing a staking transaction, ensure you have at least 32 ETH.
How to Stake in Cold Wallet
To stake an asset in your Institutional Cold Wallet, follow the steps below:
Note:Stake feature is account level only , which means you can only use the staking feature with the specific account where it's enabled. But within that account, you're free to use different wallets to stake your assets.
- Select the Cold Wallet Account you want to stake.
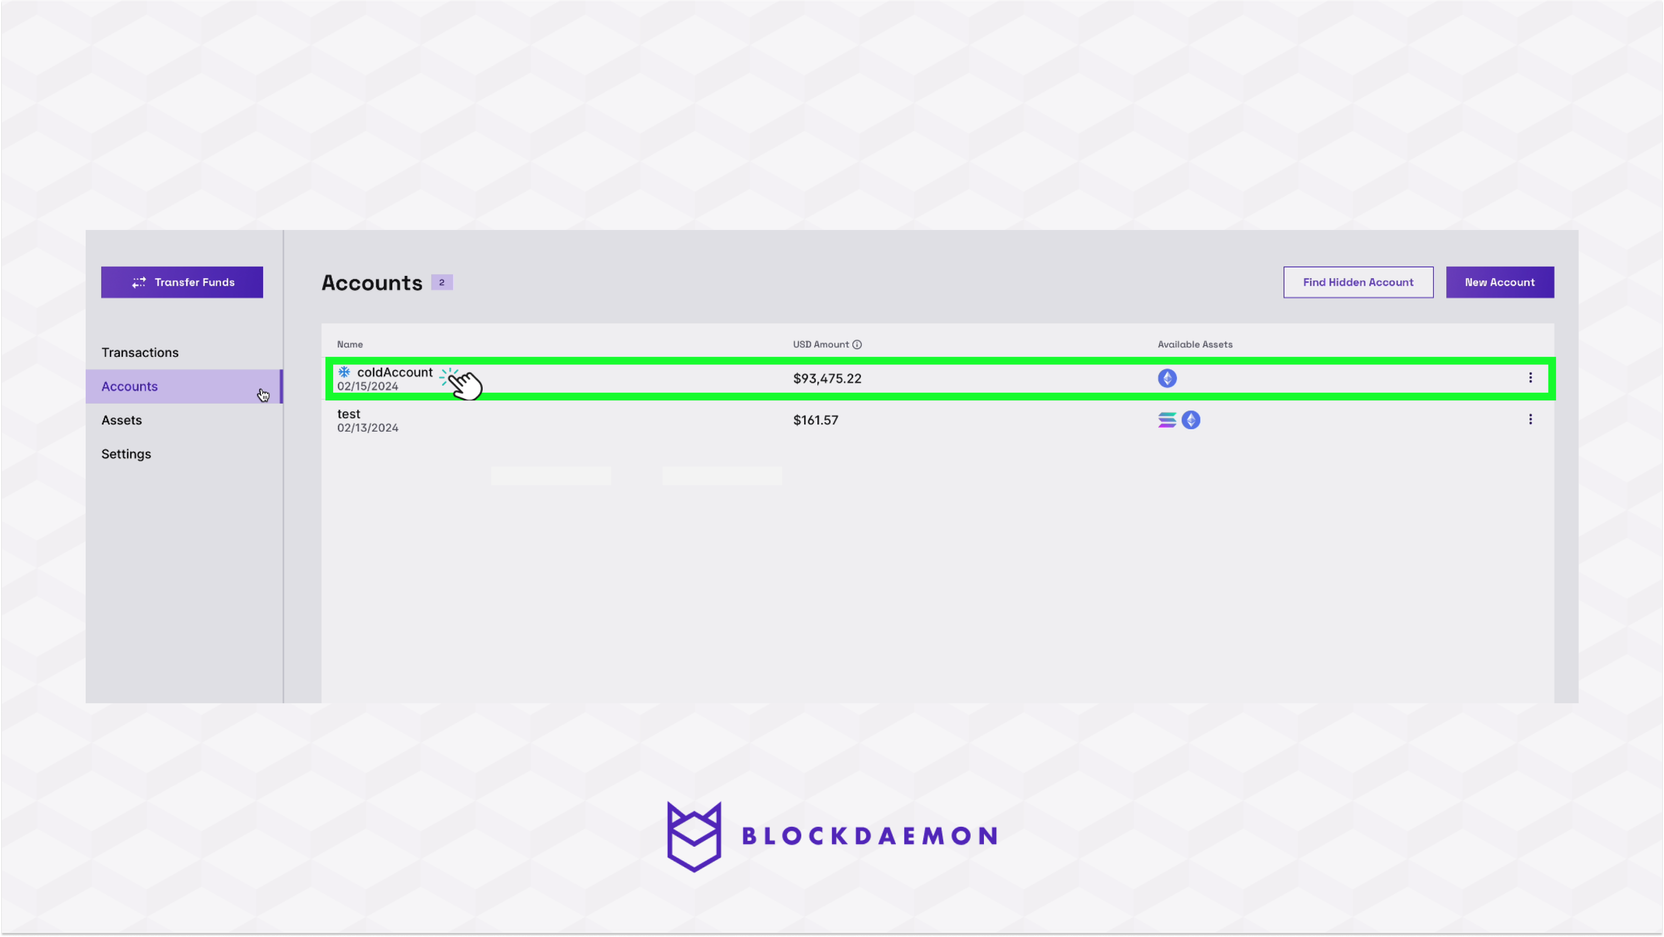
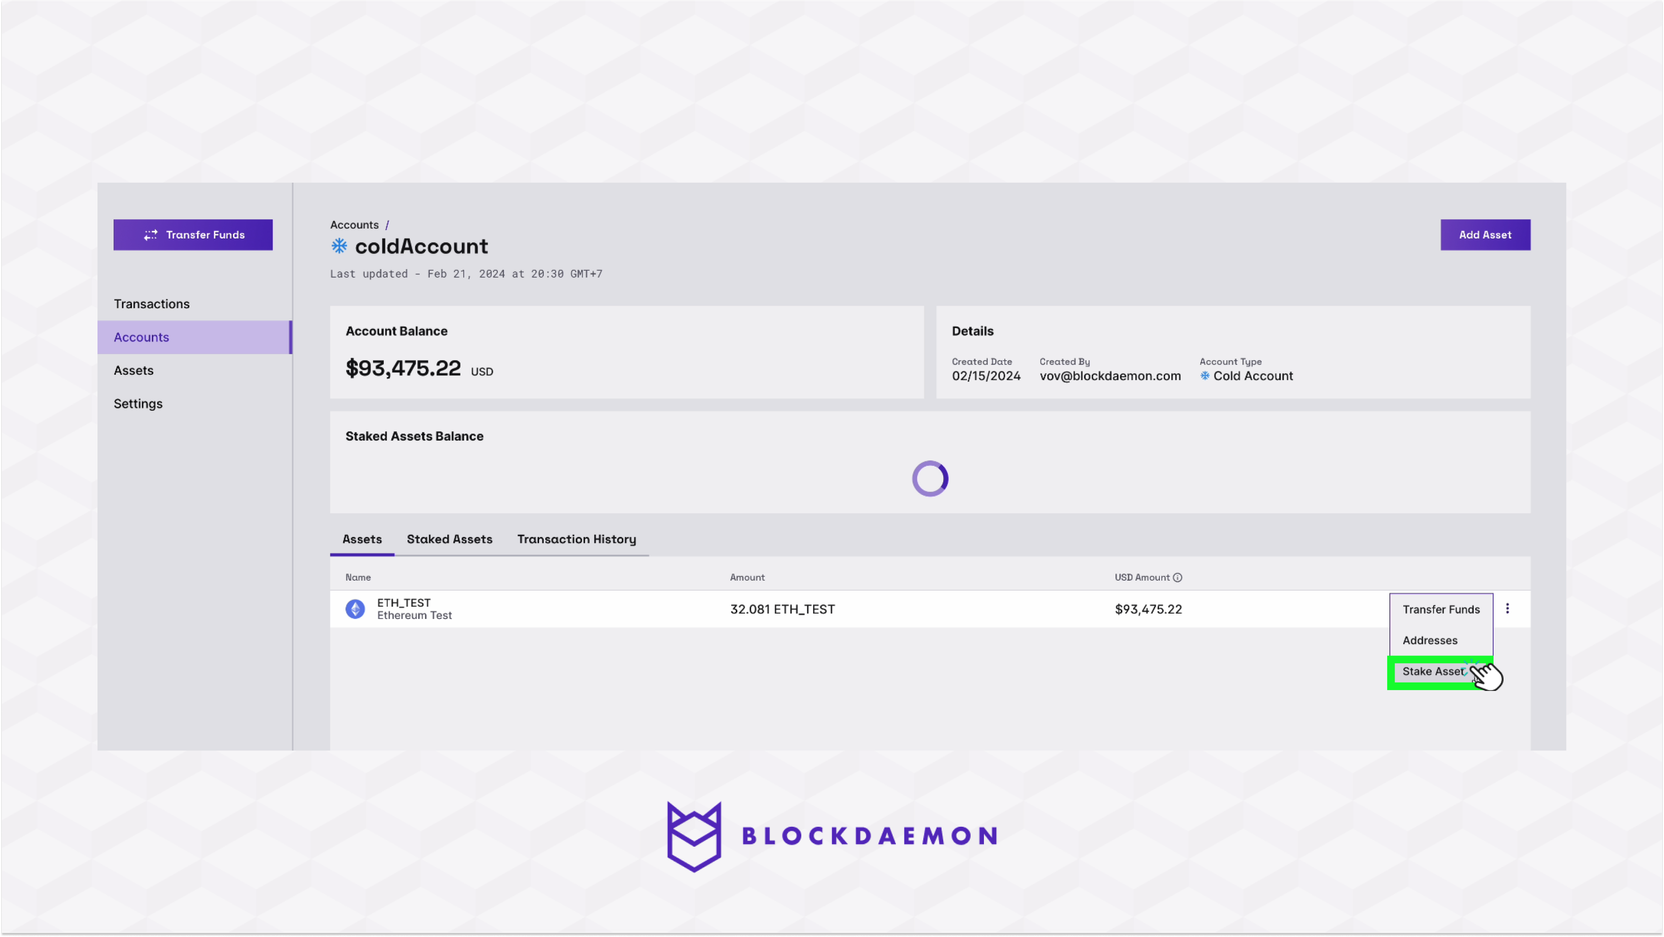
- Select the Asset you want to stake and click the overflow button.
- Click the Stake Asset button.
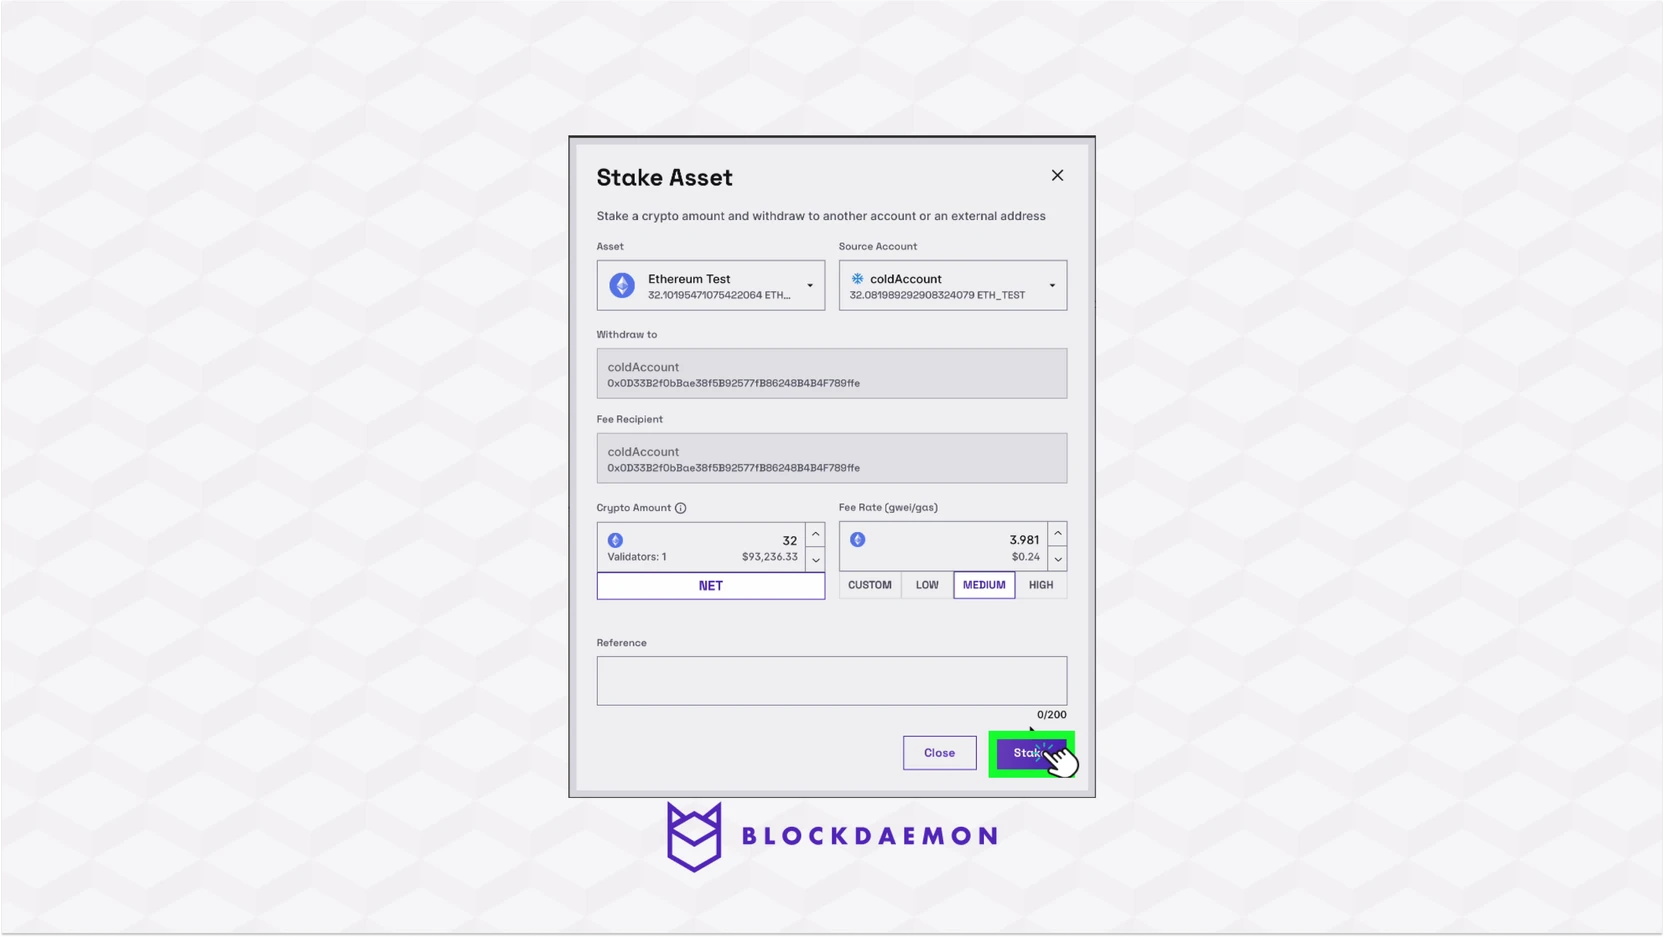
- Specify all the required fields.
Note:Ensure that you have selected the Cold Wallet account in the Source Account field.
| Field | Description |
|---|---|
| Asset | It specifies the digital asset the user wishes to stake, supported by the Institutional Vault. |
| From Wallet | Indicates the wallet from which the user wants to stake assets, chosen from multiple options within their Institutional Vault. |
| Withdraw To | Allows specifying the destination wallet or address for receiving staking rewards or withdrawals related to the staked assets. |
| Fee Recipient | Defines the address or wallet that will receive transaction fees. For ETH, this field automatically matches the Withdraw To address. |
| Crypto Amount | Used to enter the amount of the asset to be staked, indicating the number of tokens or units involved. |
| Fee Rate | Specifies the rate or percentage of staking rewards charged as a fee by the Institutional Vault or blockchain network. |
| Referenced | Optional field for including references or notes related to the staking transaction, useful for record-keeping or additional info. |
- Click the Stake button.
- Confirm the operation on your Institutional Vault Approver application.
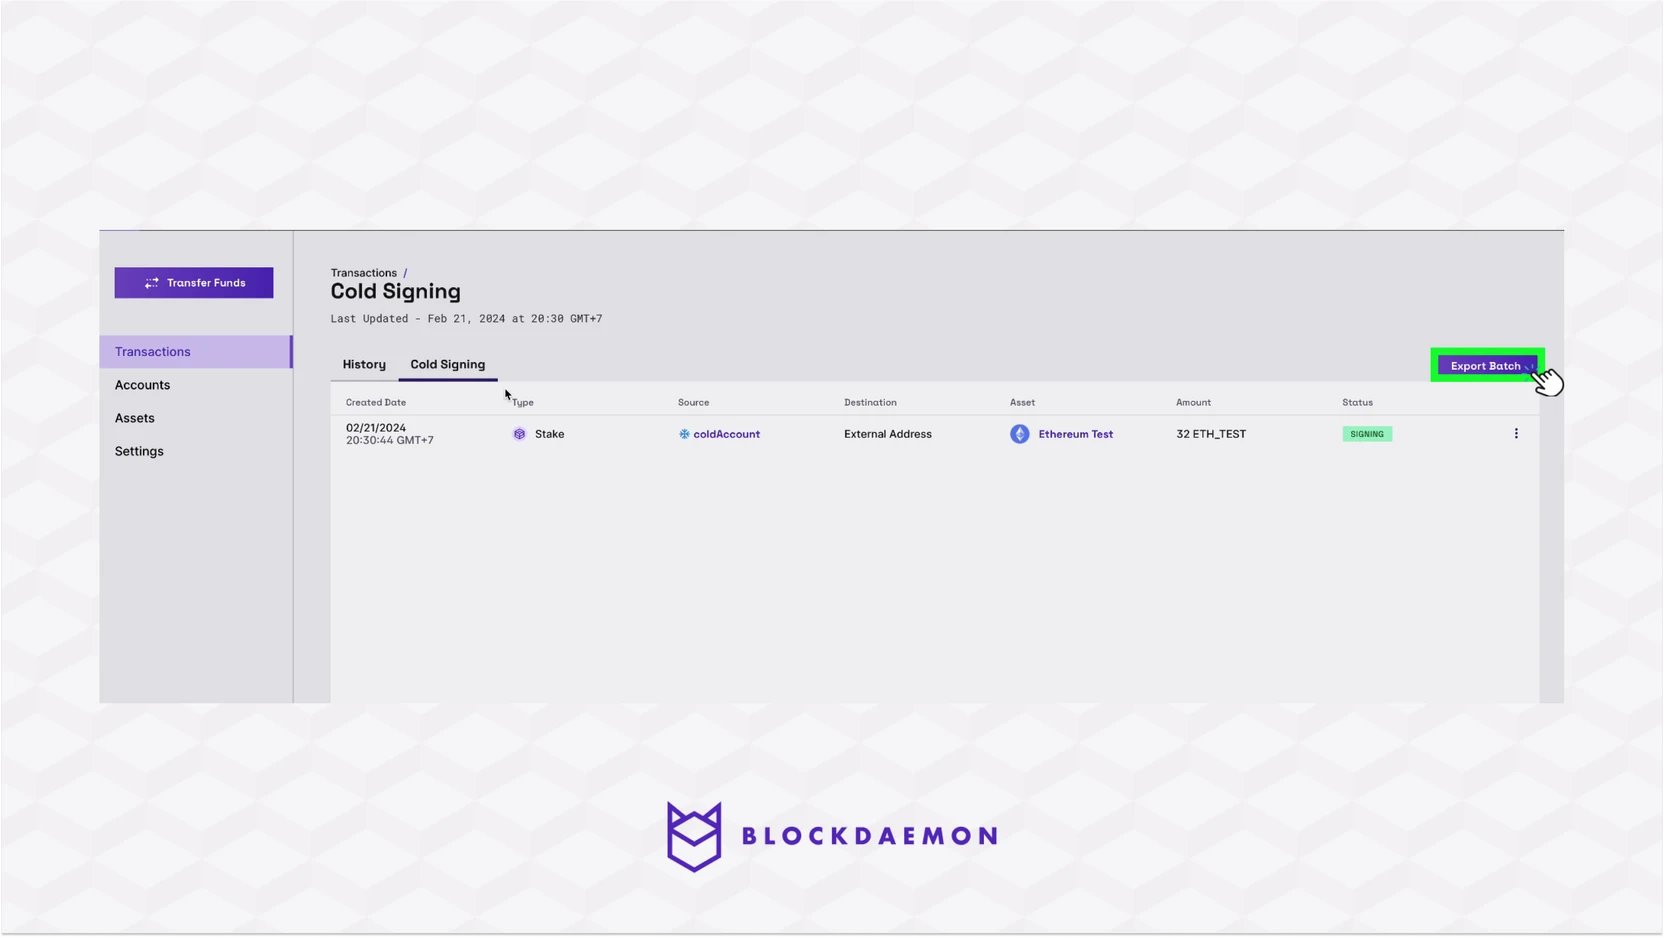
- Click the Transactions tab, and select the Cold Signing tab.
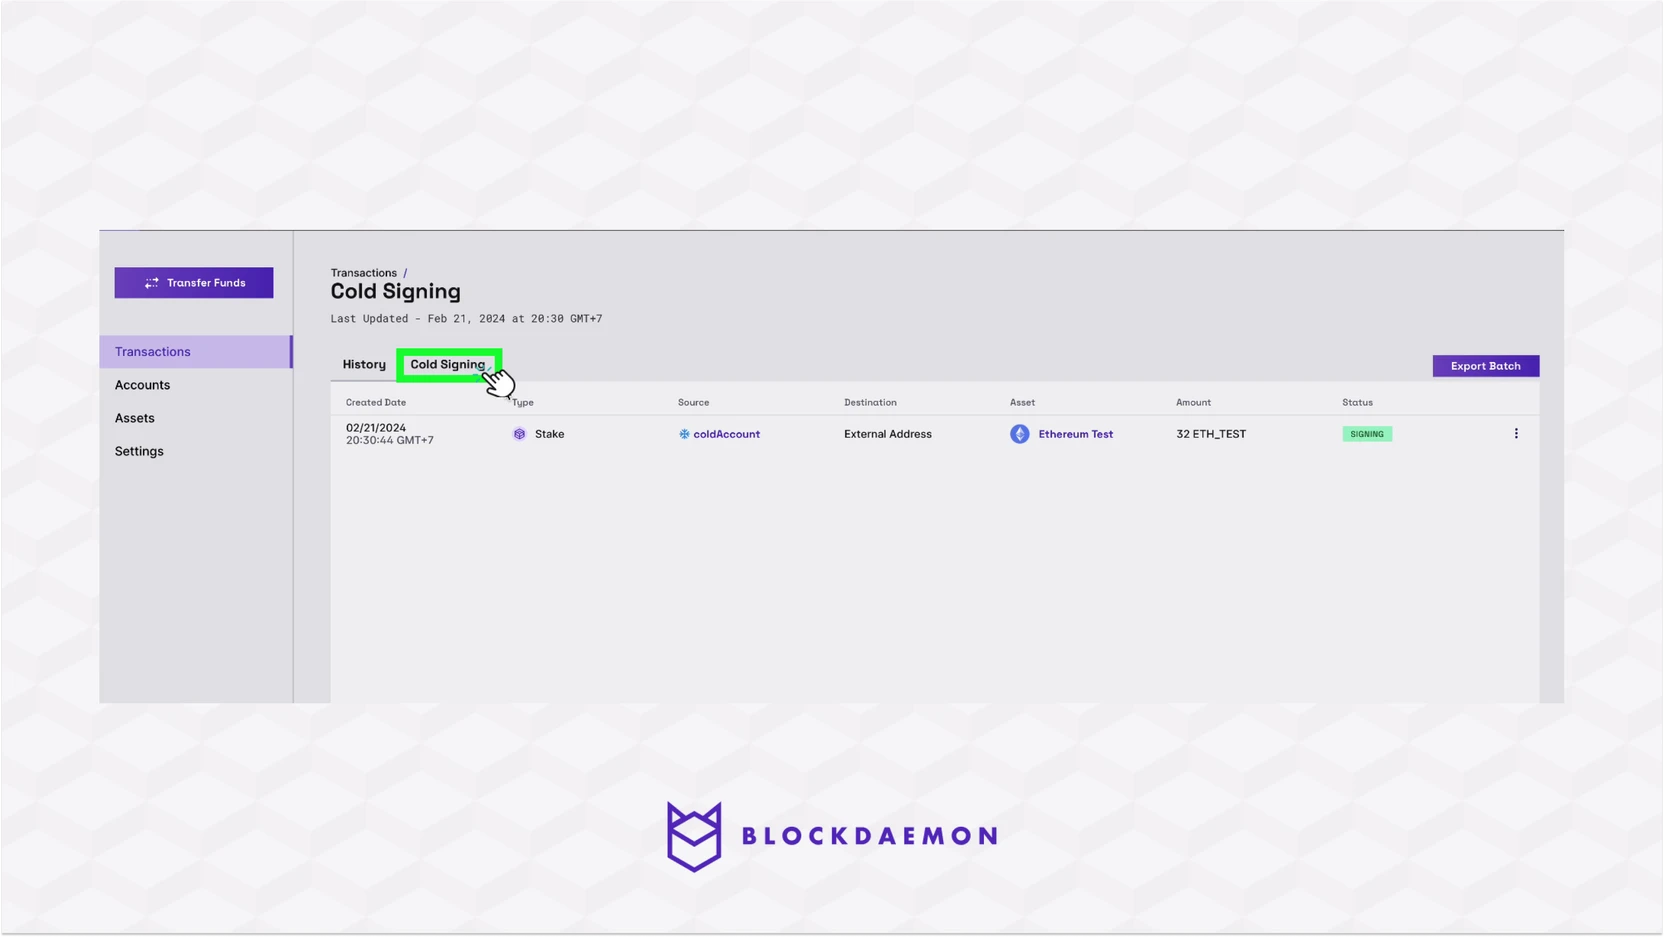
- Click the Export Batch button.
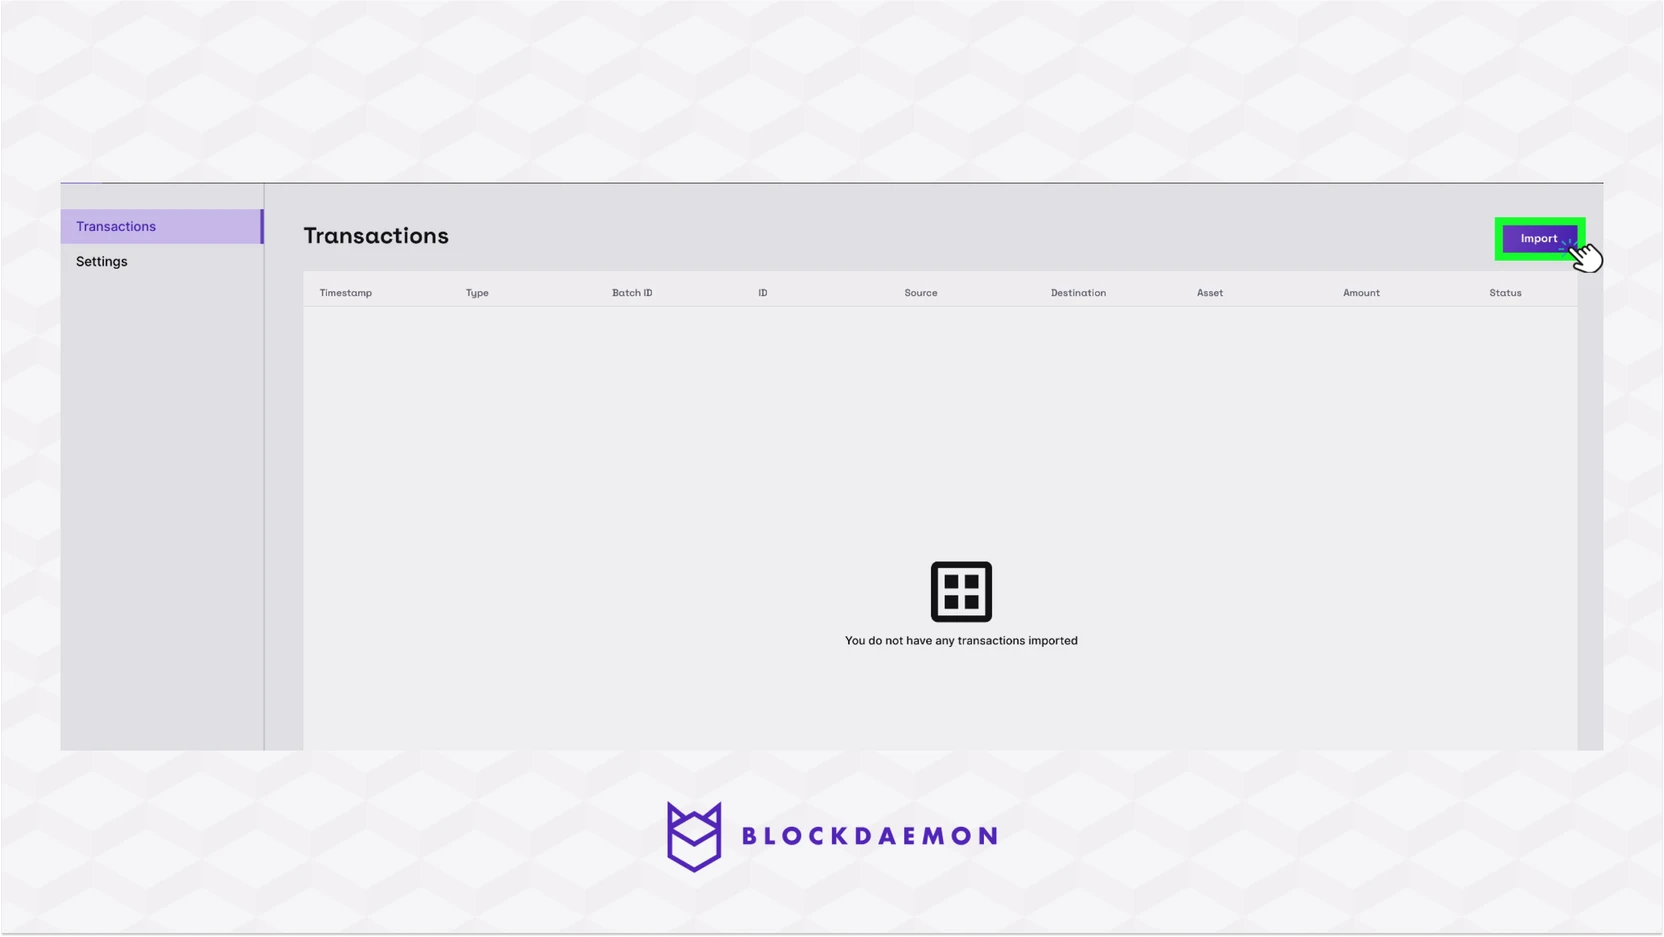
- Navigate to the Cold Wallet.
- Click the Transactions tab > Import button.
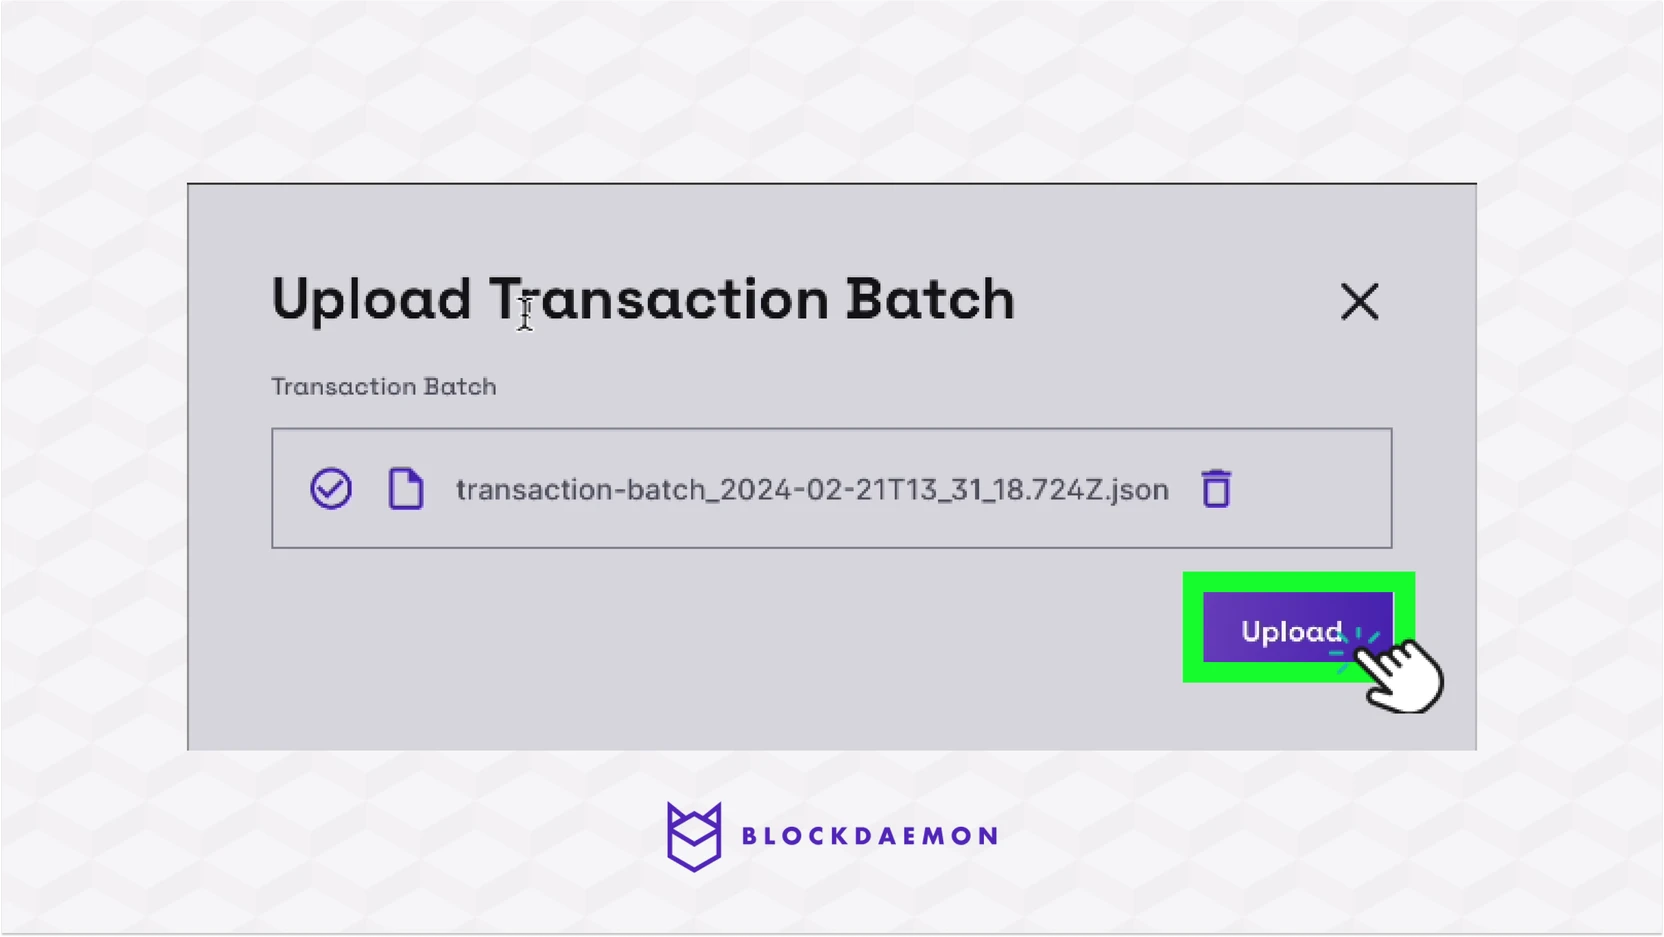
- Upload the transaction batch JSON file downloaded from the Hot Wallet app.
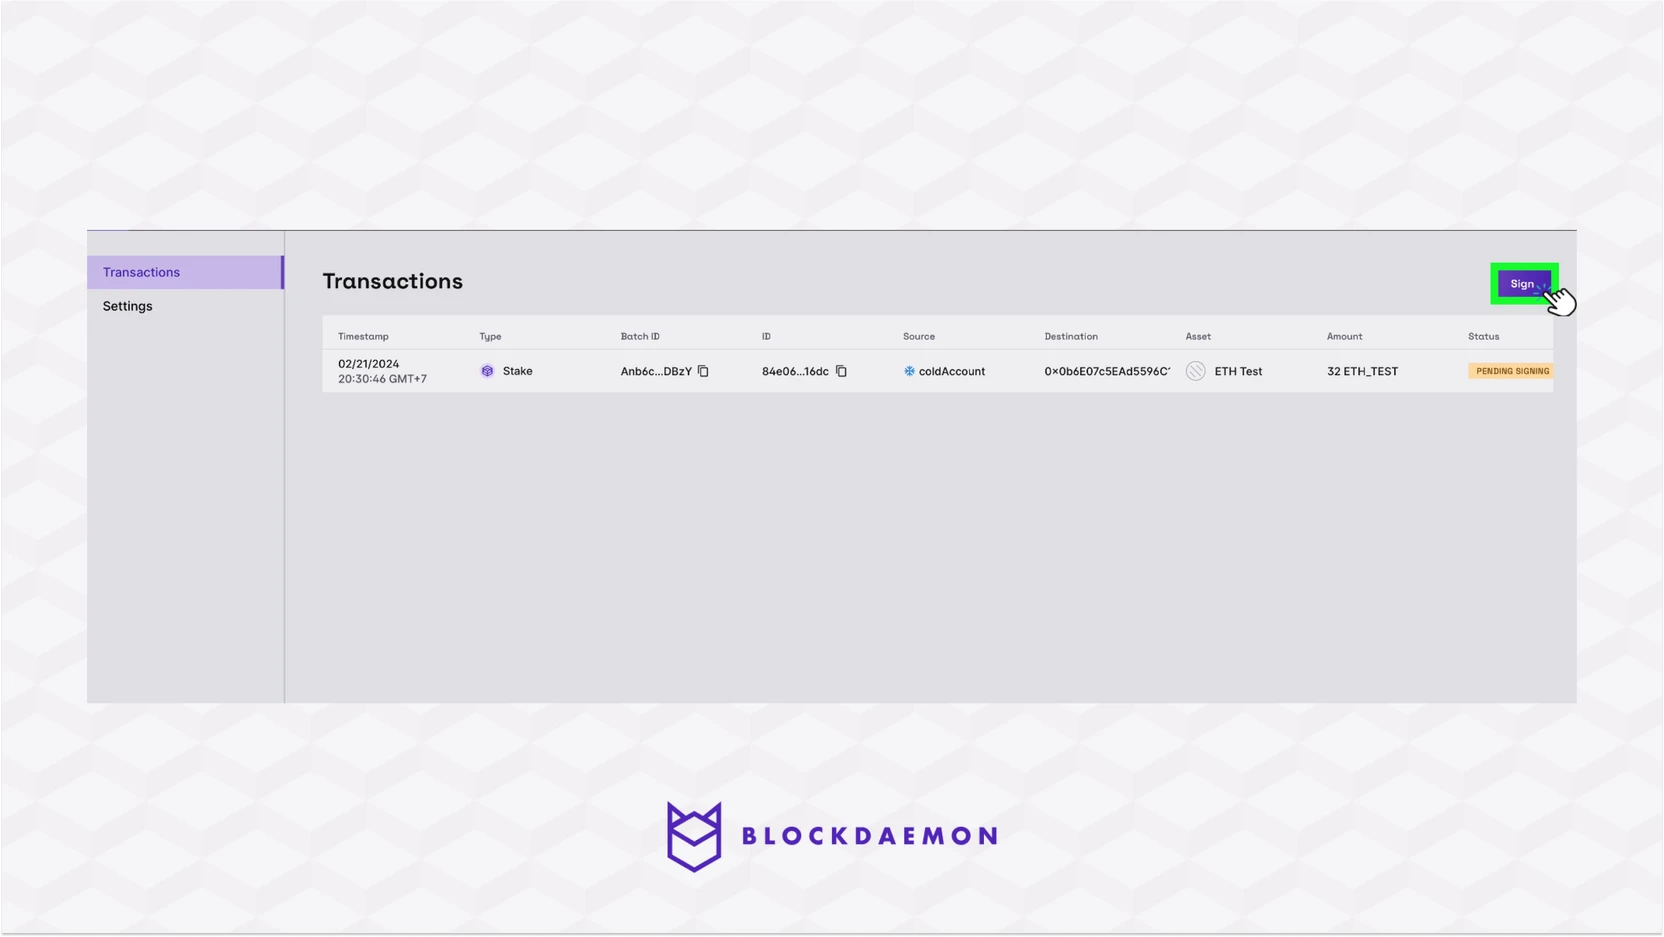
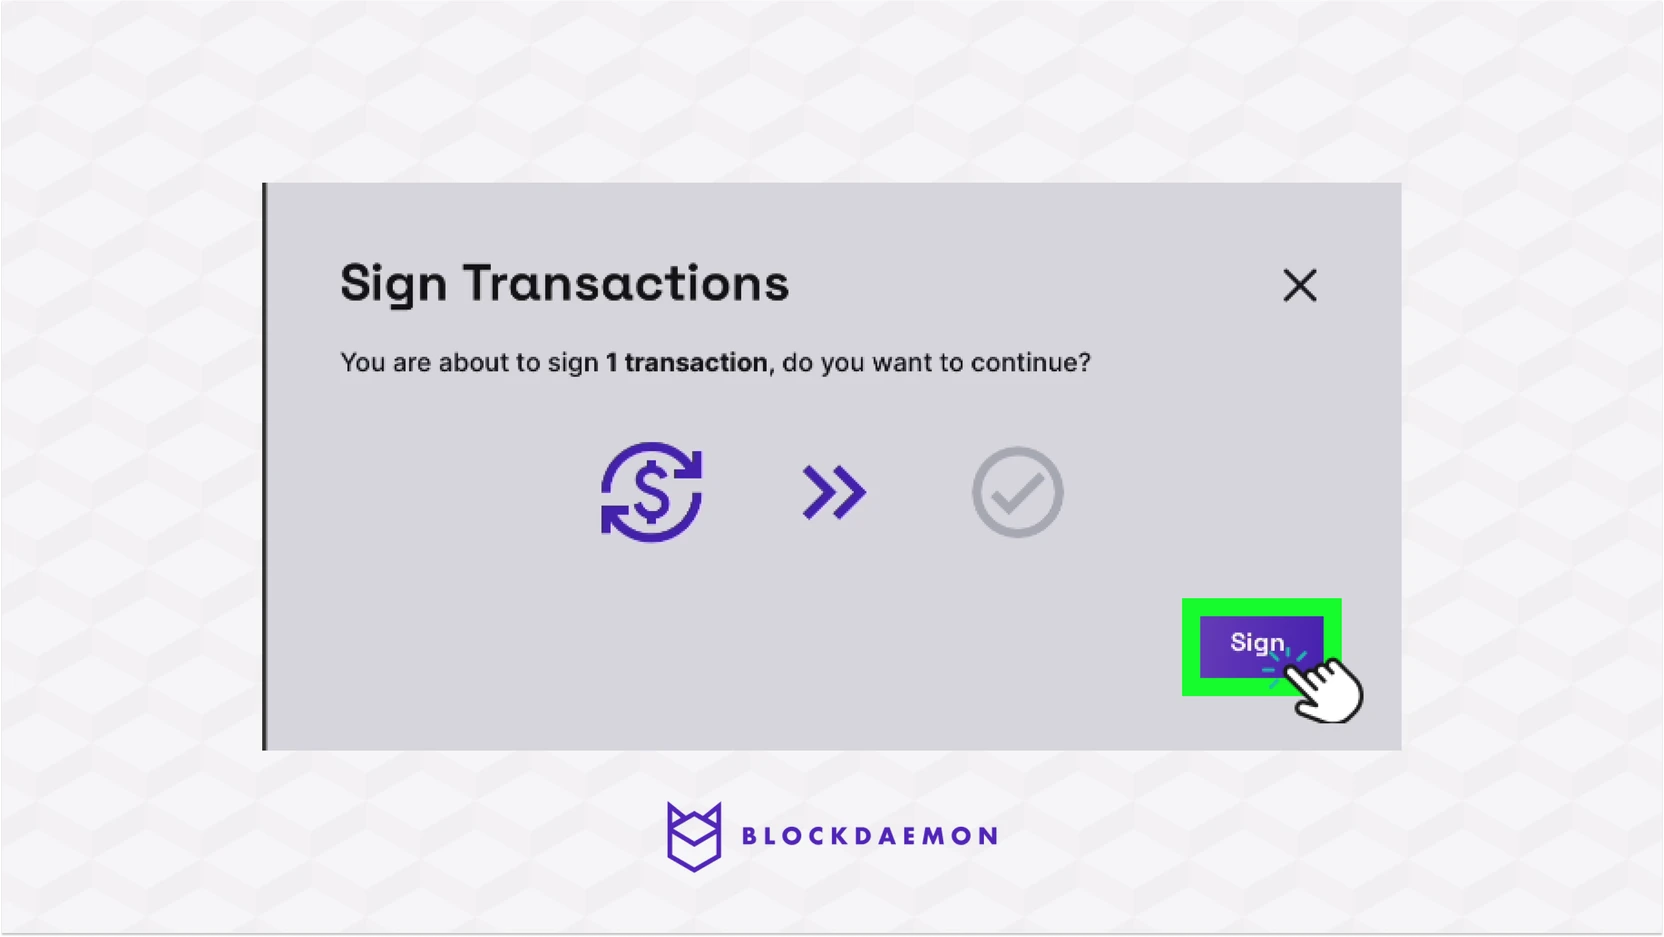
- After that, click the Sign button and click Sign to confirm the signing operation.
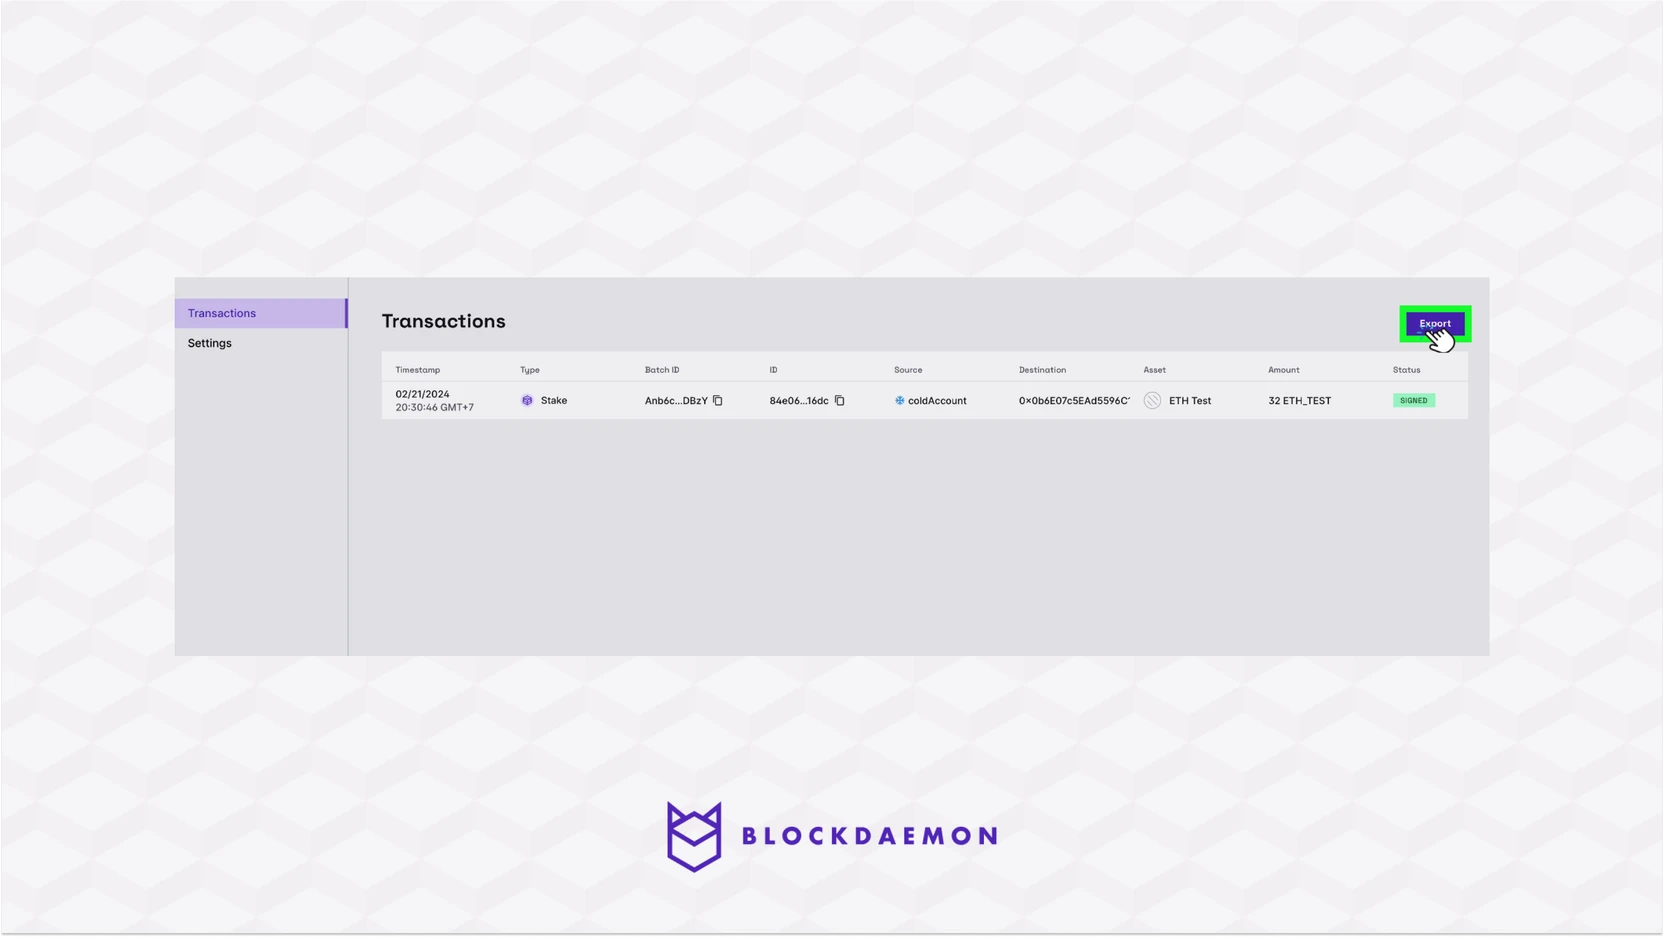
- Click the Export button.
- Navigate back to your Hot Wallet.
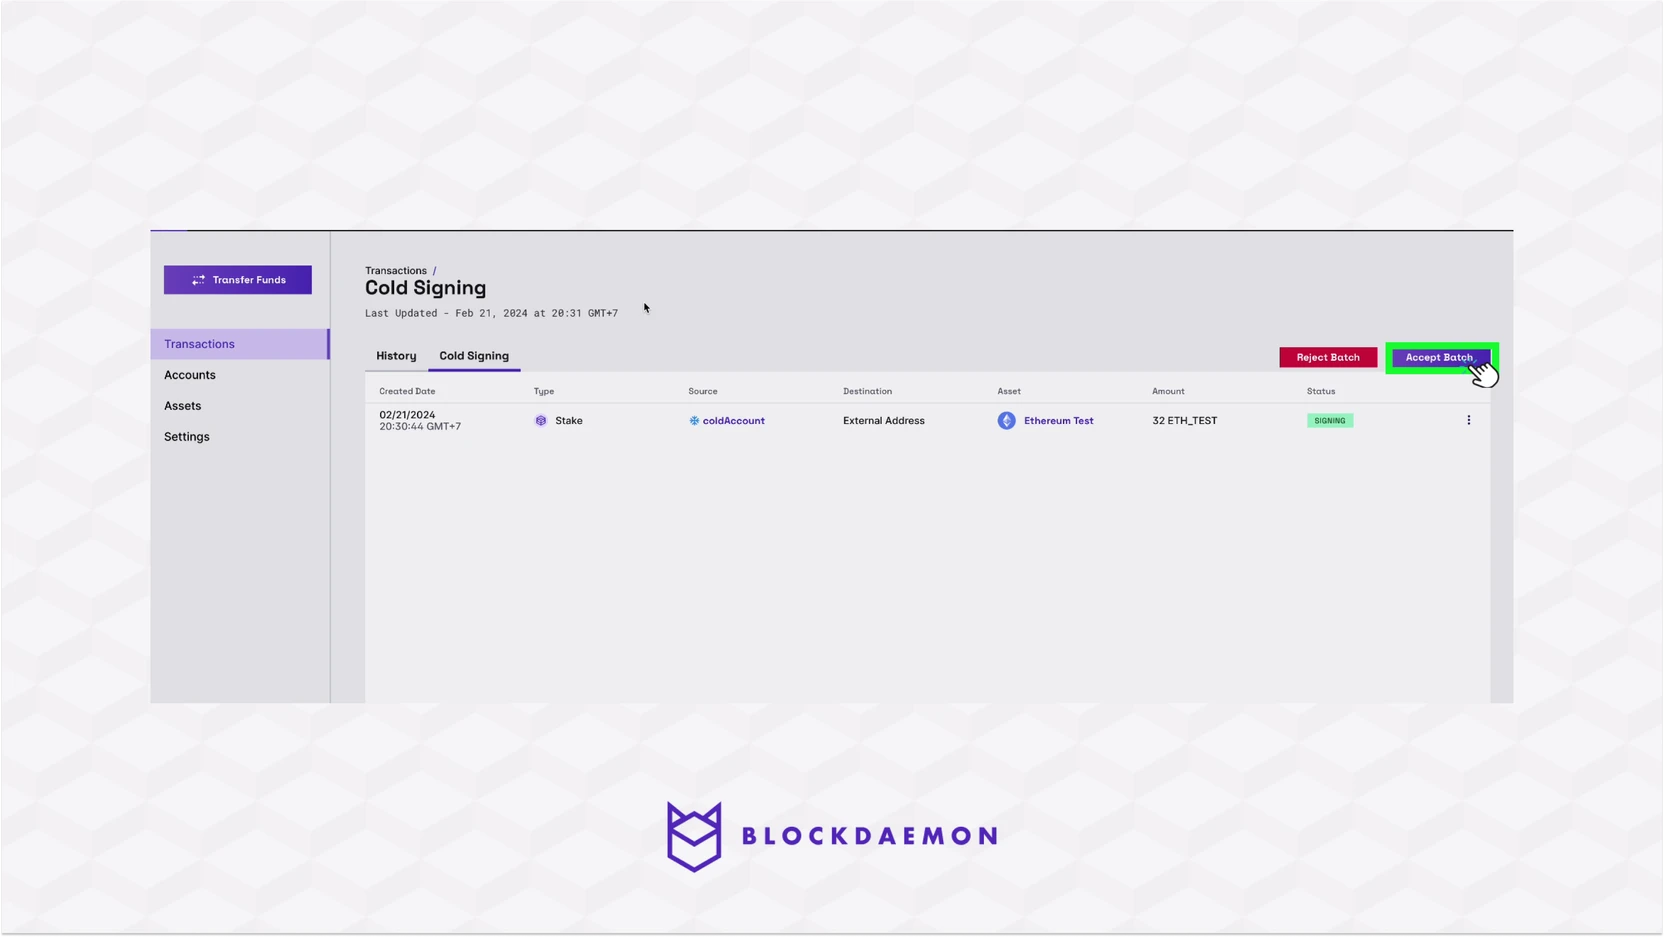
- Under the Cold Signing tab, click the Accept Batch.
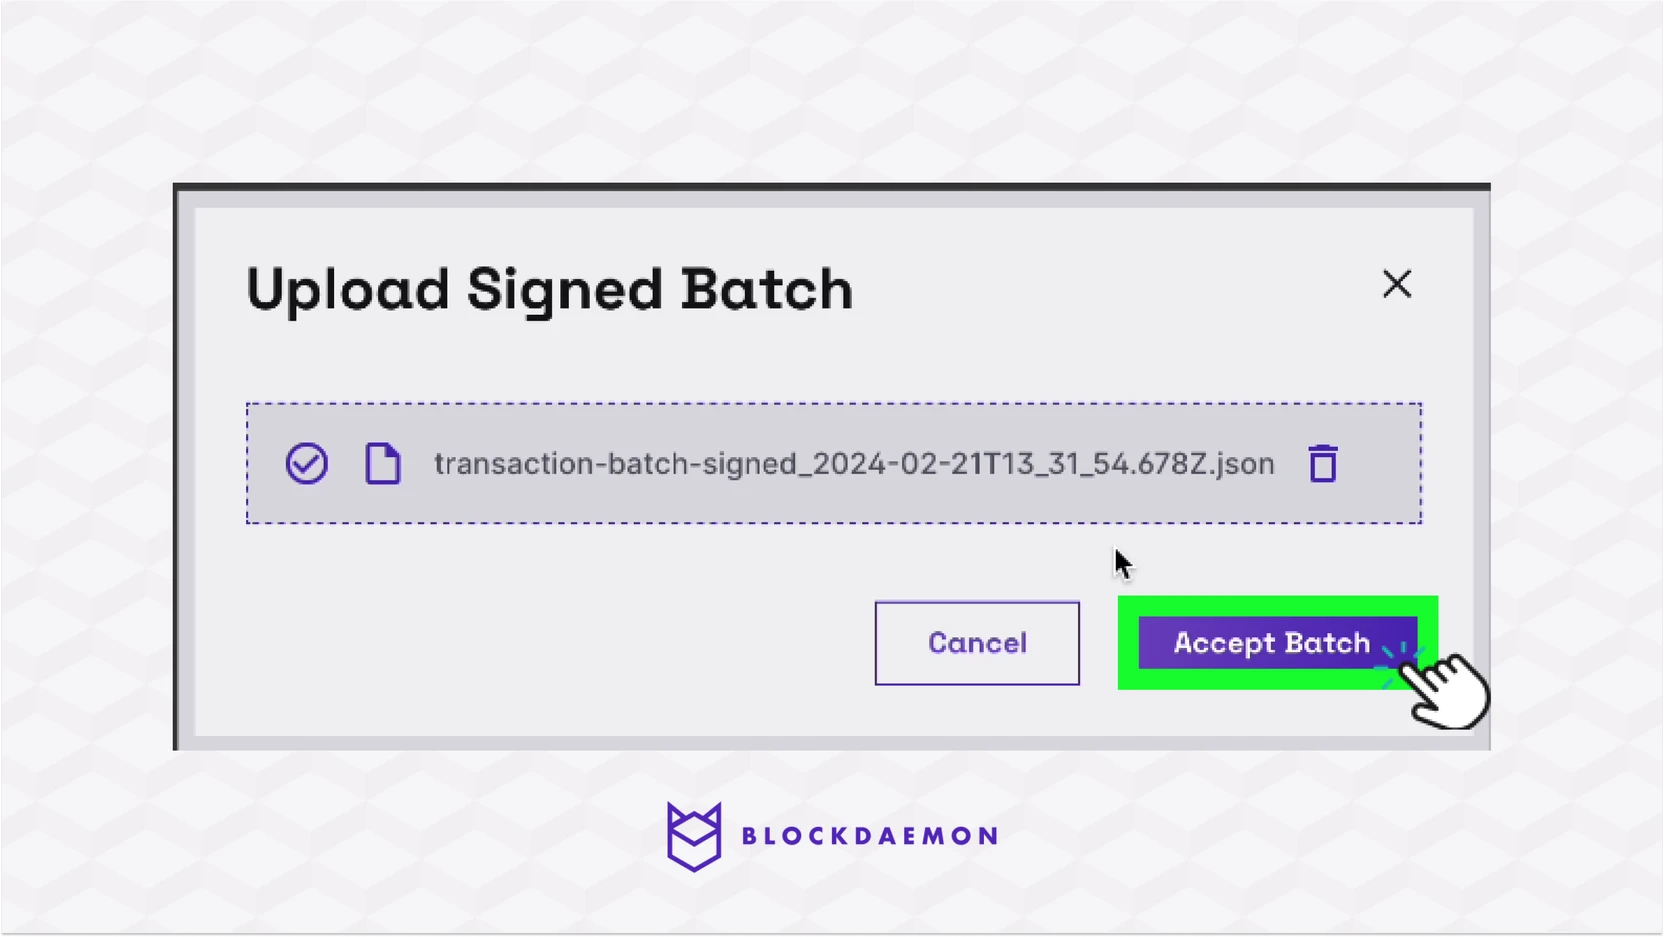
- Upload the file you downloaded from the Cold Wallet app and click Accept Batch.
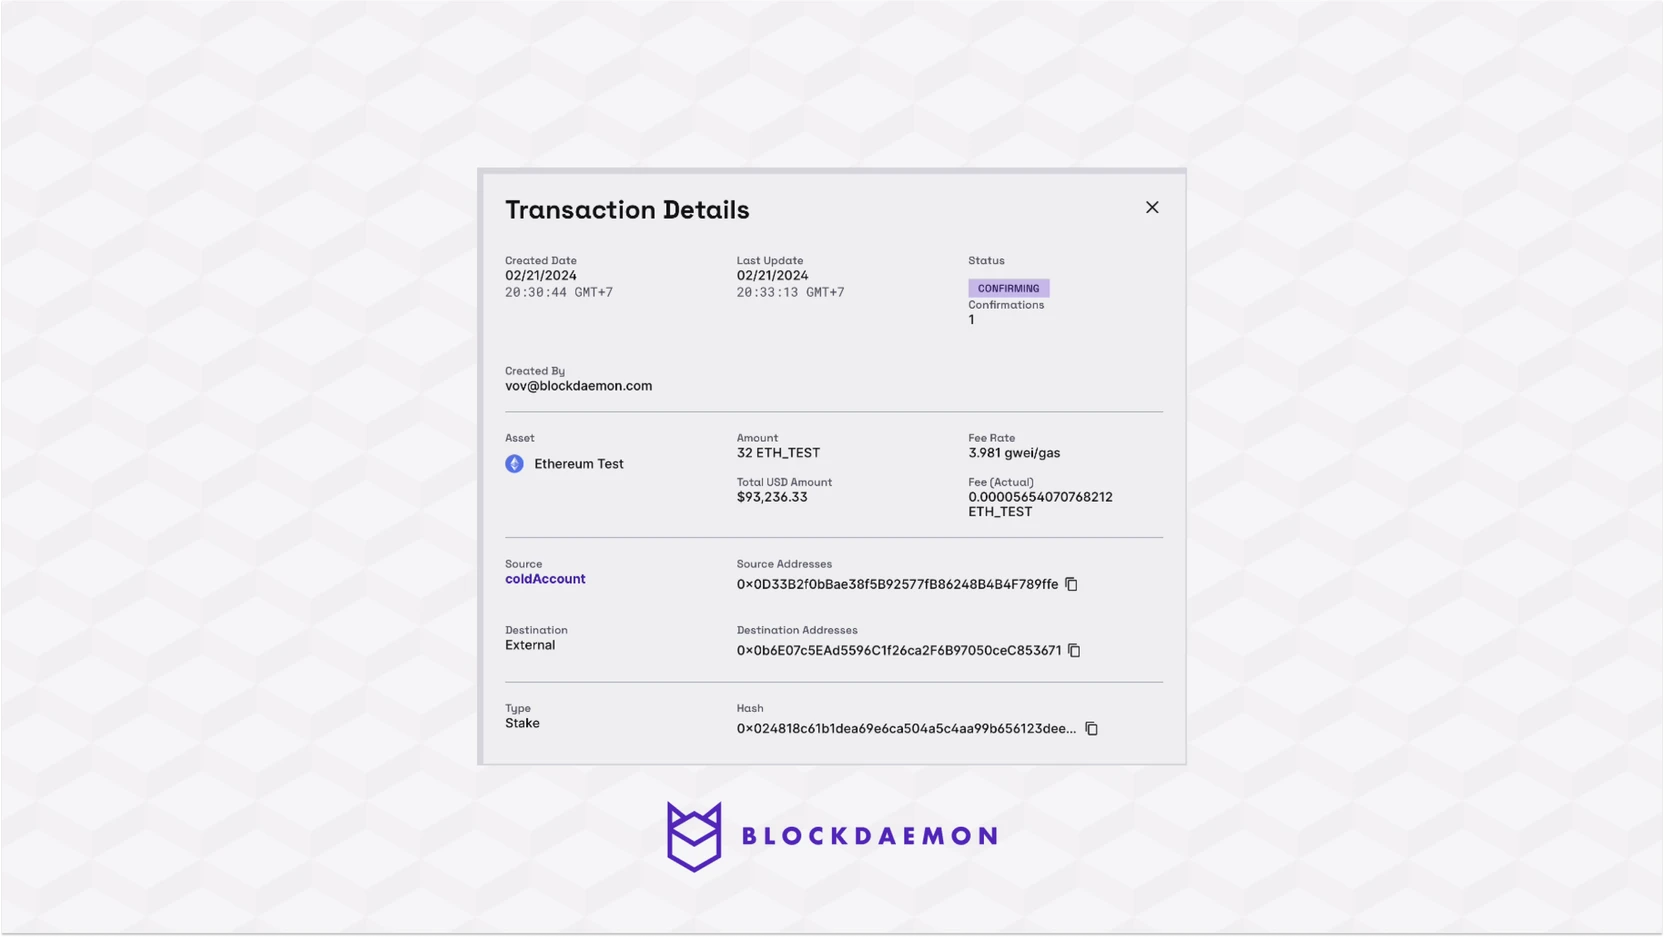
- Click the History to see the transaction details. The transaction status should be changed to Broadcasting > Confirming.
🗣️We Are Here to Help!
Please contact us via email or support chat if you encounter an issue, bug, or need assistance. Don't forget to include any relevant details about the problem. To request a wallet form and Institutional Vault Approver form, please click here or contact our sales team.
Updated about 1 month ago