Automated Approver User
👩💻 Find out how to delegate the approval process to the server
Overview
Users will still need to interact with the approver app to confirm operations, such as transfers or staking. However, the "approval" process can be delegated to the server. Once the HTTP approver server is configured, approval requests can be routed to it, allowing users to approve or reject requests programmatically.
Prerequisites
The HTTP server must provide several parameters to allow its correct configuration in the wallet.
- Signature verification key — the public key of the public-private key pair that the server uses to sign operations. It must be a 65-byte ECDSA public key encoded in base64. See an example code to generate the key pair here.
- TLS public key (optional) – The public key of the TLS certificate used for TLS authentication. See an example code of creating a self-signed TLS certificate and printing the TLS public key here.
- The automated approver HTTP server is to be added to the
wallet.yamlconfiguration file. Example:
    automated_approvers:
      - signature_verification_key: "" // The key from Prerequisite step 1
        url: "" // The url of the automated approver HTTP server
        tls_public_key: "(Optional) the key from Prerequisite step 2"
Note:Following this guide, it is likely the automated approver user and group will need to be approved using the mobile BD Approver app in accordance with the administrative policies preconfigured at installation.
Create Automated Approver User
To create an automated approver user, follow the steps below:
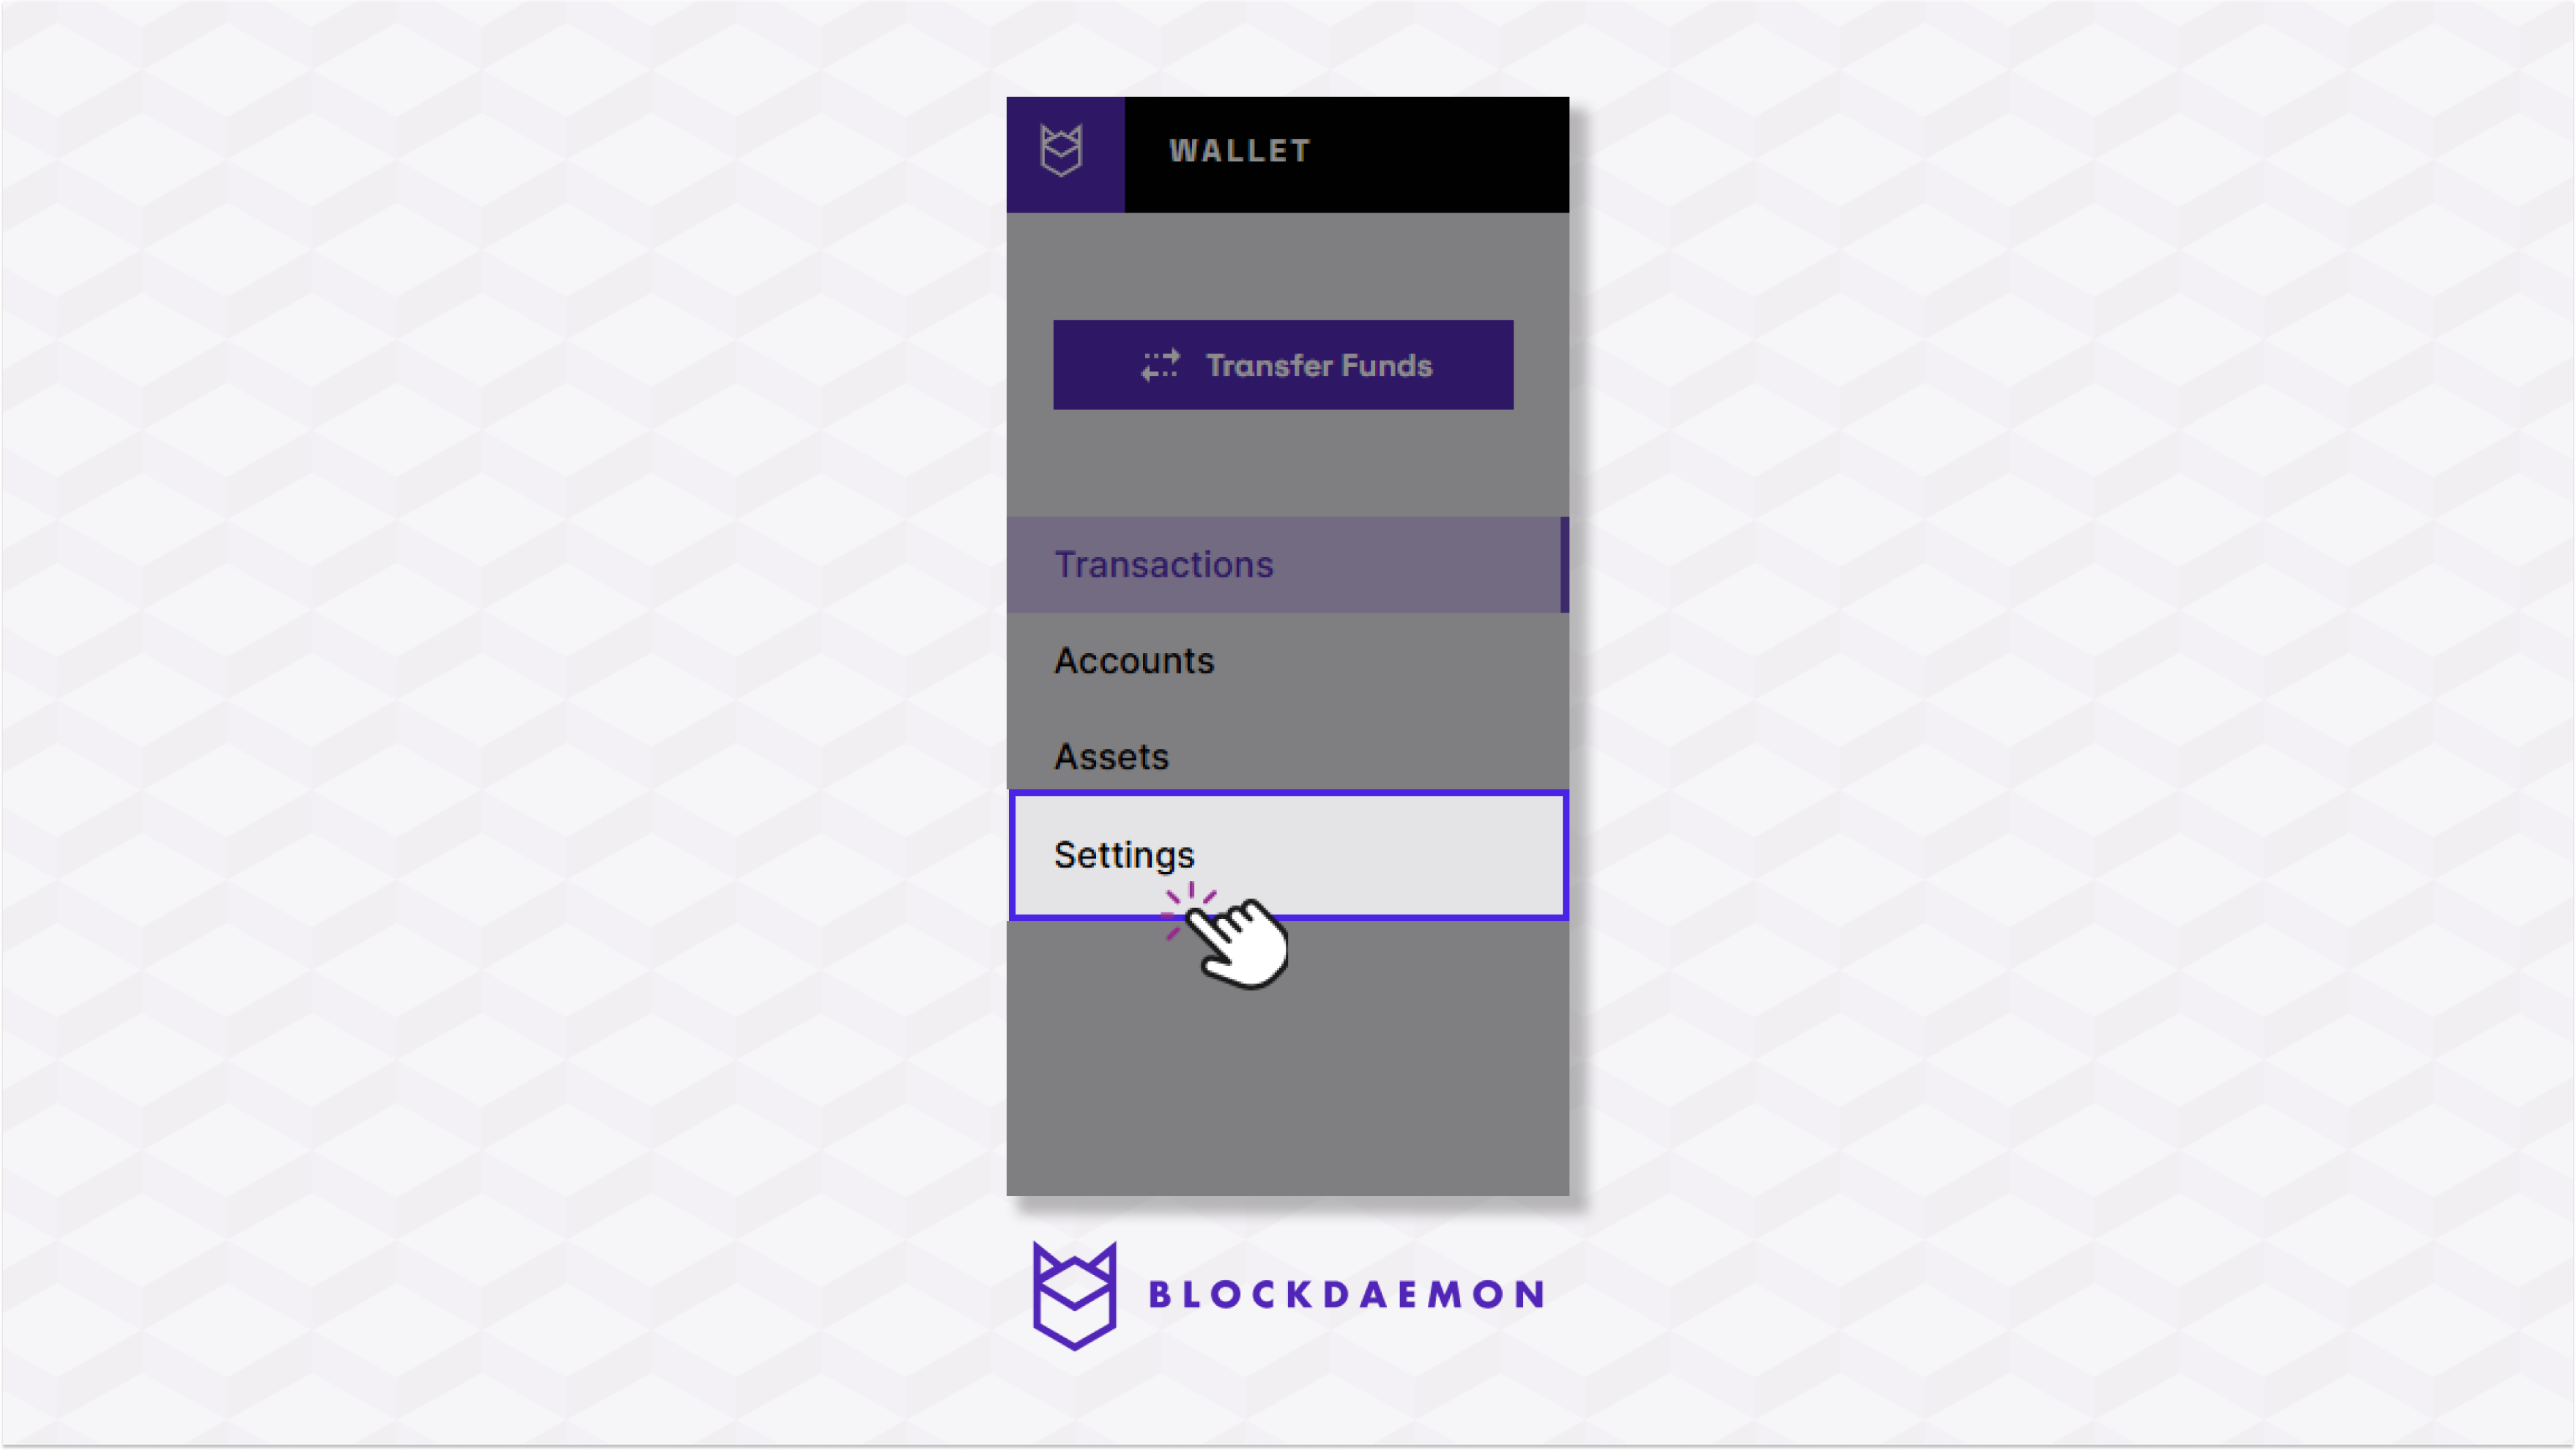
- Go to the Settings menu.
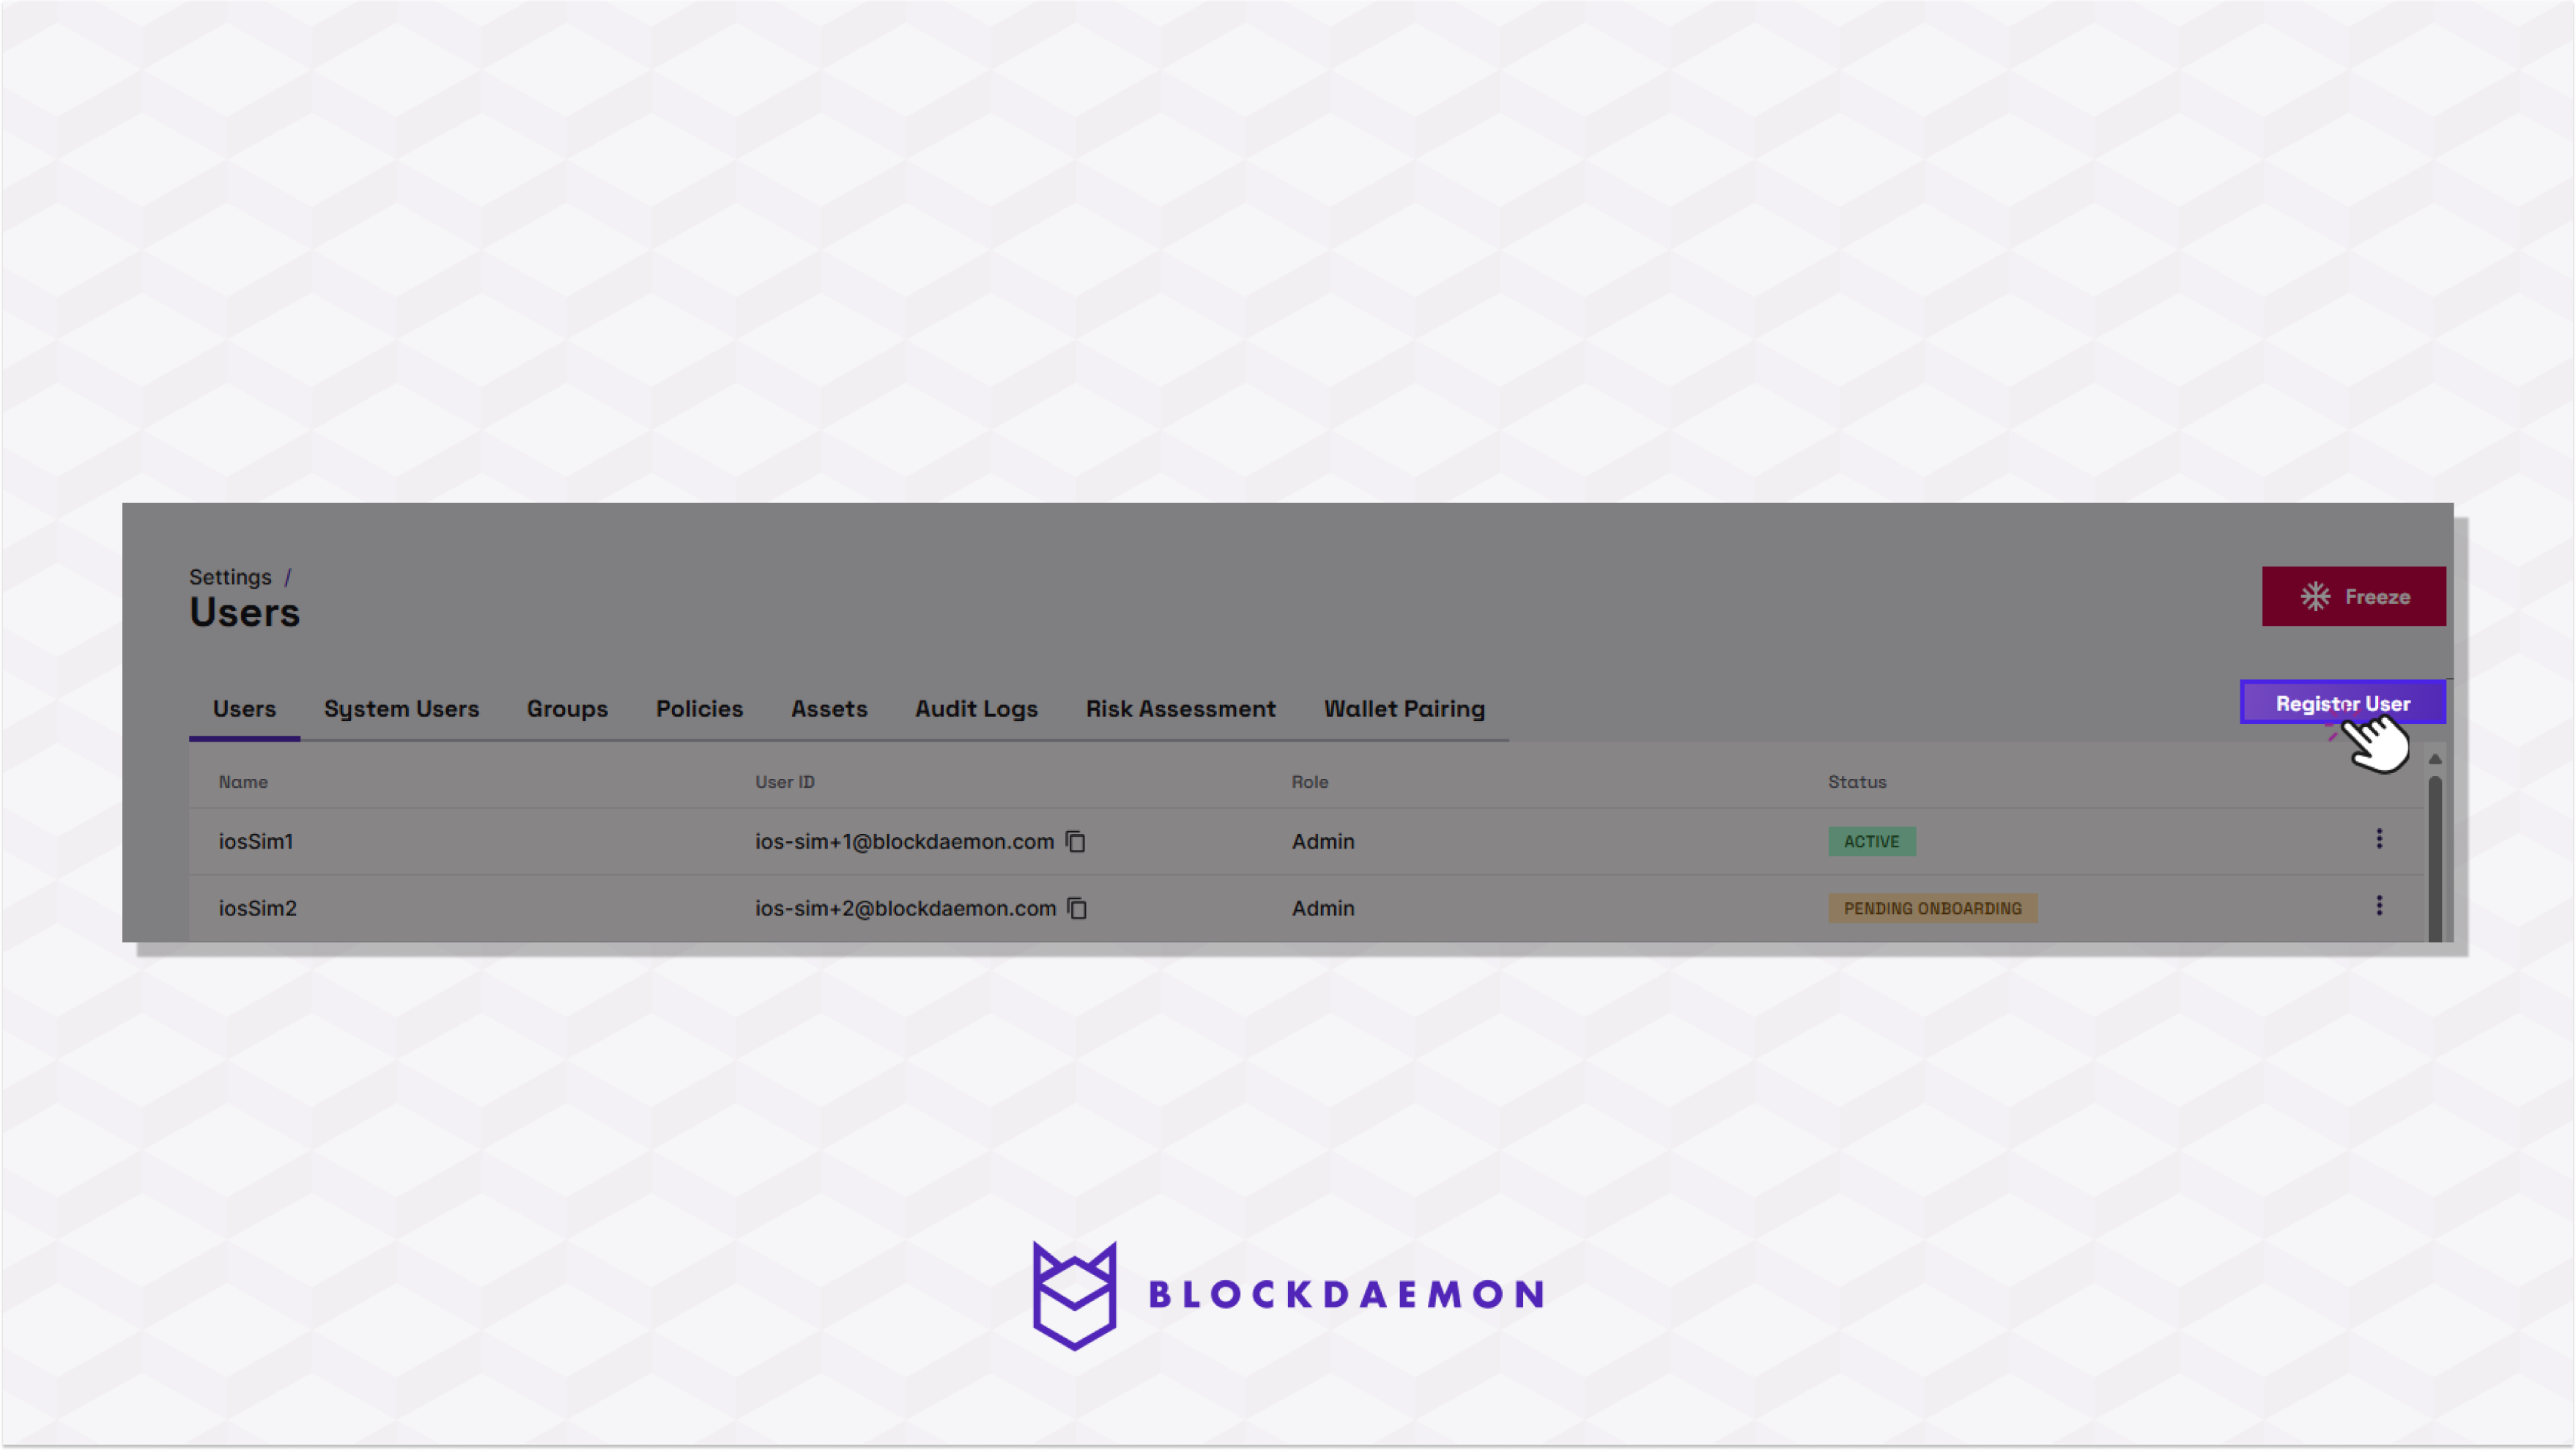
- Within the Settings menu, under the User tab, select Register User.
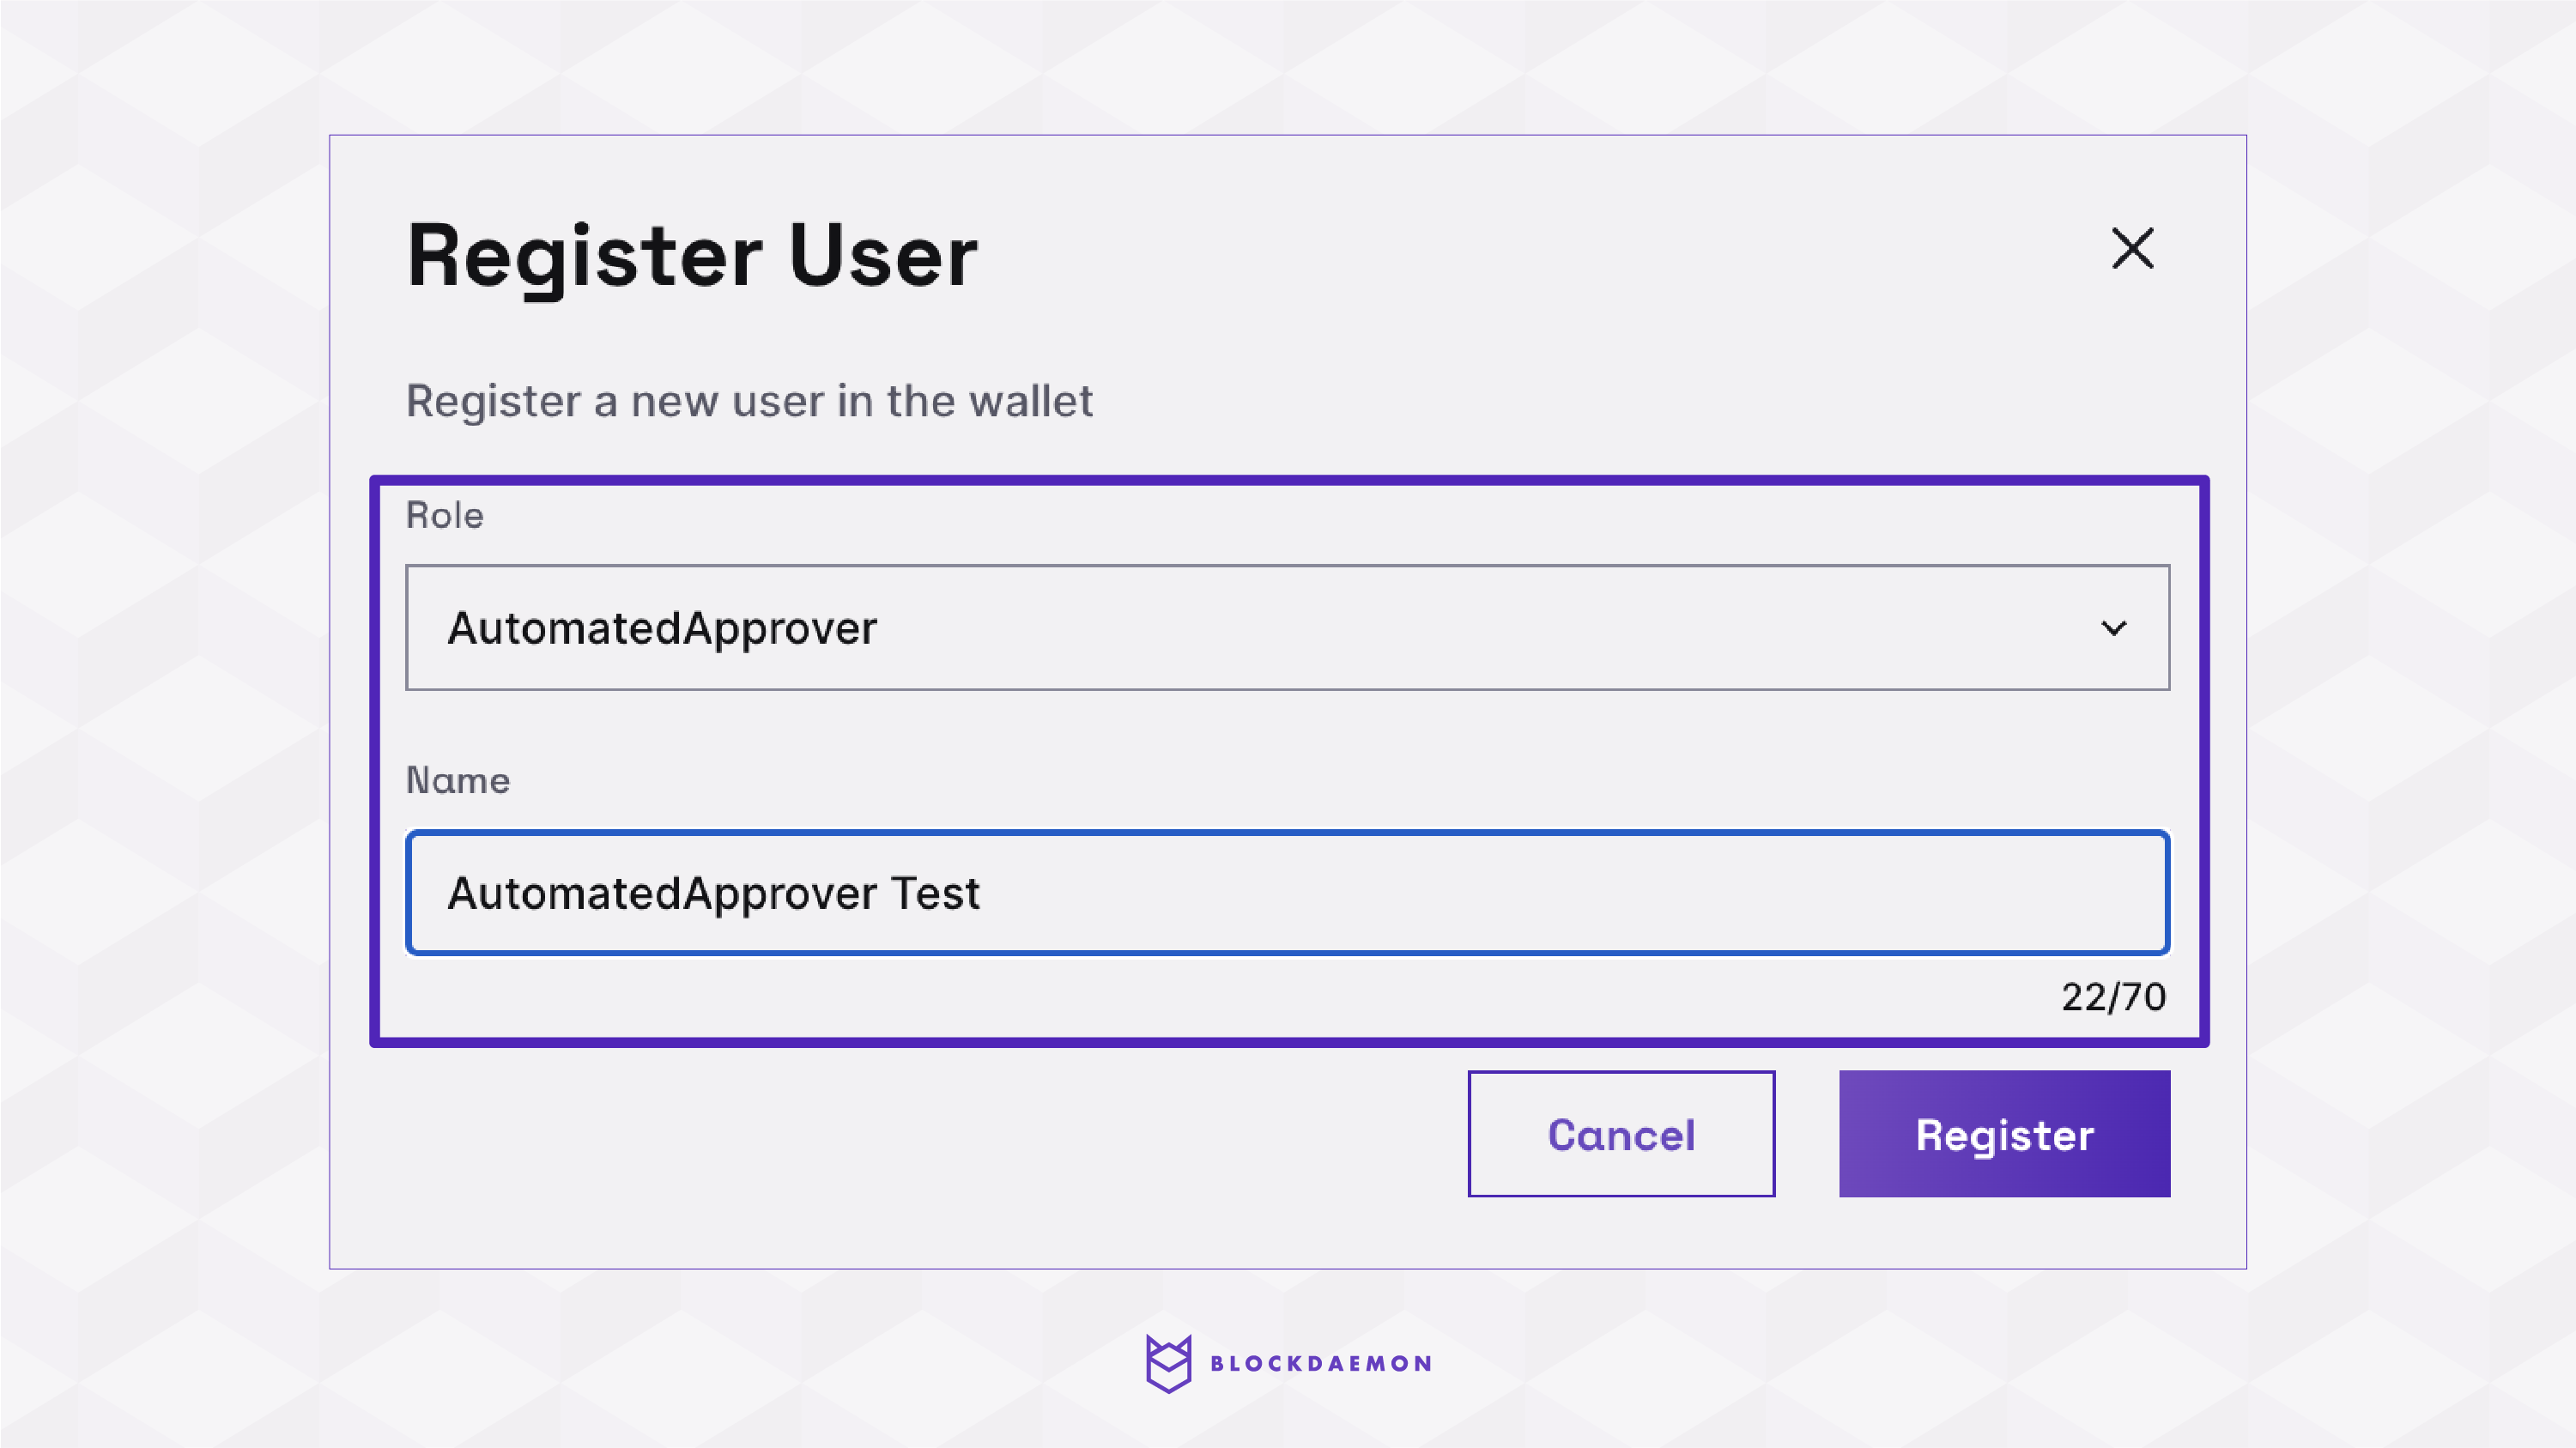
- Fill out the name and the role fields.
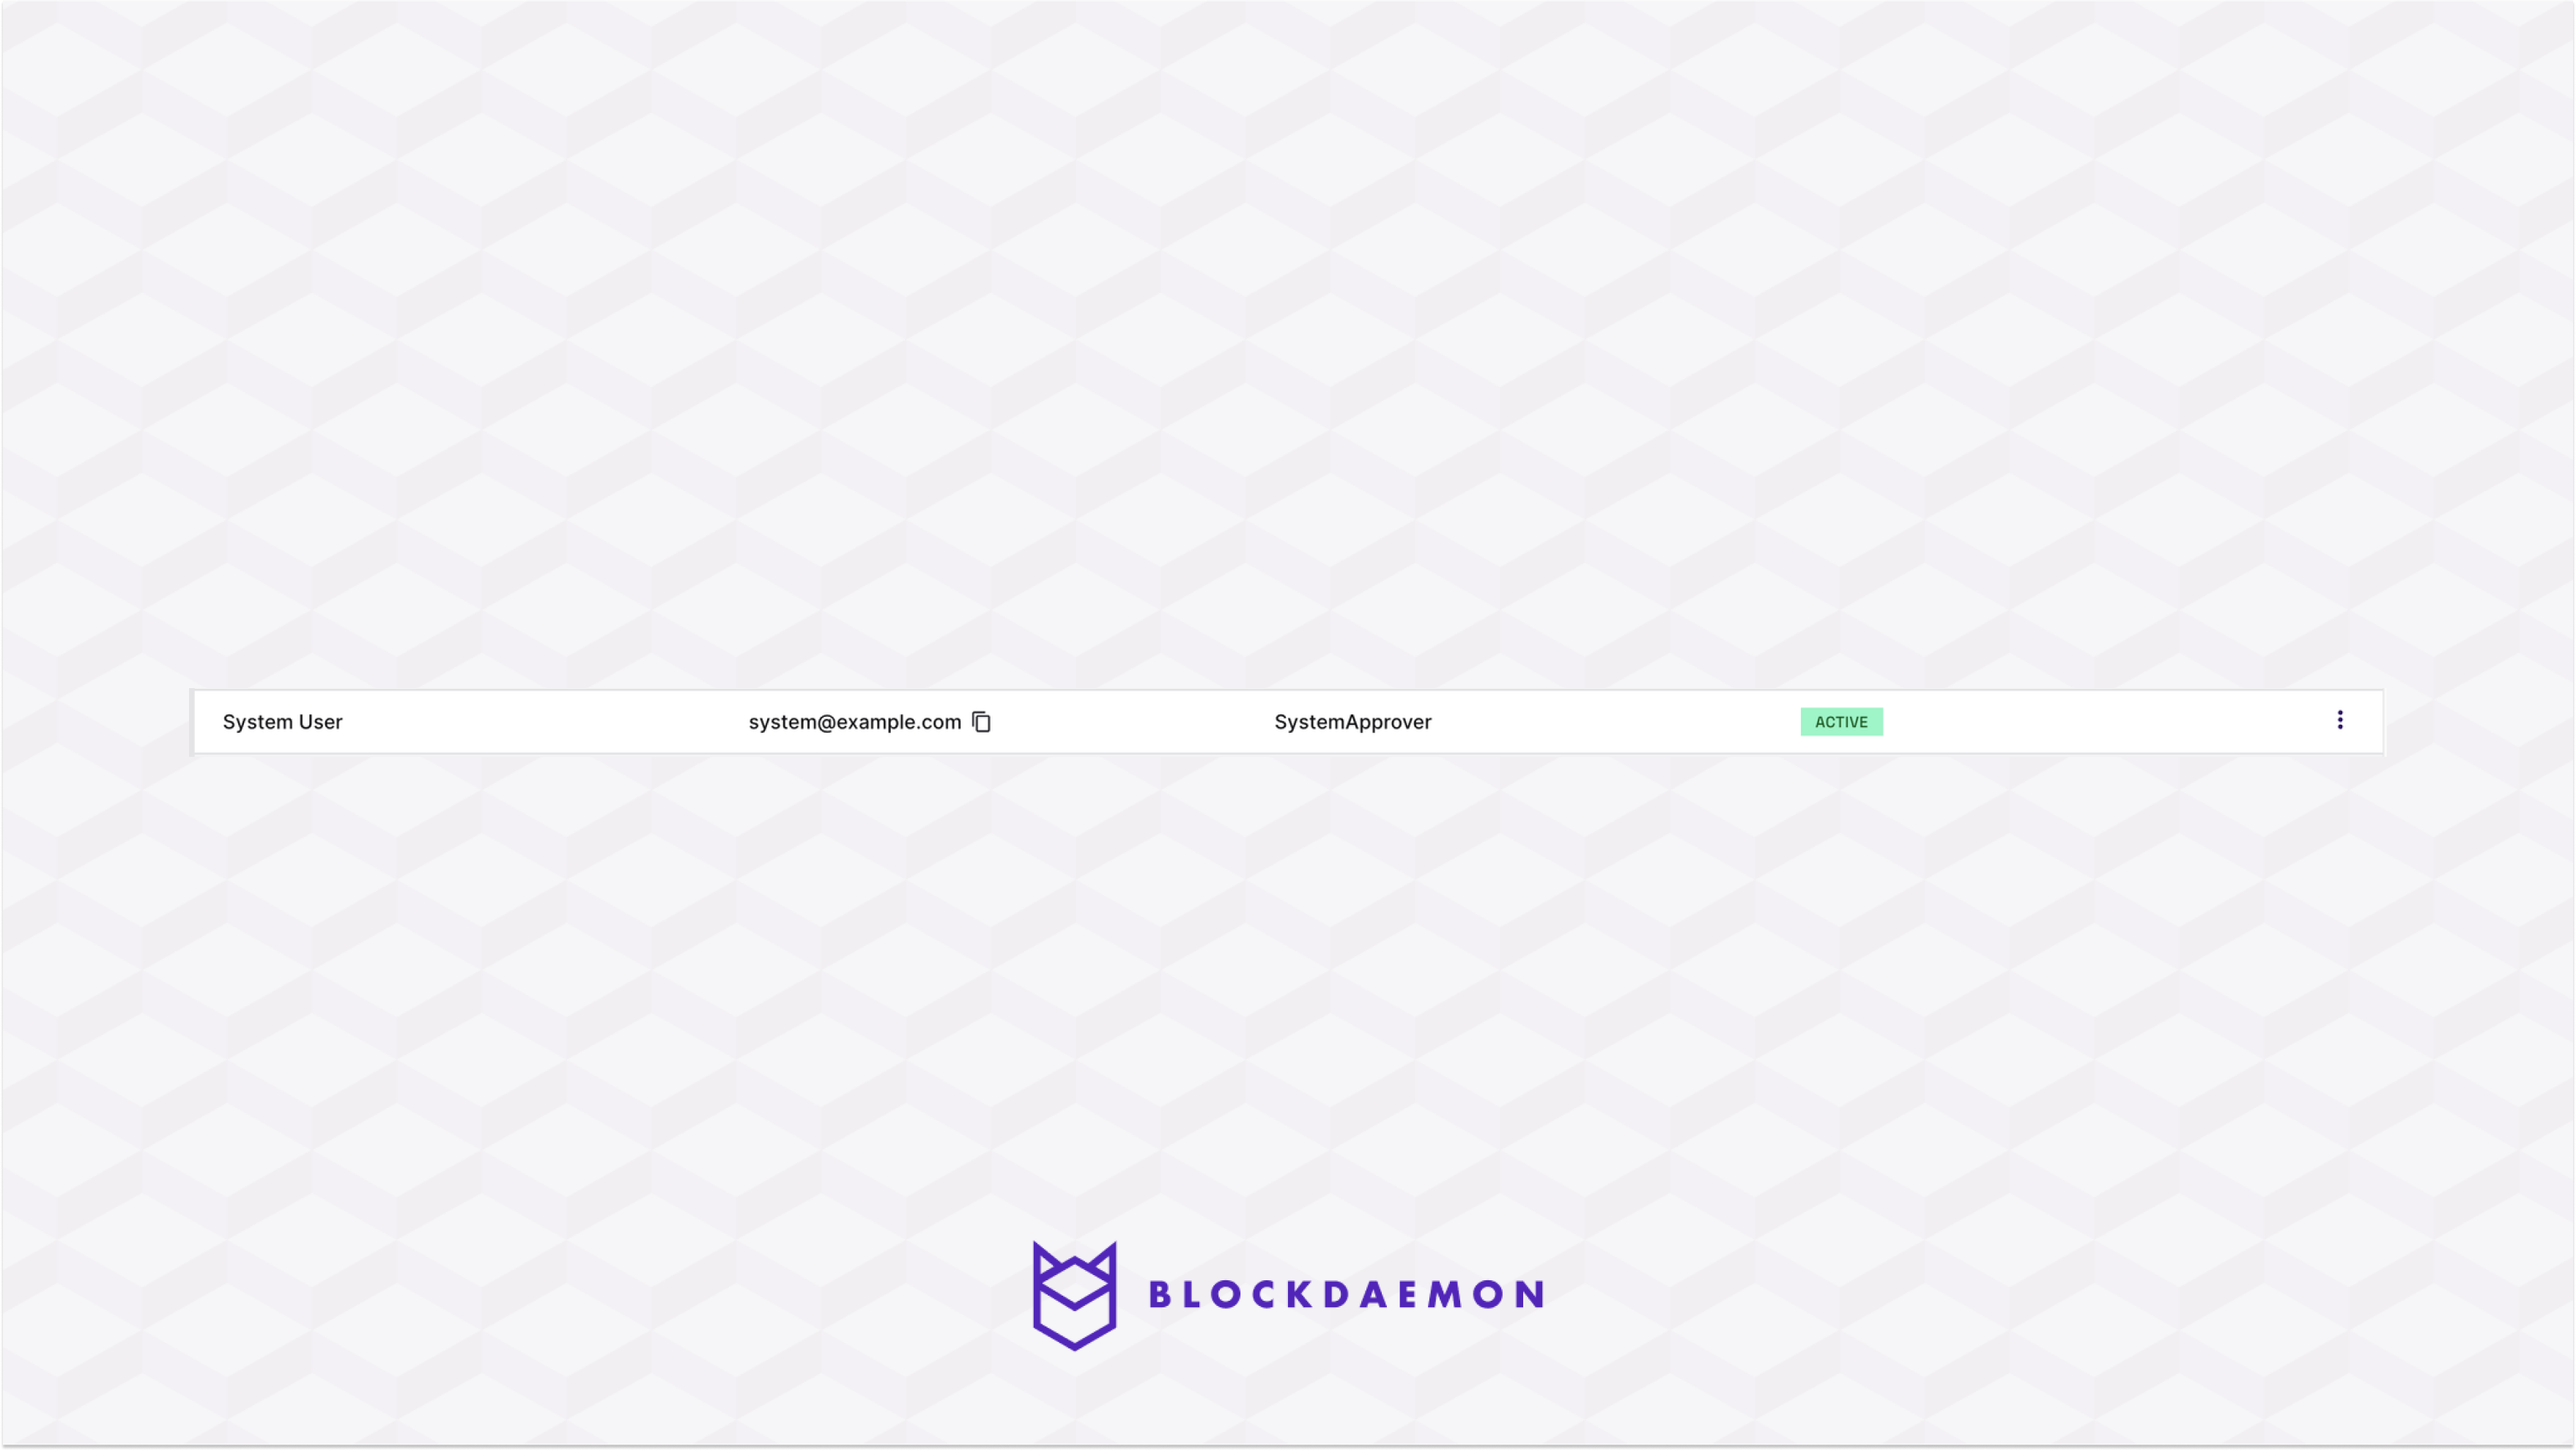
Note:Ensure that the Role of the user is AutomatedApprover.
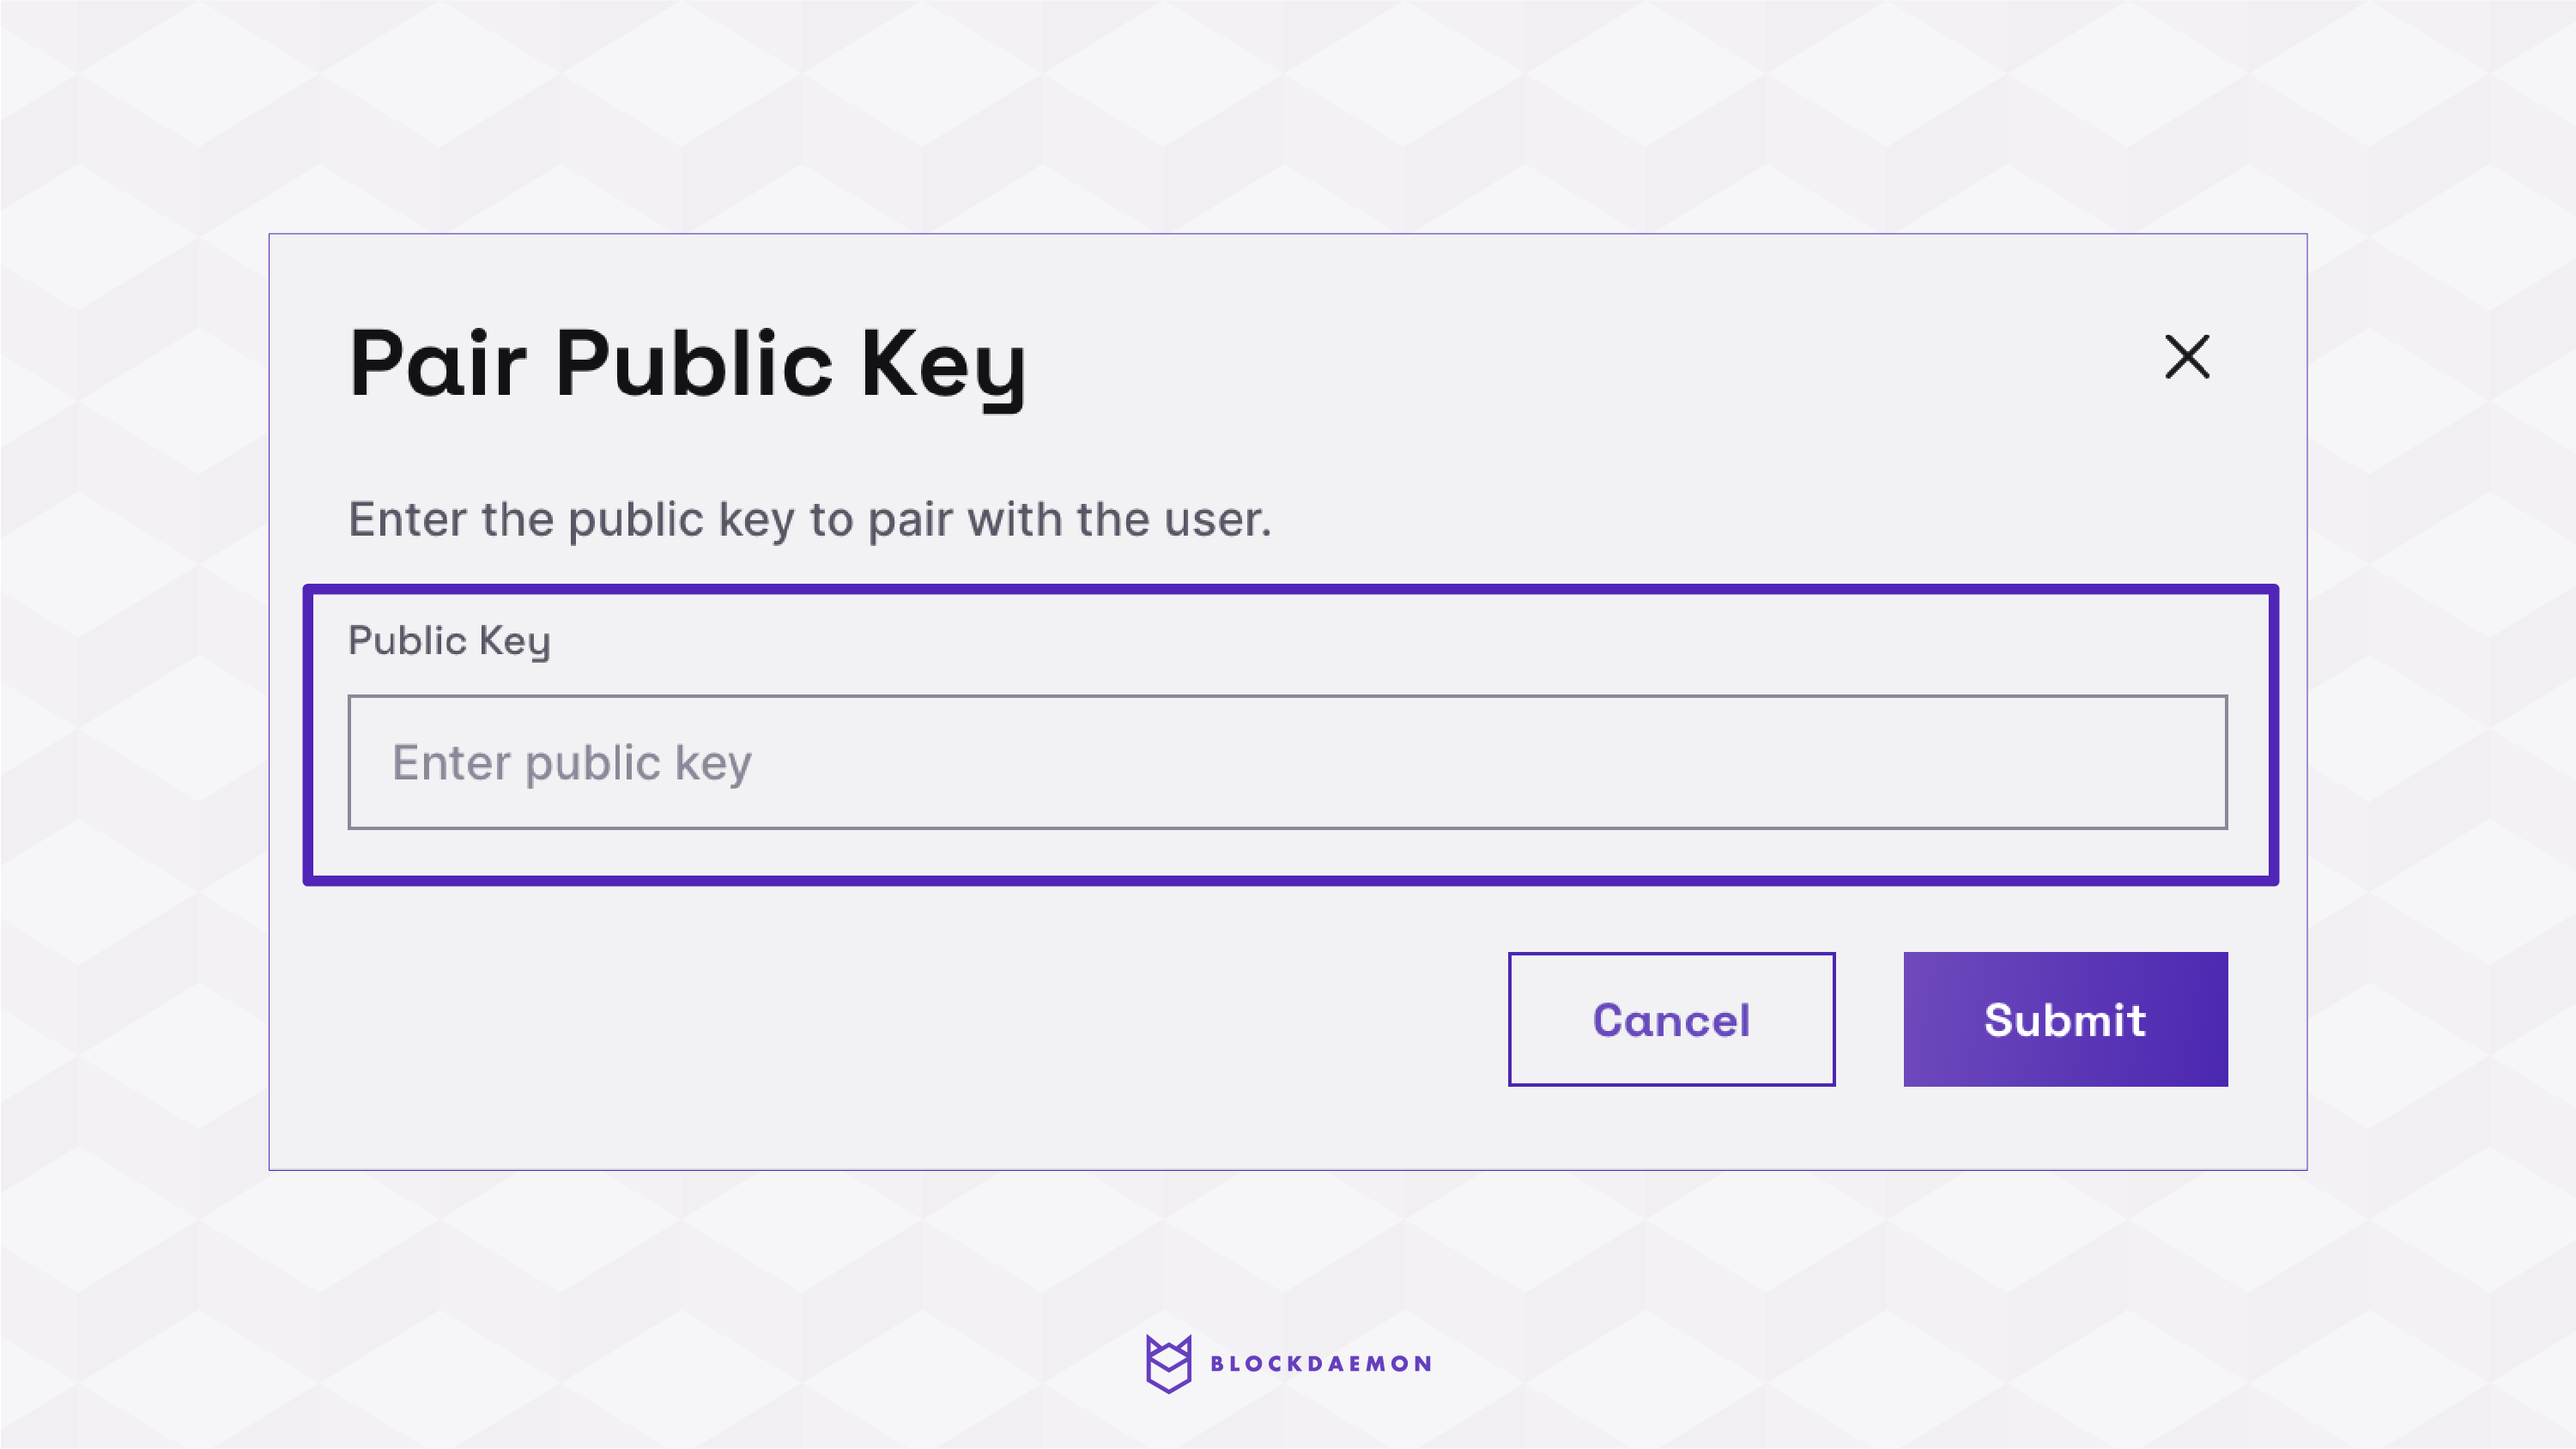
- The newly added use will have the “Pending Onboarding” status. To activate the user, we have to pair the user with a “Signature verification key.”
Note:The “Signature verification key” must be the same one in the config.
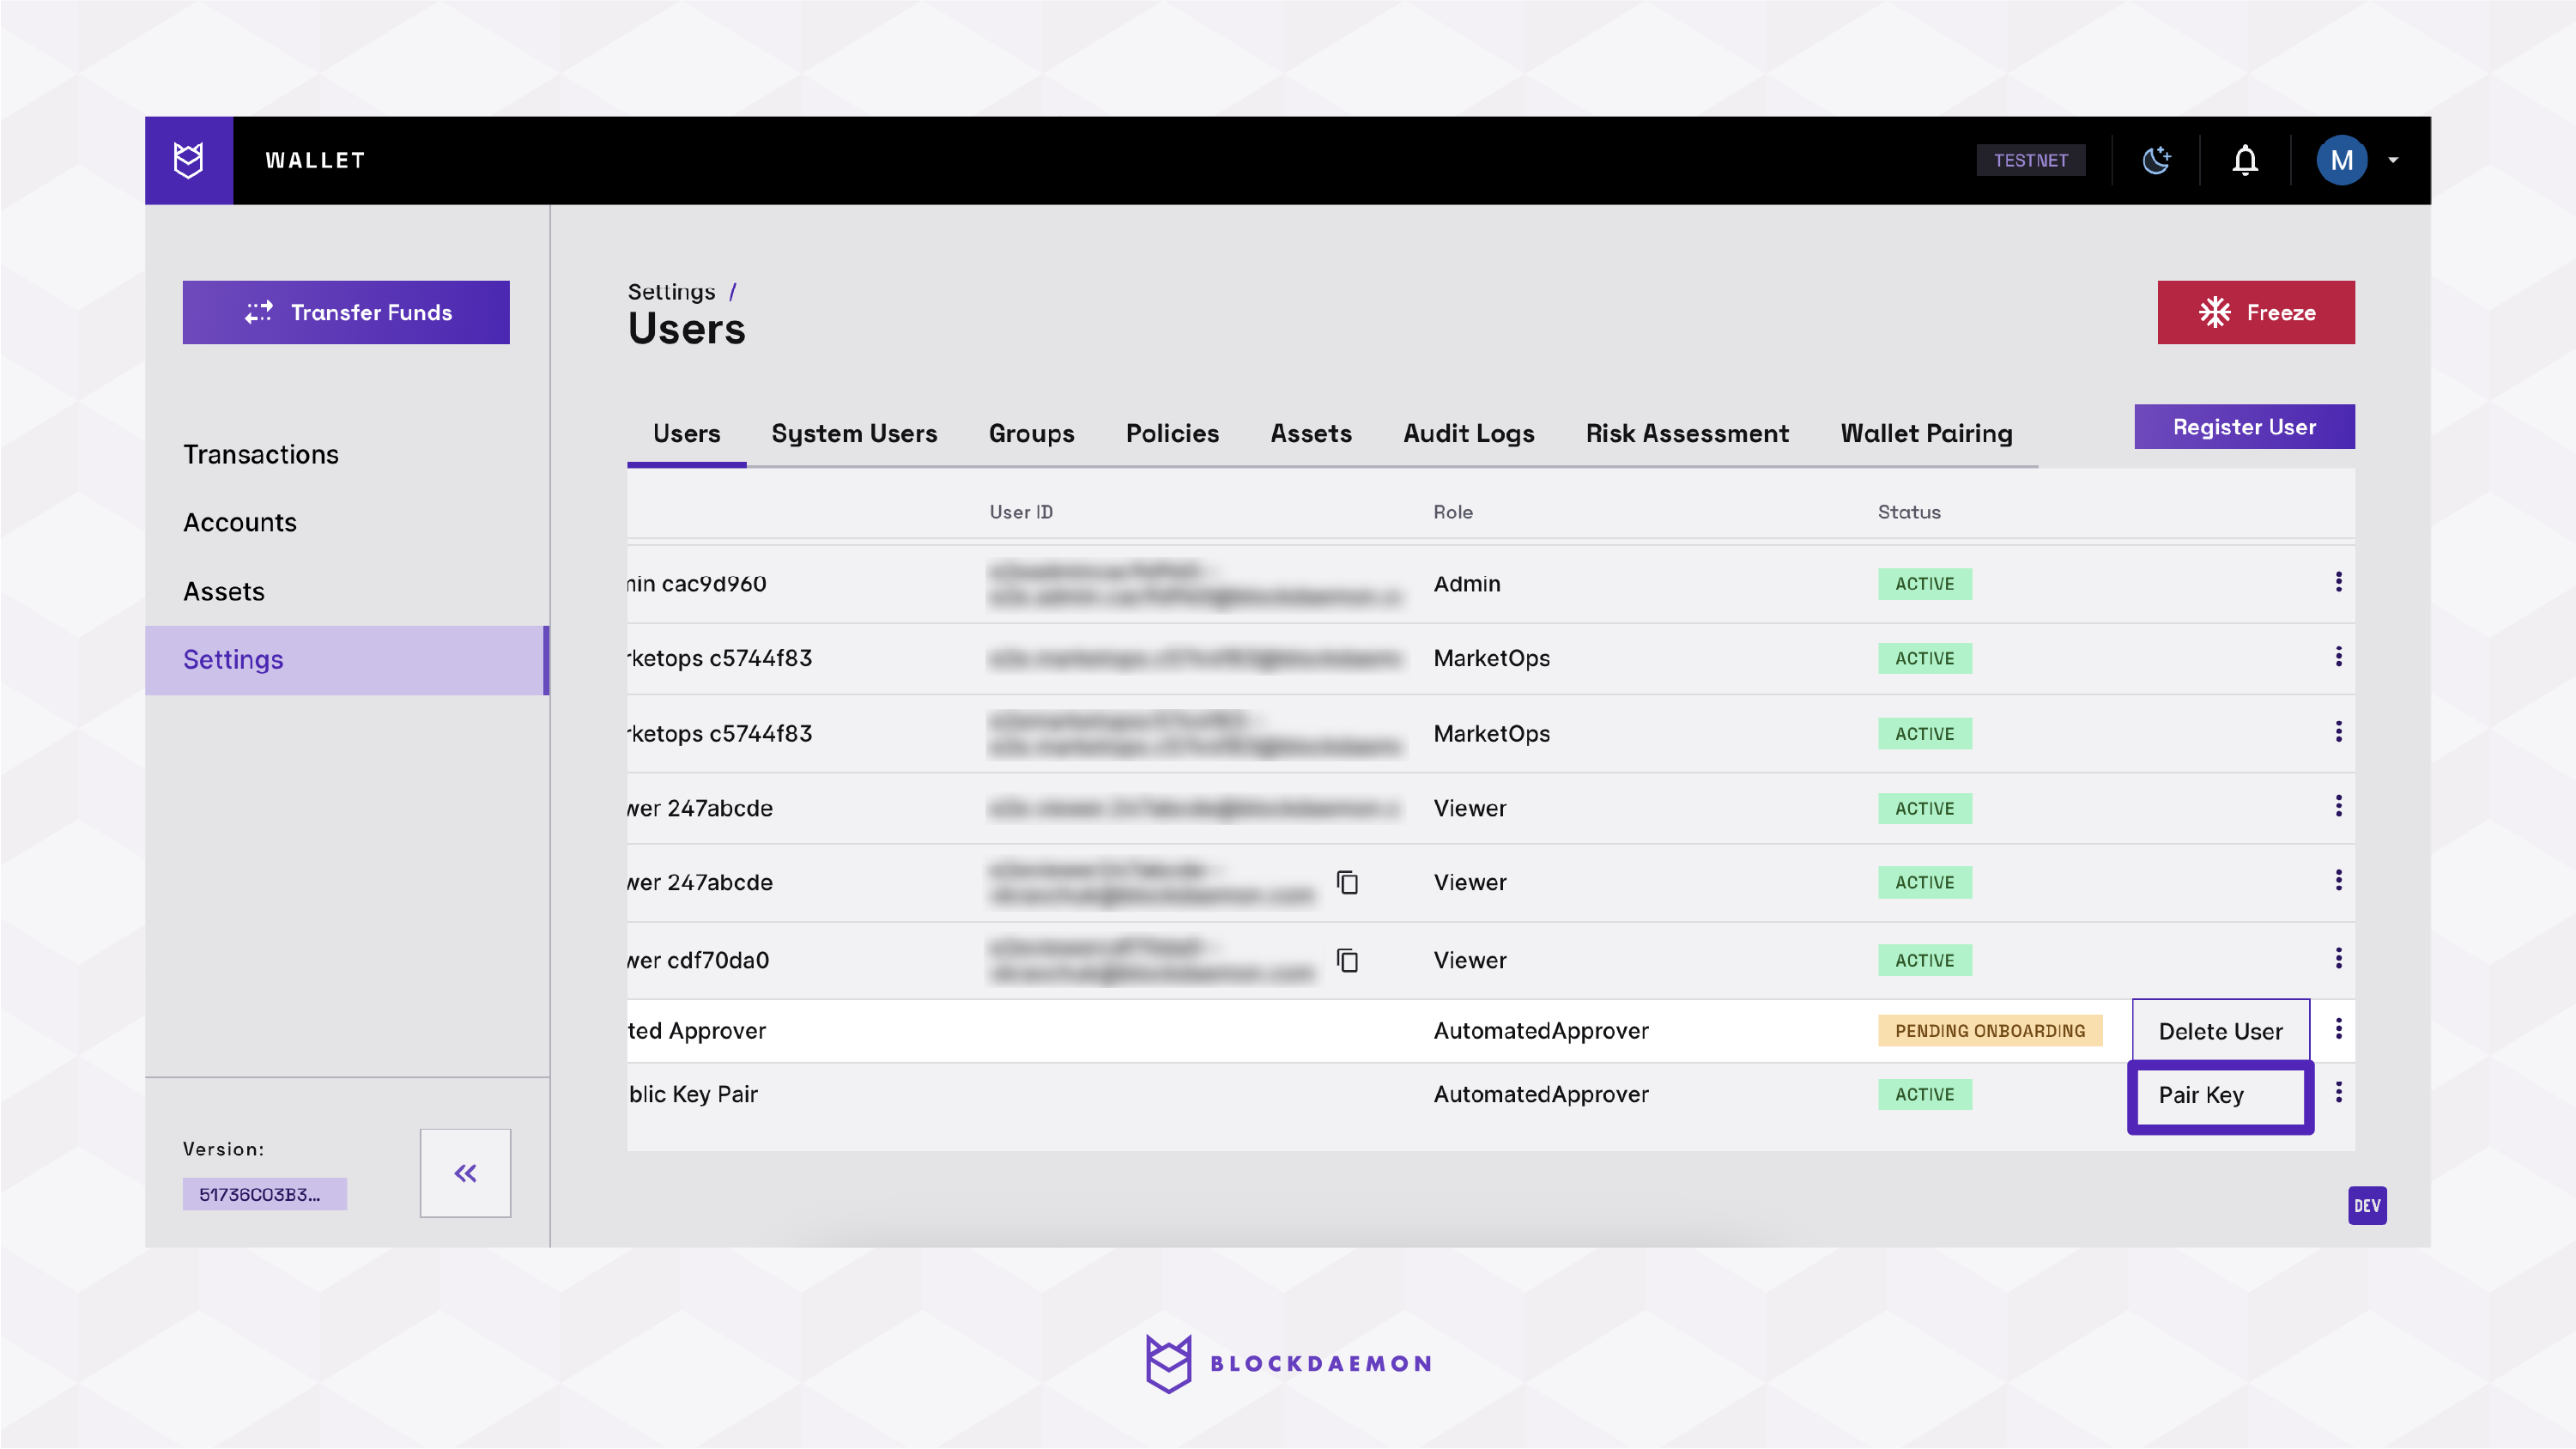
- Insert the Signature verification key/Public key. Once the pairing is complete, the user’s status changes to active.
- Create a new group and add the automated approver user to the group.
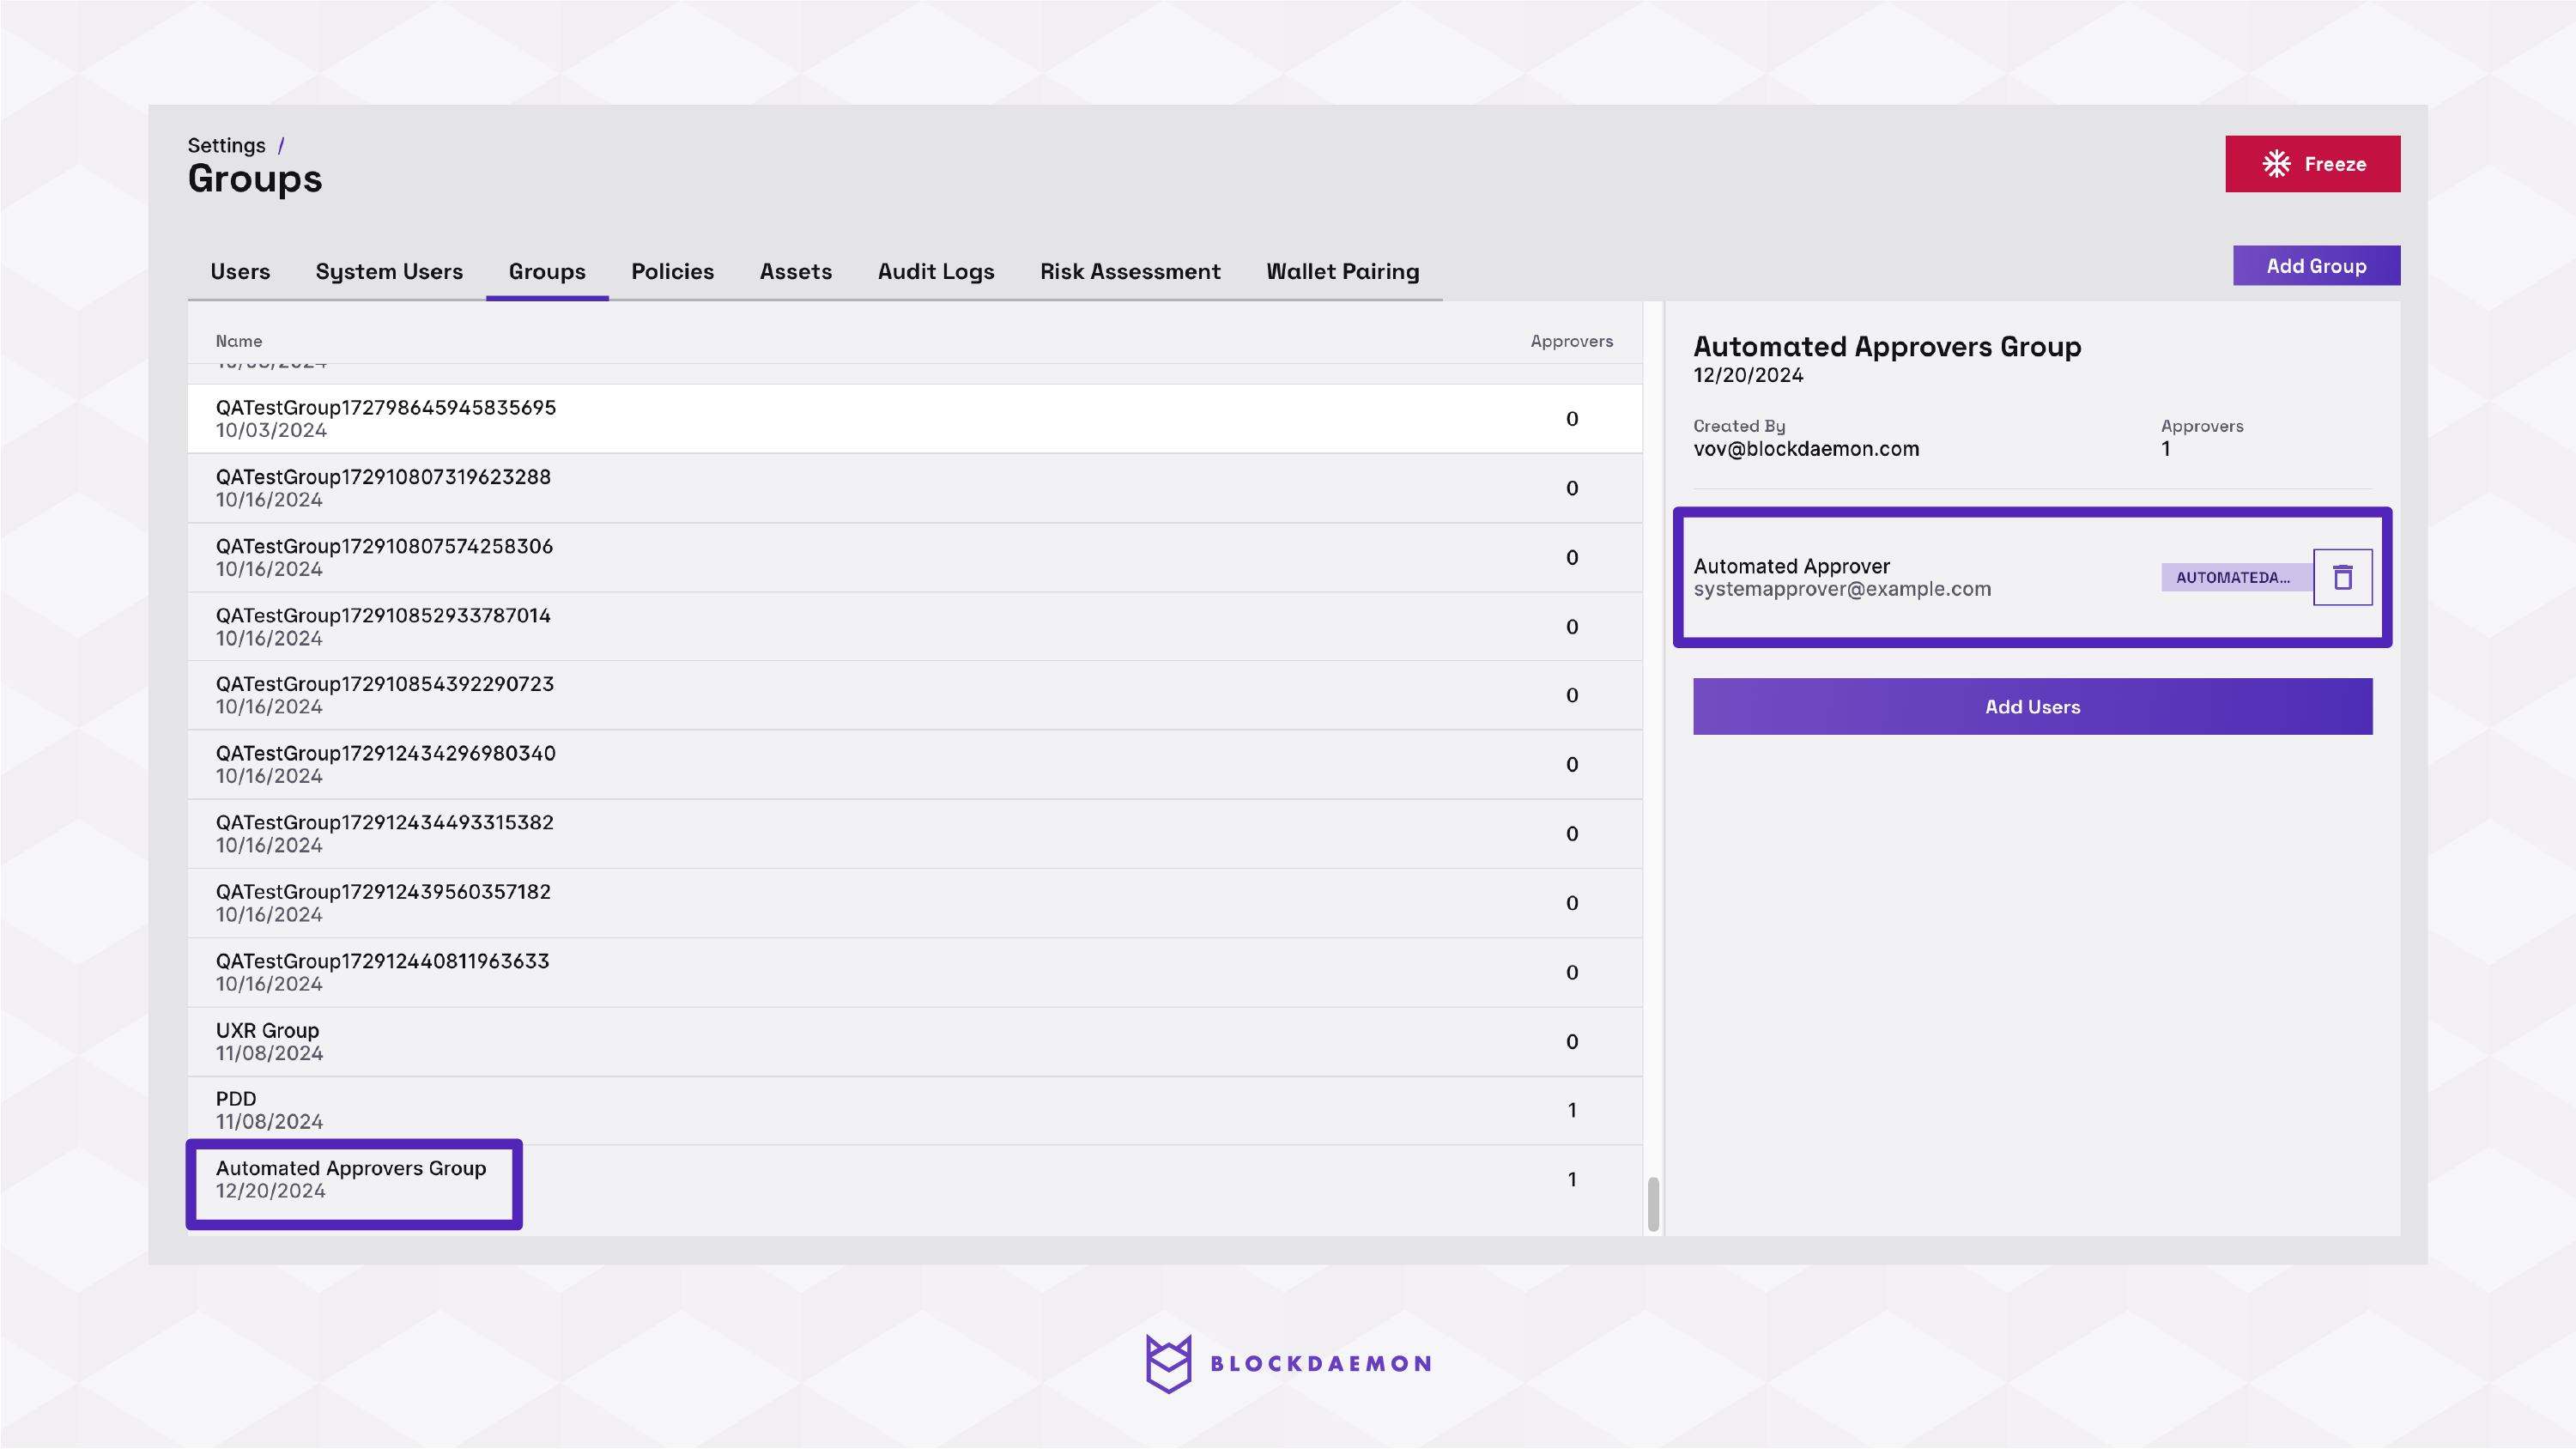
- Create a transfer policy requiring approval from the newly created group.

🗣️We Are Here to Help!
Please contact us via email or support chat if you encounter an issue, bug, or need assistance. Don't forget to include any relevant details about the problem. To request a wallet form and Institutional Vault Approver form, please click here or contact our sales team.
Updated about 1 month ago