How to Restake with Eigenlayer
Restake rewards with Eigenlayer via Blockdaemon app.
EigenLayer is an Ethereum-based protocol that introduces restaking. It allows users to reuse their ETH on the consensus layer, securing additional protocols and applications without additional collateral. Users can stake ETH directly or with a liquid staking token (LST) and opt in to EigenLayer smart contracts to restake their ETH or LST, extend the network's security, and enable the opportunity to earn additional rewards.
This guide will show you how to stake & restake with EigenLayer native restaking via the Blockdaemon app.
Info
- If you're staking via our staking API or want an overview of the process, watch our video guide.
- To learn more about EigenLayer, visit our dedicated page here.
Prerequisites
Before you start, please note:
- Restaking requires depositing ETH.
- If you have already staked, you must exit your ETH validators, collect your ETH collateral, and then re-stake. Restaking requires your Ethereum validator's withdrawal credentials to be set to your Eigenpod address.
- Changing withdrawal credentials on an existing validator is not possible.
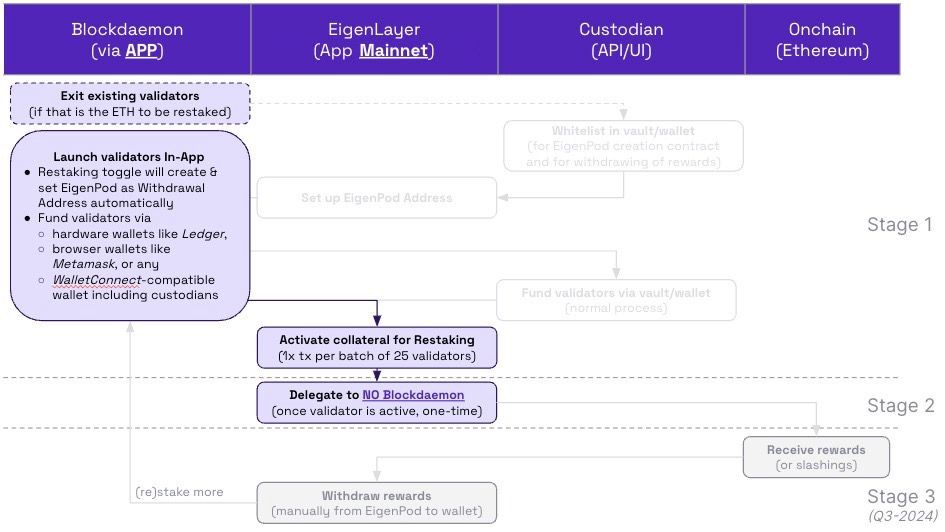
Overview of Process
Stake ETH
Step 1: Access Staking Page
-
Go to Wallets & Staking > Staking menu.
-
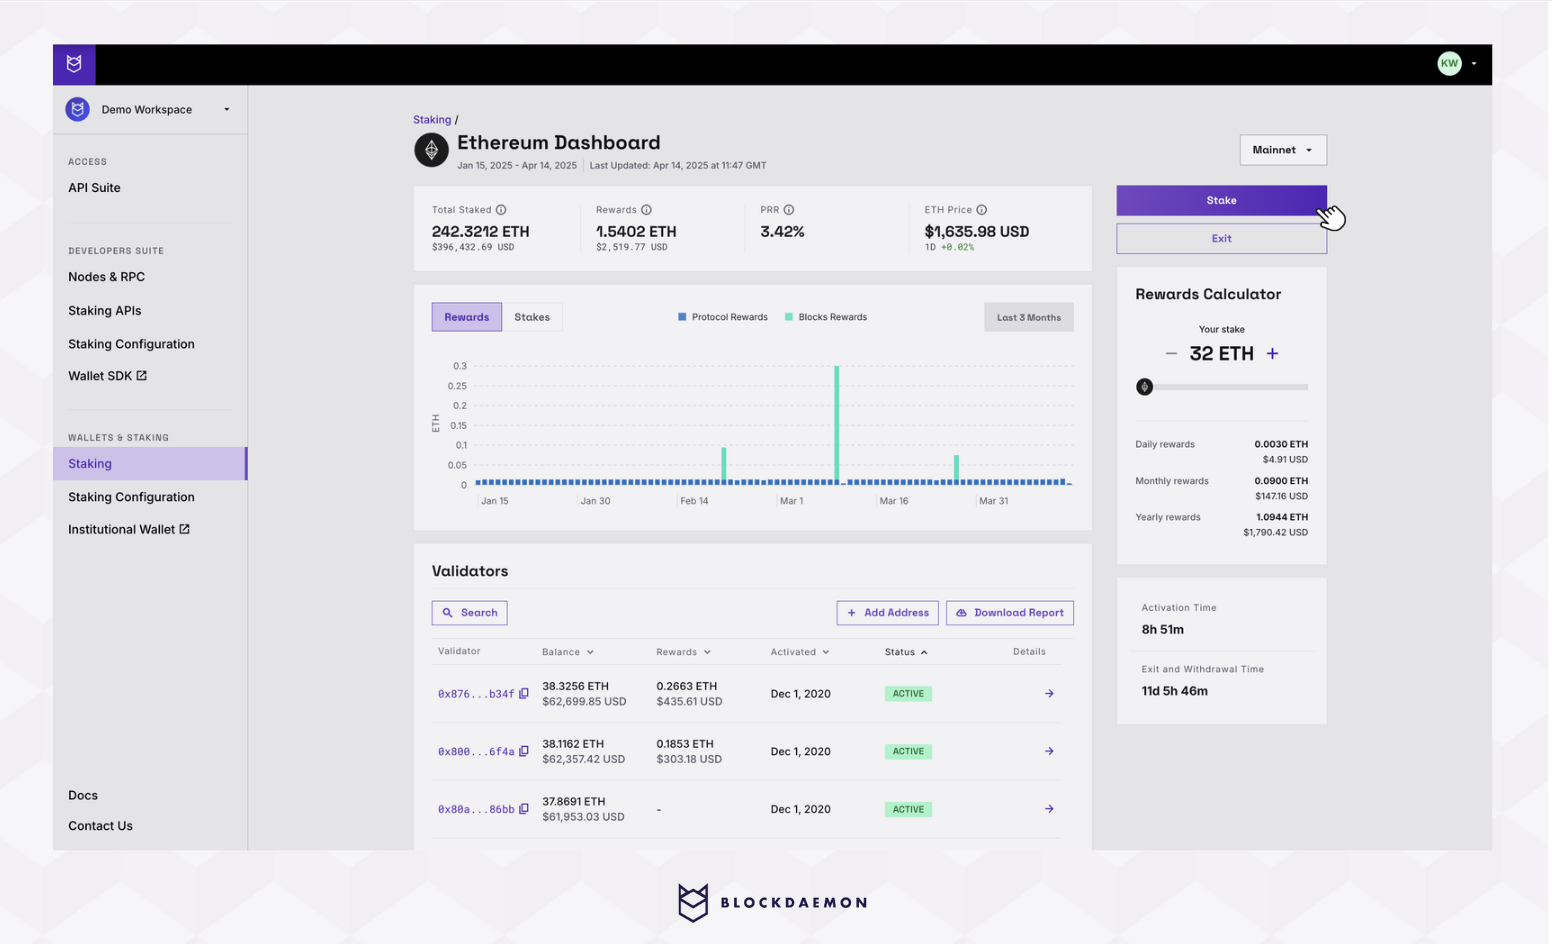
Staking can be initiated from the Ethereum card as shown below via the Stake button and is also available from the Dashboard.
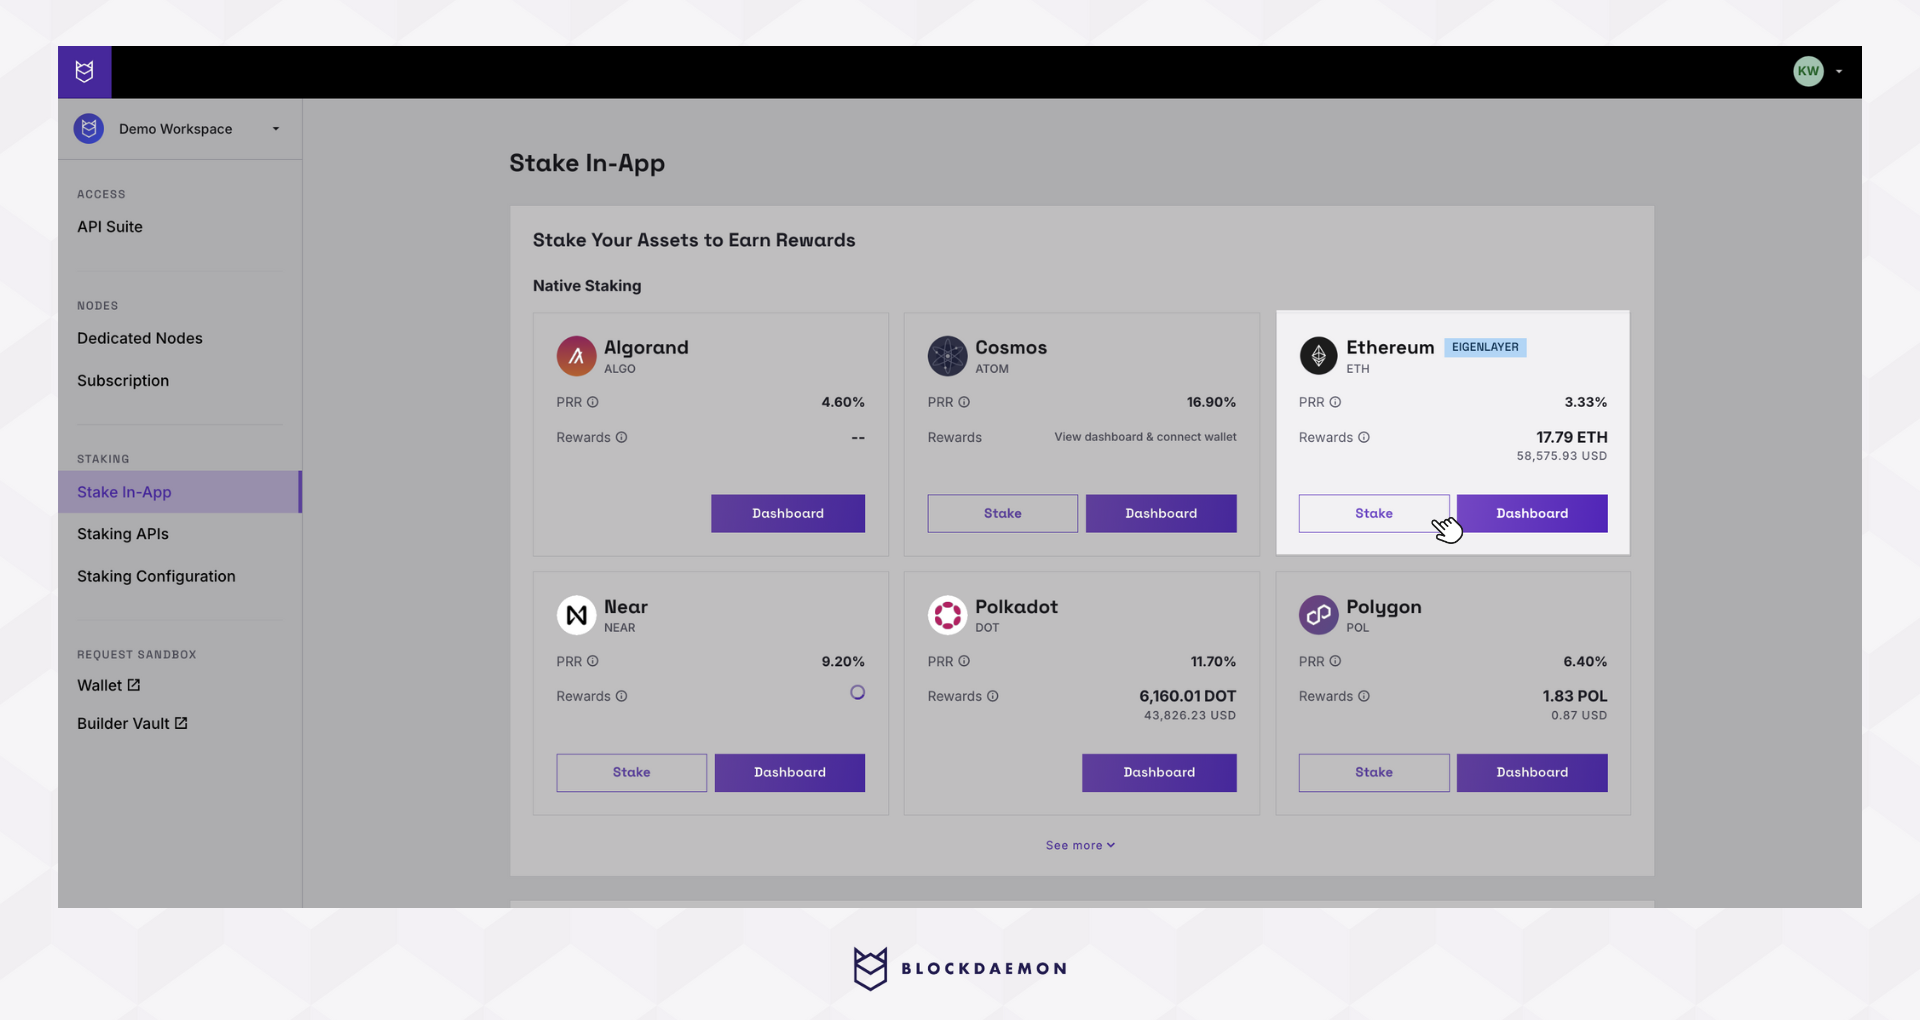
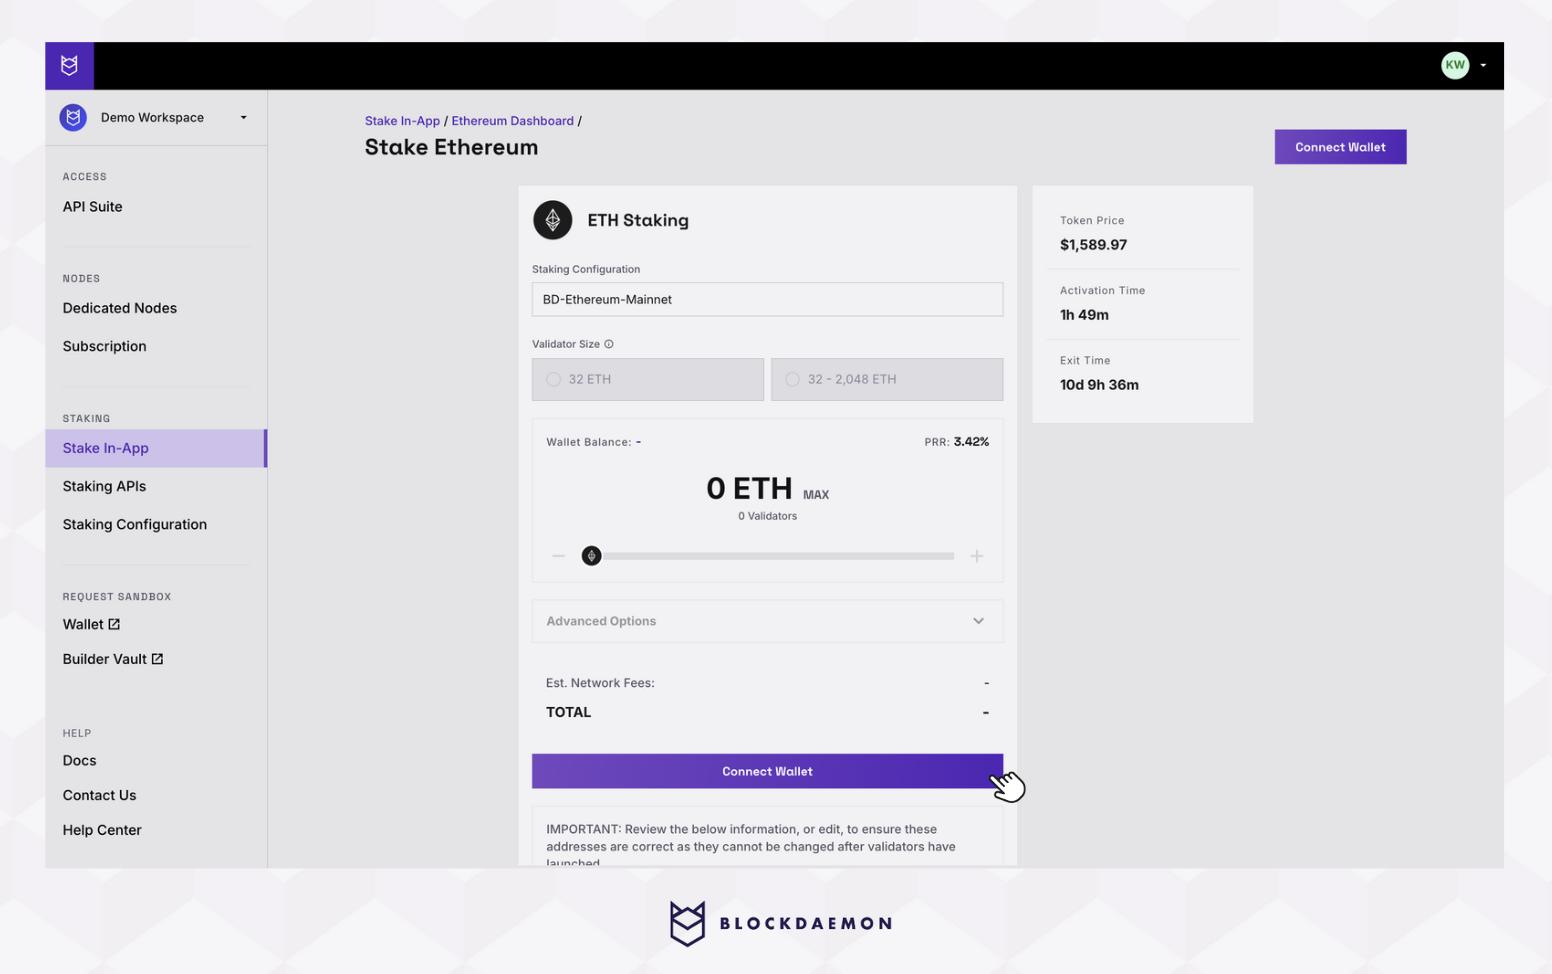
If you begin staking ETH from the Ethereum Dashboard, select Stake.
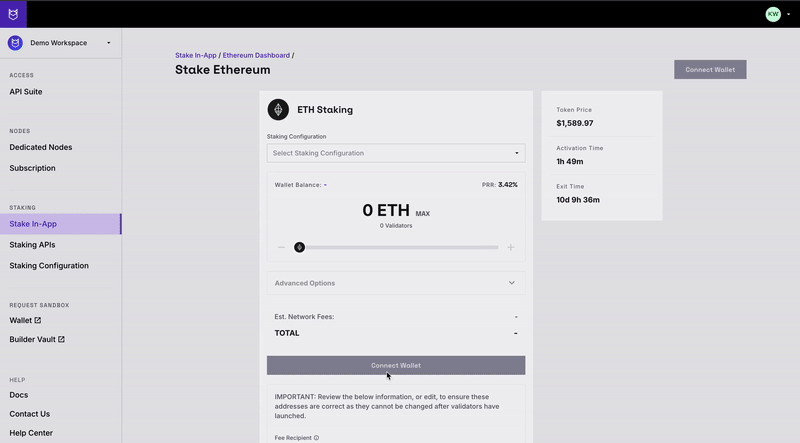
Step 2: Connect Your Wallet
-
Connect your wallet based on the staking configuration.
-
If you have more than 1 Ethereum staking configuration: Select the configuration you’d like to use, then select Connect Wallet.
-
If you only have 1 Ethereum staking configuration: Select Connect Wallet.
-
-
Choose your wallet from the available options to access your account and link it to the Blockdaemon app.
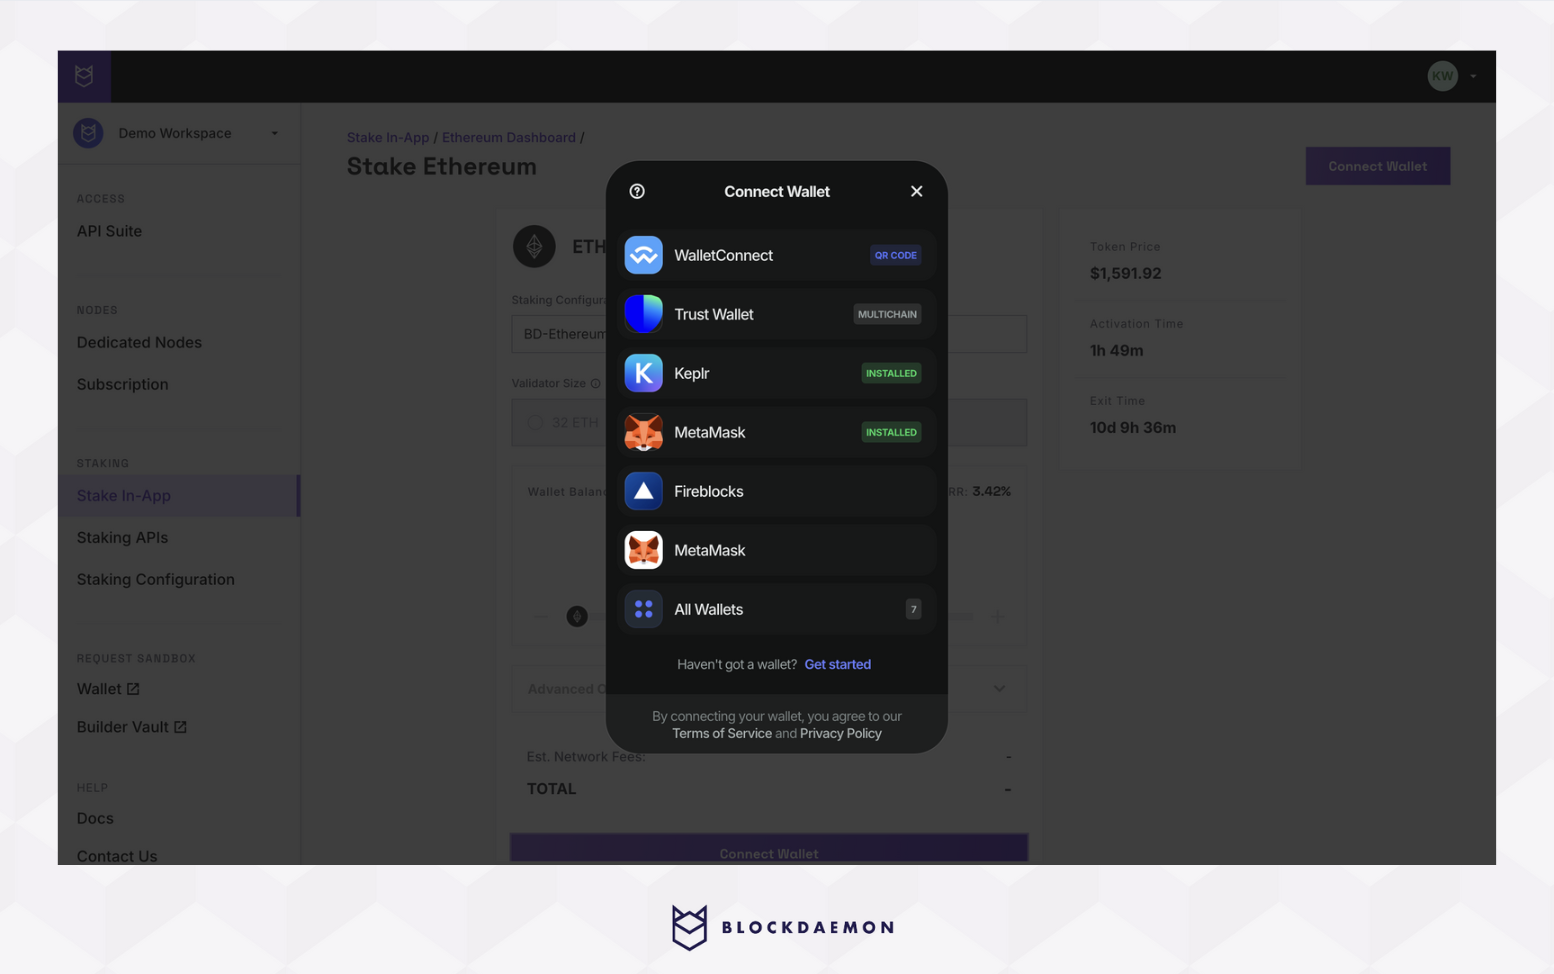
- Your wallet information and details of your Staking Configuration will be displayed at the top of the page.

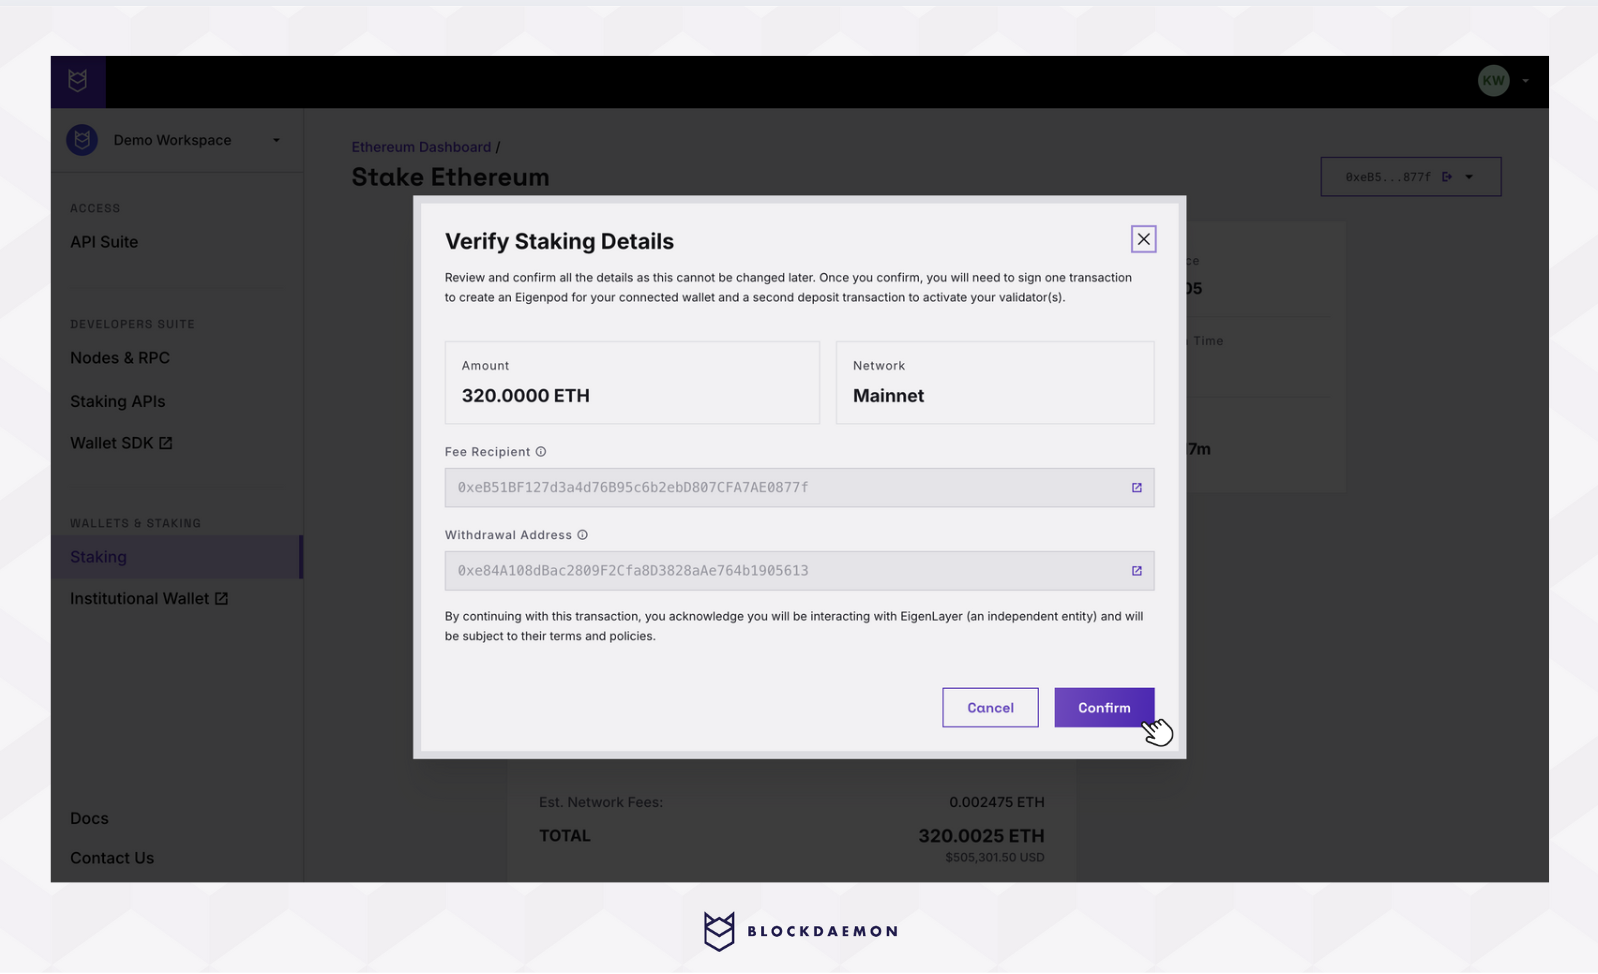
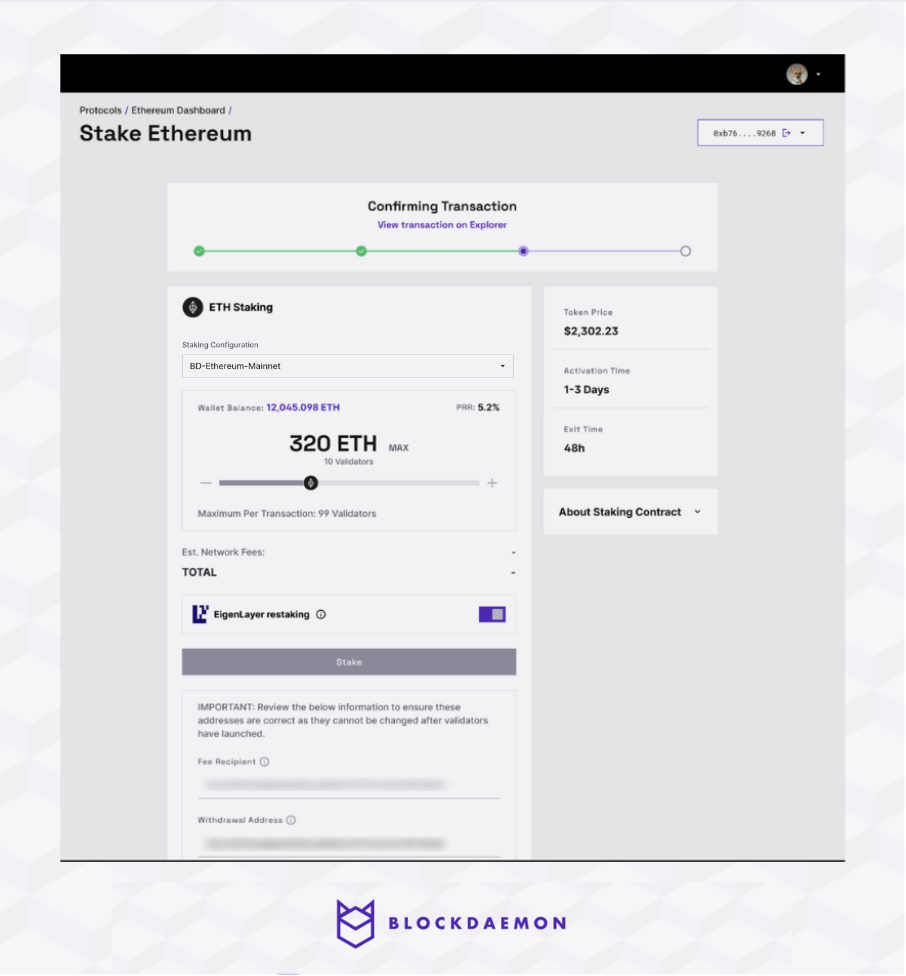
Step 3: (Re)Stake ETH
Info
- Ensure you have enough balance to cover the gas fees.
- Review all staking details before proceeding as addresses cannot be changed after validators have launched.
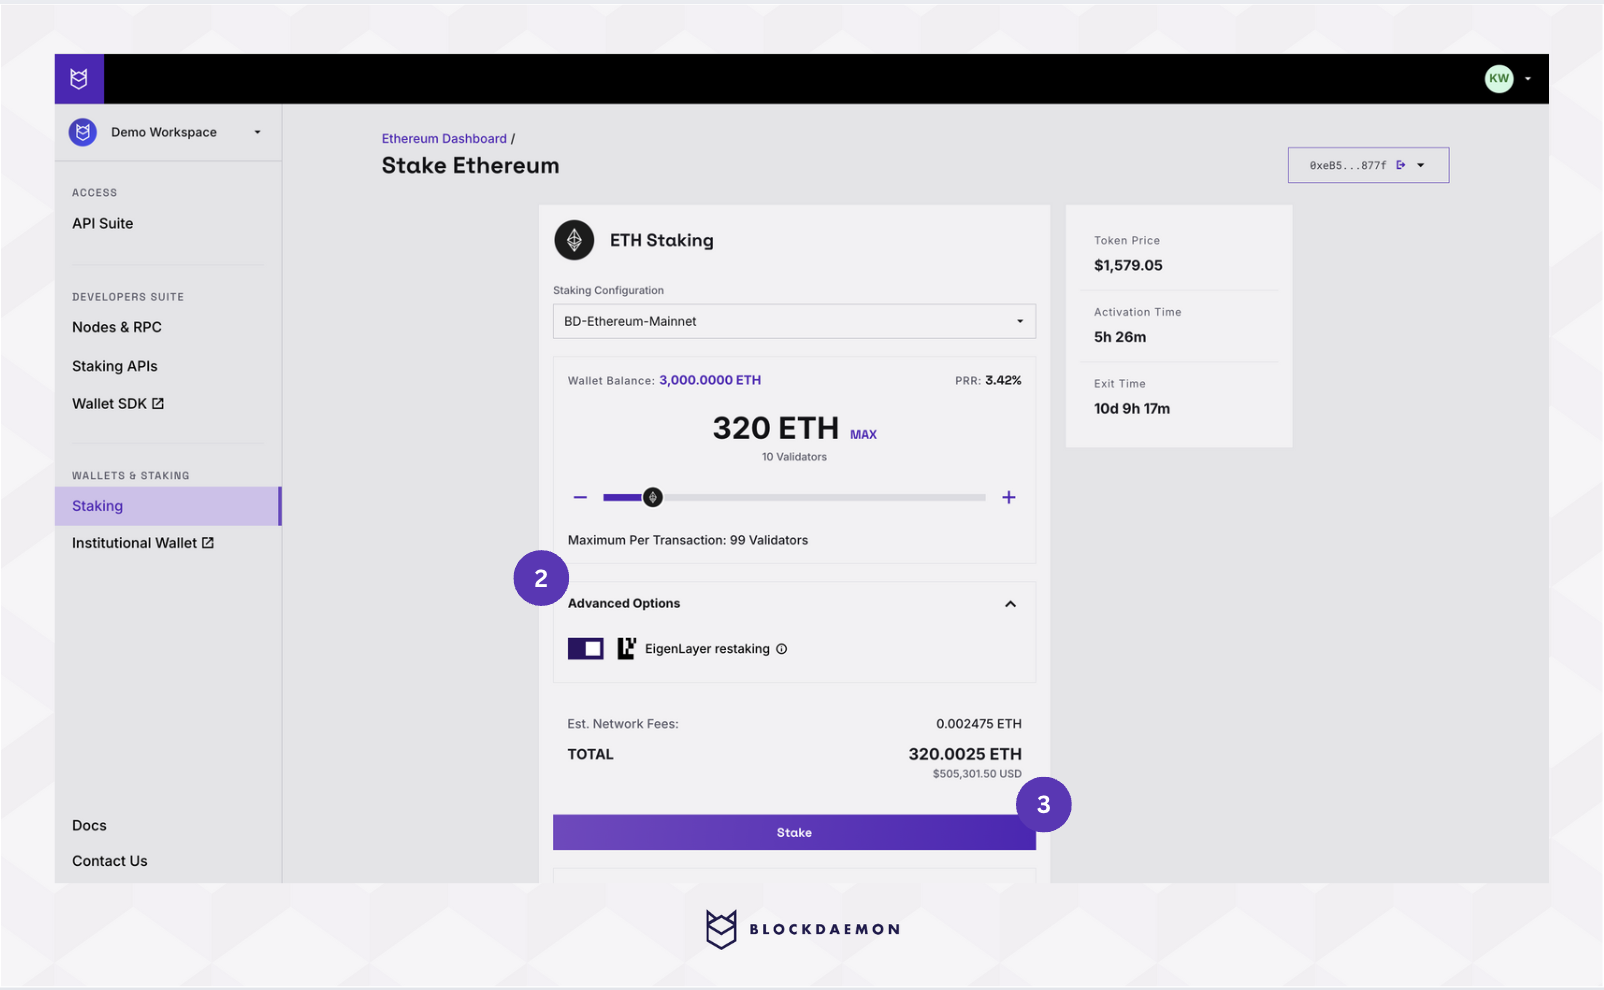
- Specify the staking amount using the slider.
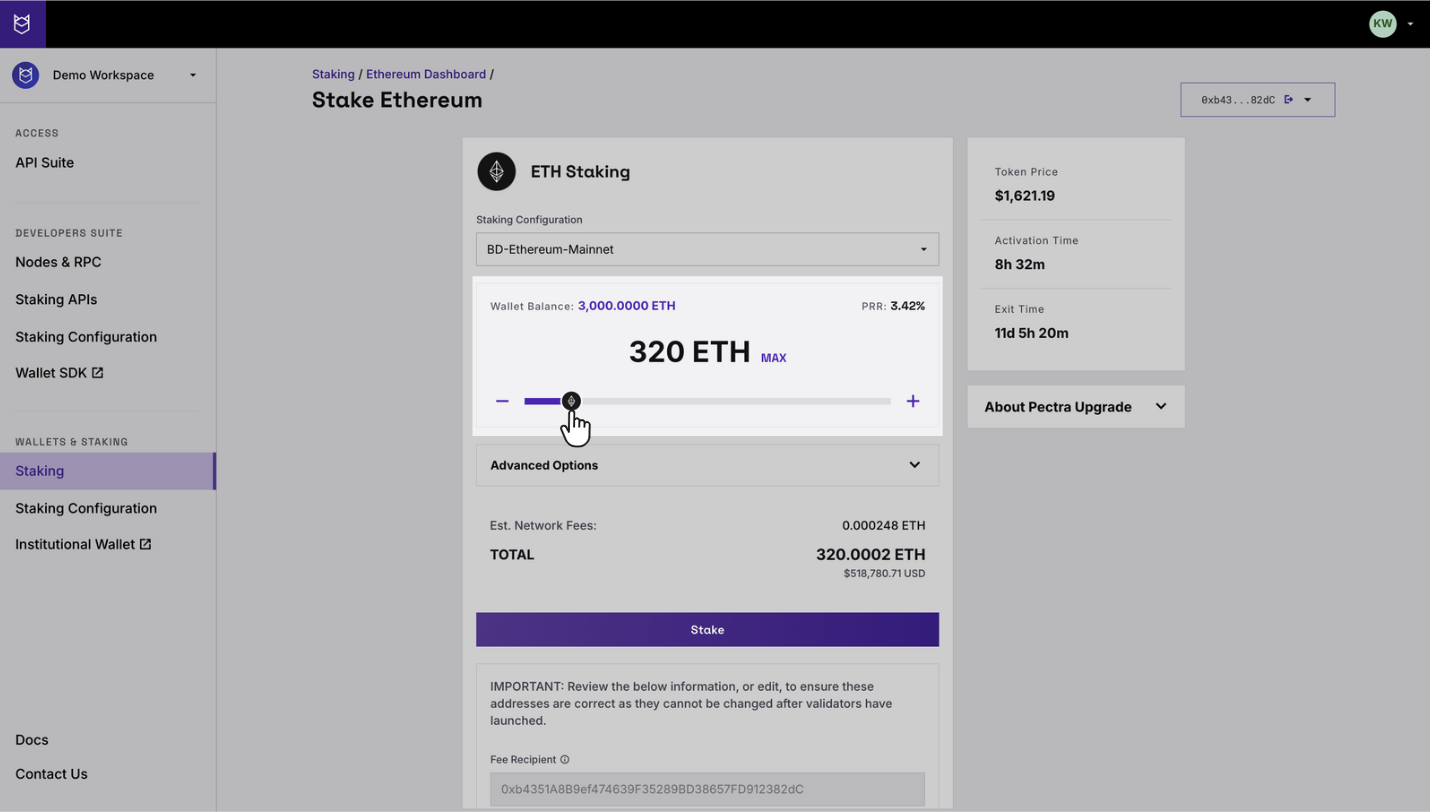
- Enable the EigenLayer restaking toggle.
- You can have only 1 withdrawal address for all validators, which must be set to your EigenPod Address.
- If your connected wallet address already has an EigenPod Smart Contract address, it will be populated as your withdrawal address. If not, we will create a new EigenPod address for you.
- Click Stake to initiate the transaction.
- Review the details of your transaction. Once you're sure everything is correct, finalize the process and submit your transaction.
InfoIf you don't have an EigenPod Address, we'll create one for your connected wallet.
Step 4: Creating EigenPod
Important Notes
- If you already have an EigenPod address, skip toStep 5: Confirm the Transaction
- Ensure you have sufficient balance to cover the fees
- Confirm and sign the transaction in your wallet to create your EigenPod.
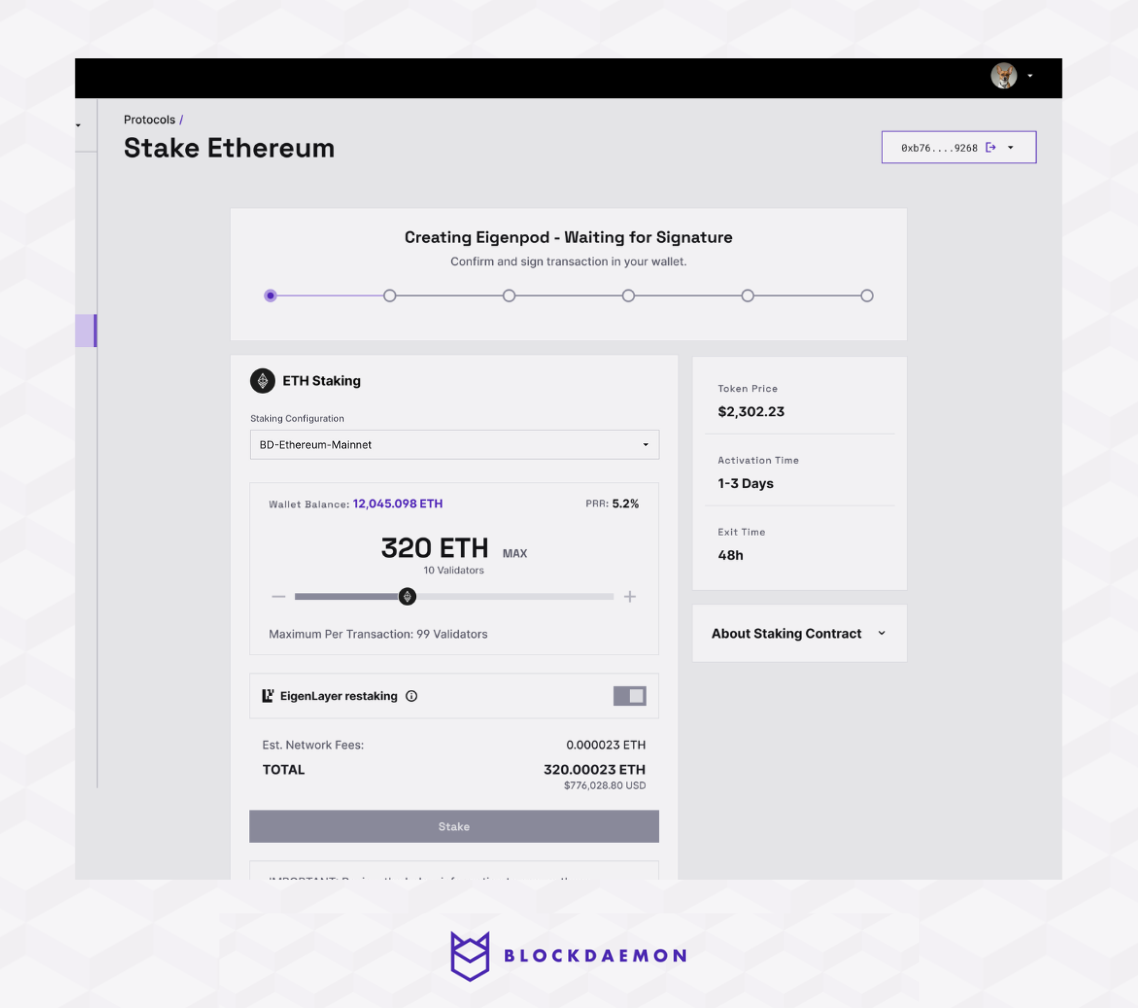
- Your transaction is now broadcast and confirmed on the network.
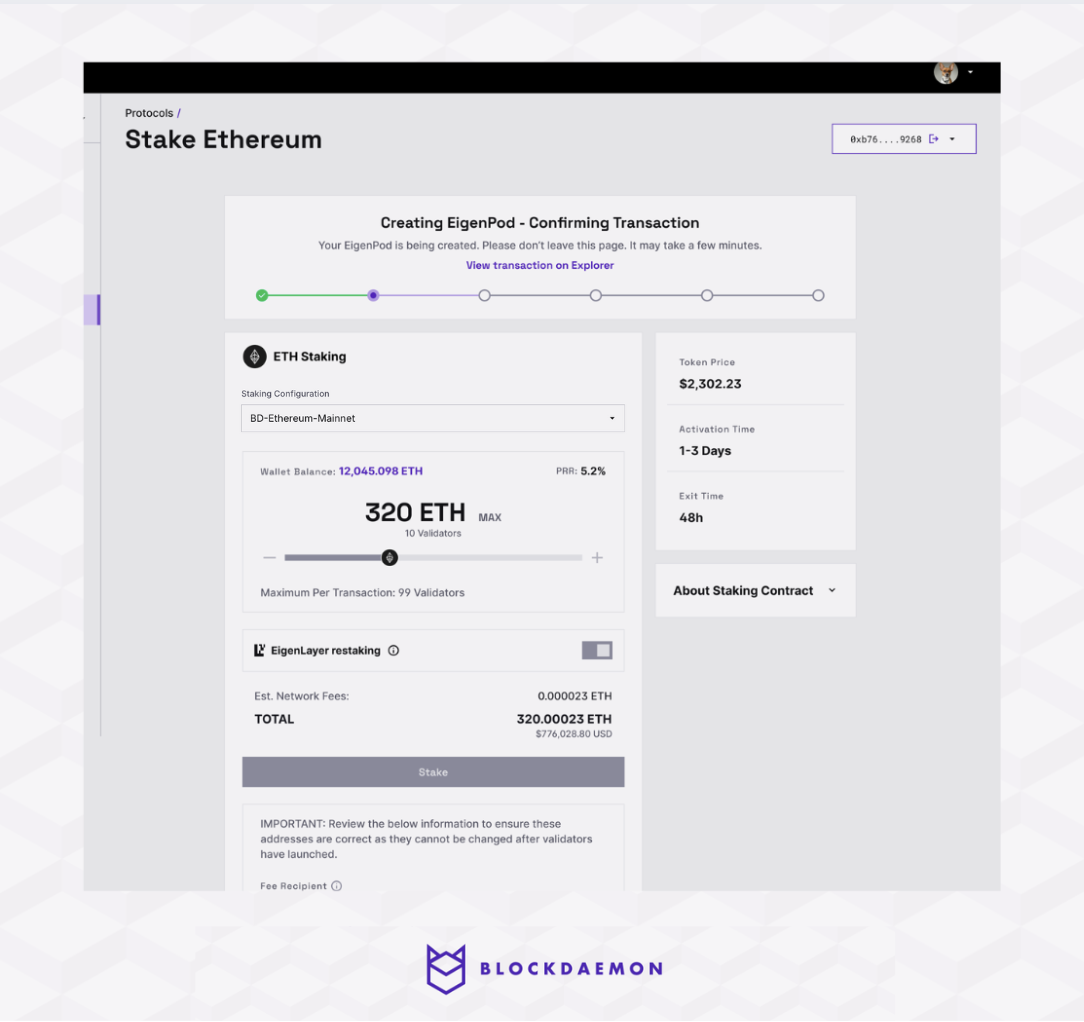
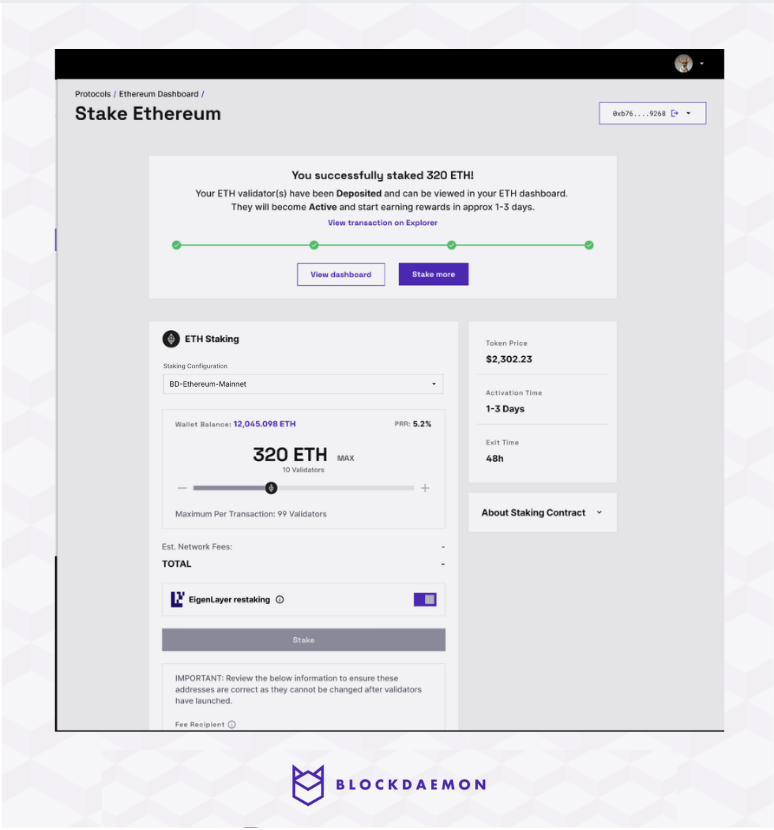
Step 5: Confirm the Transaction
- Preparing the validators for deployment.

- Confirm and sign the transaction in your wallet.
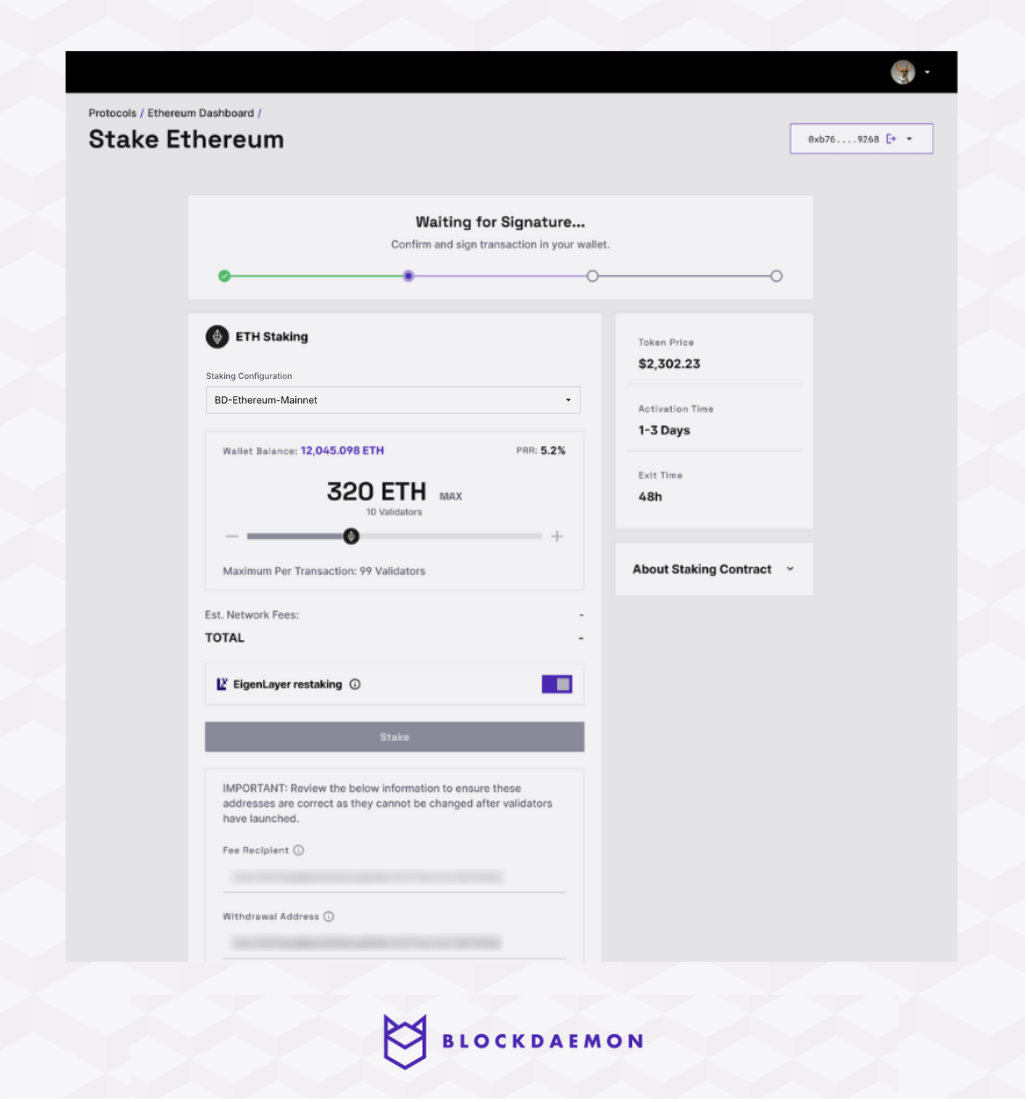
- Your transaction is now broadcast and confirmed on the network.
- Once the network confirms the transaction, your ETH validator(s) are deposited. You can view them in the Ethereum Staking Dashboard. It may take 1-3 days for the validators to become active and start earning rewards, depending on the protocol activation queue.
Activate Restaked Collateral
- Once your validator has activated the protocol, go to the EigenLayer app at Mainnet.
- Connect your wallet. Under Awaiting Restake , you'll see your EigenPod address and the amount of ETH from your validators.
- Click the Restake button to transfer your collateral into the restaking system. The system will fetch the necessary proof about your restaking validators.
This process may take a few minutes depending on the number of validators.
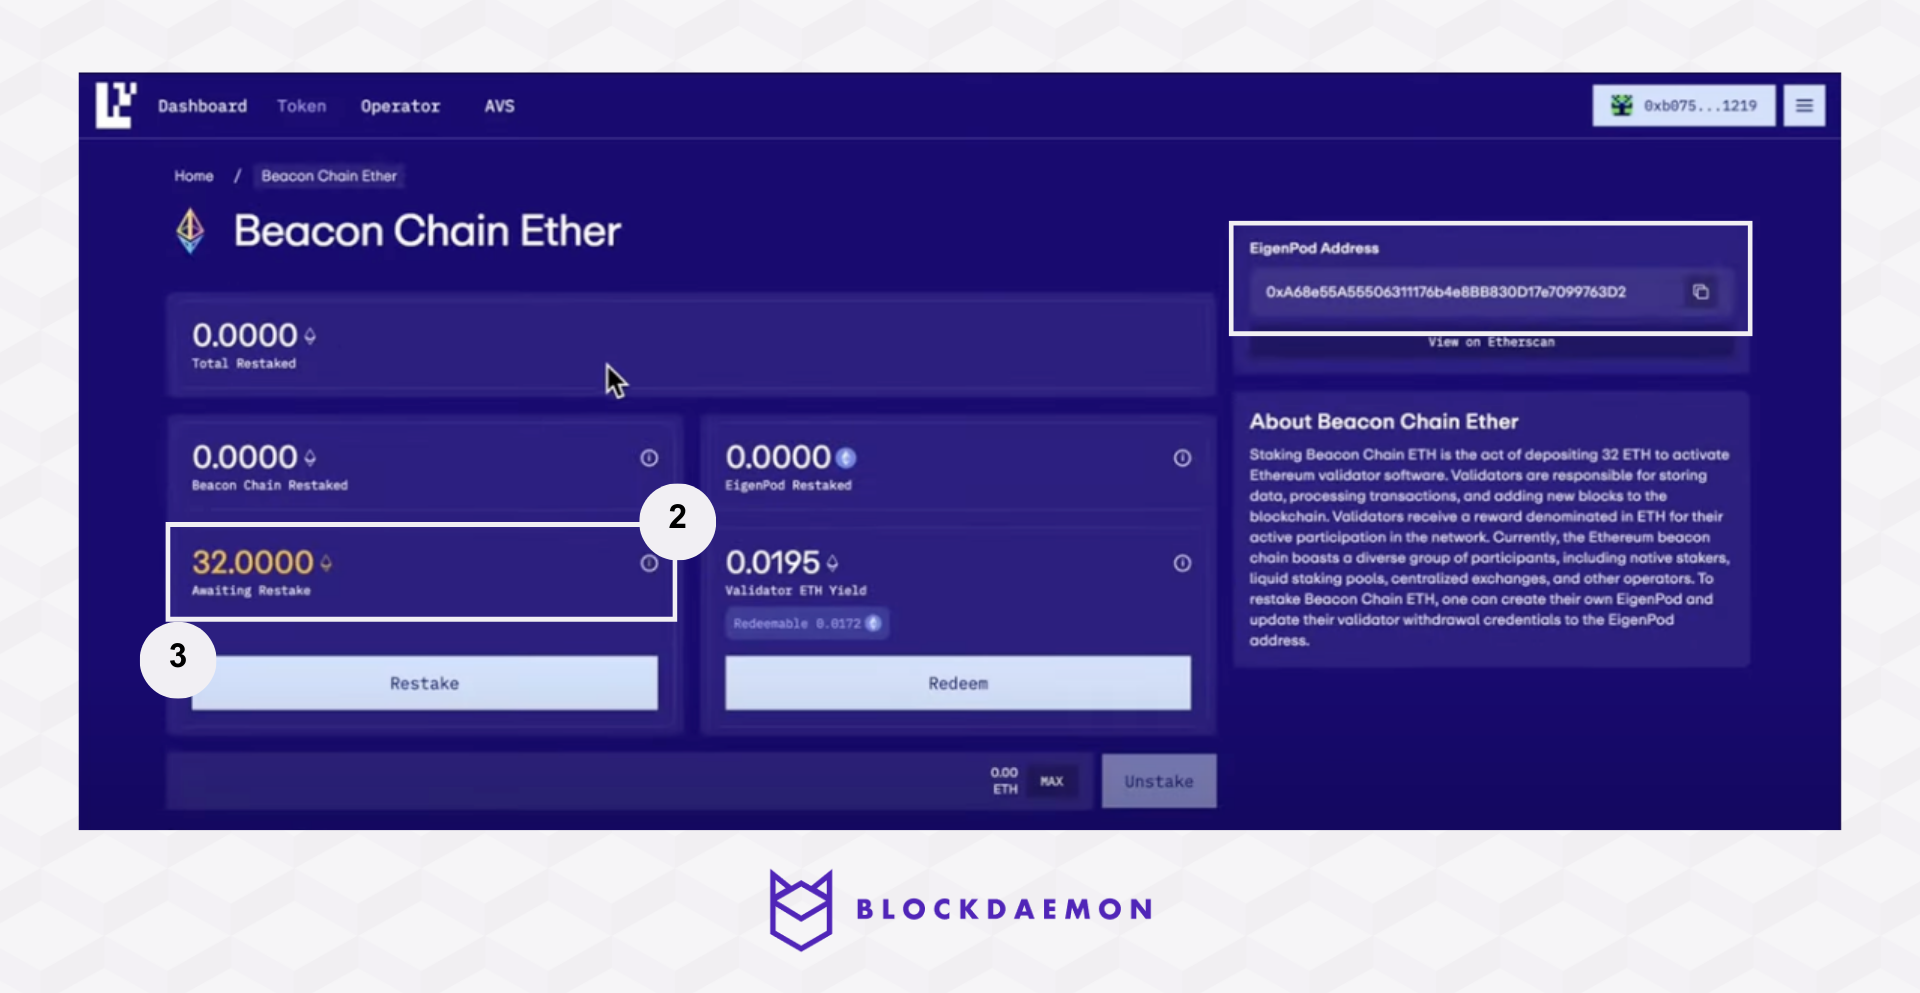
- Once generated, the EigenLayer protocol will generate another transaction for you to sign.
- Transactions are currently processed in batches of up to 25 validators per transaction, so you might be asked to sign several similar transactions.
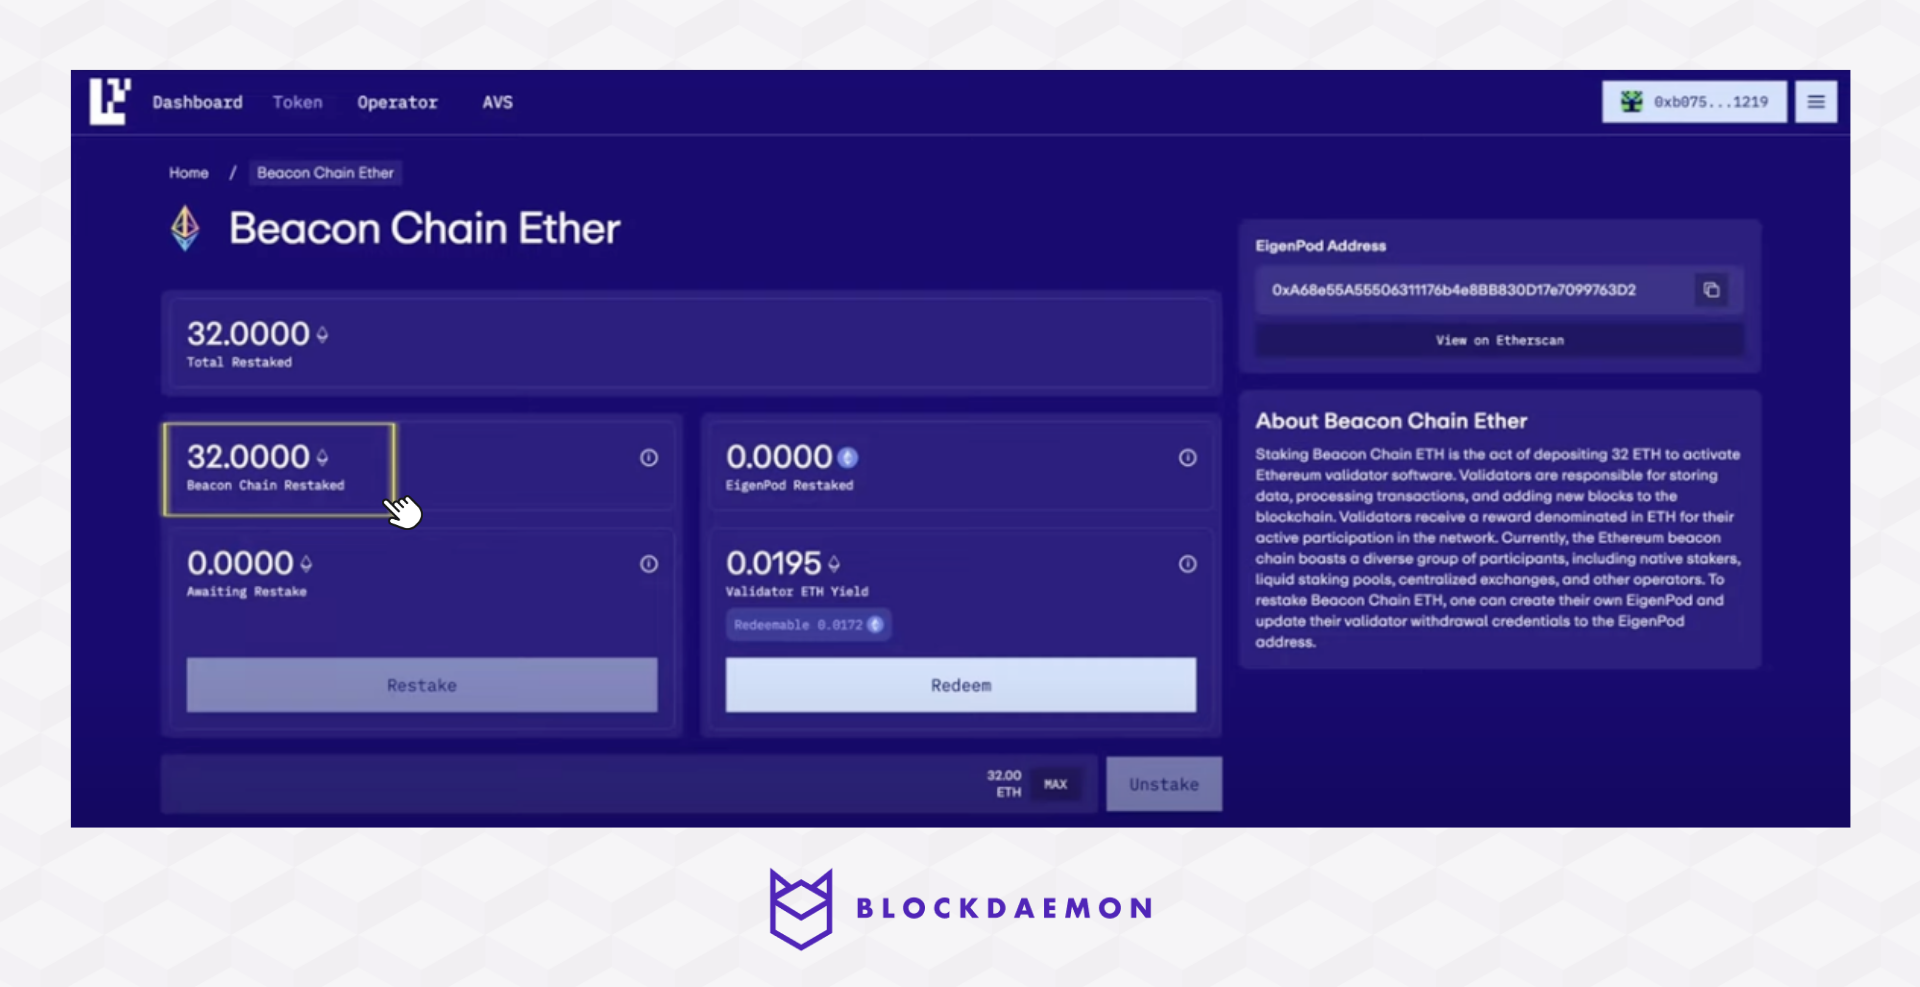
- Your collateral is active in the EigenLayer system and will start earning Restaked Points.
- You can see the number of your restaked ETH under Beacon Chain Restaked.
Delegate to Blockdaemon
Delegating to an operator is necessary only once per wallet address.
If you've already delegated any token (whether native ETH or any LST or $EIGEN) before, additional collateral put into EigenLayer will be delegated to the same selected operator.
NoteIf you want to get started in restaking using
LSTor$EIGEN, go to the EigenLayer app under Restake, and select your token of choice to "Deposit". Afterwards, follow the steps below.
- Go to the EigenLayer app under Operator, then select Blockdaemon on Mainnet.
- On the right-hand side, you'll see the Registered AVSs that Blockdaemon currently supports, which will determine your restaking risks and rewards once these mechanisms go live.
- Click the Delegate button to choose your node operator and sign the corresponding transaction.
- You will see the delegating progress message. Once completed, your delegated balance will reflect all your available restated funds.
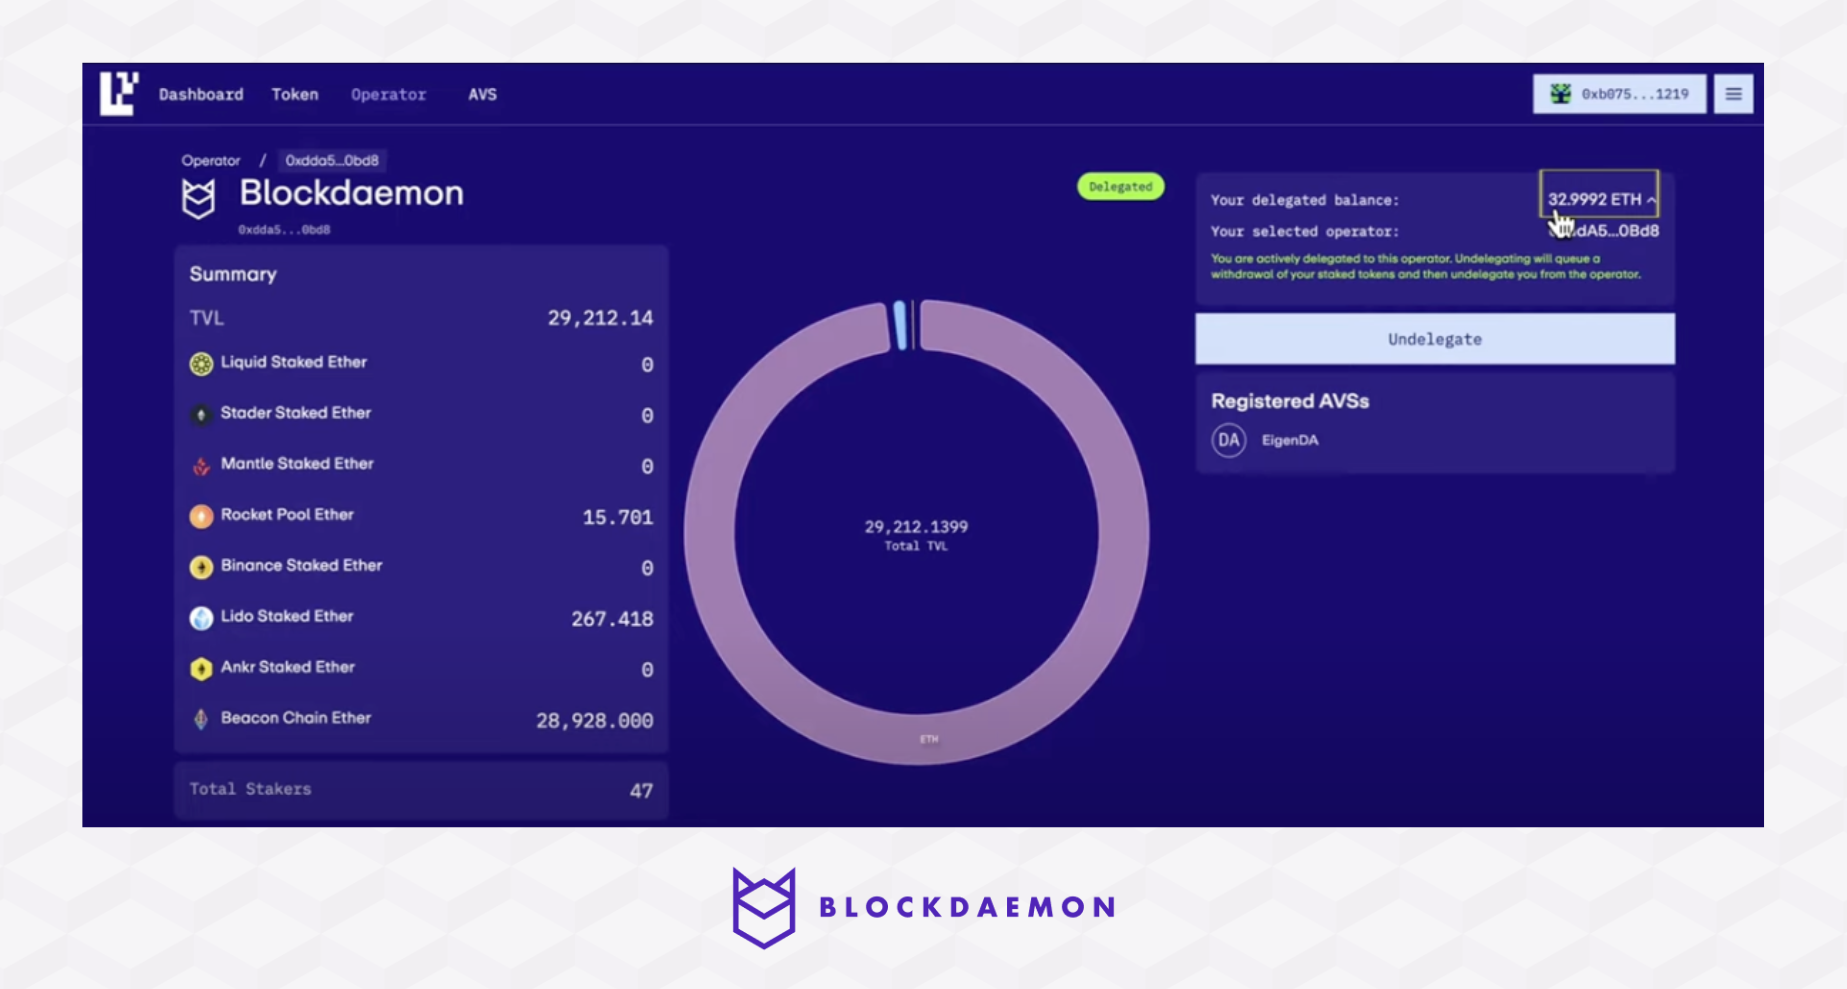
- Initiating an Undelegate transaction will queue a withdrawal (Unstake) of your funds. The Undelegate and Queue Withdrawal transactions are combined due to the security architecture of EigenLayer smart contracts.
Exit Restaking Process
If you want to exit your Blockdaemon validator linked to an EigenPod smart contract at the withdrawal address, you can exit via the Blockdaemon app.
Once the validator completes the exit queue process, the staked ETH will go to the EigenPod to enable you to unstaking. The duration of the unbonding period varies based on the parameters of the supported AVSs.
There is an escrow period of 7 days on EigenLayer Mainnet before you can completely withdraw your funds.
InfoPlease refer to the EigenLayer documentation for more details on full (collateral) and partial (rewards) withdrawals.
👋 Need Help?
Contact us through email or our support page for any issues, bugs, or assistance you may need.
Updated 6 months ago