
Stake ETH on MetaMask Institutional via Blockdaemon
A step-by-step guide on how to stake ETH on MetaMask Institutional via Blockdaemon as the Staking provider.
This article shows you how to stake ETH on MetaMask Institutional via Blockdaemon as the Staking provider using a demo custodian, Saturn Custody.
The steps on how to stake an ETH on MetaMask are outlined below:
Step 1: Initiate a Stake Via the MetaMask Institutional Dashboard
- Log In to your MetaMask Institutional dashboard.
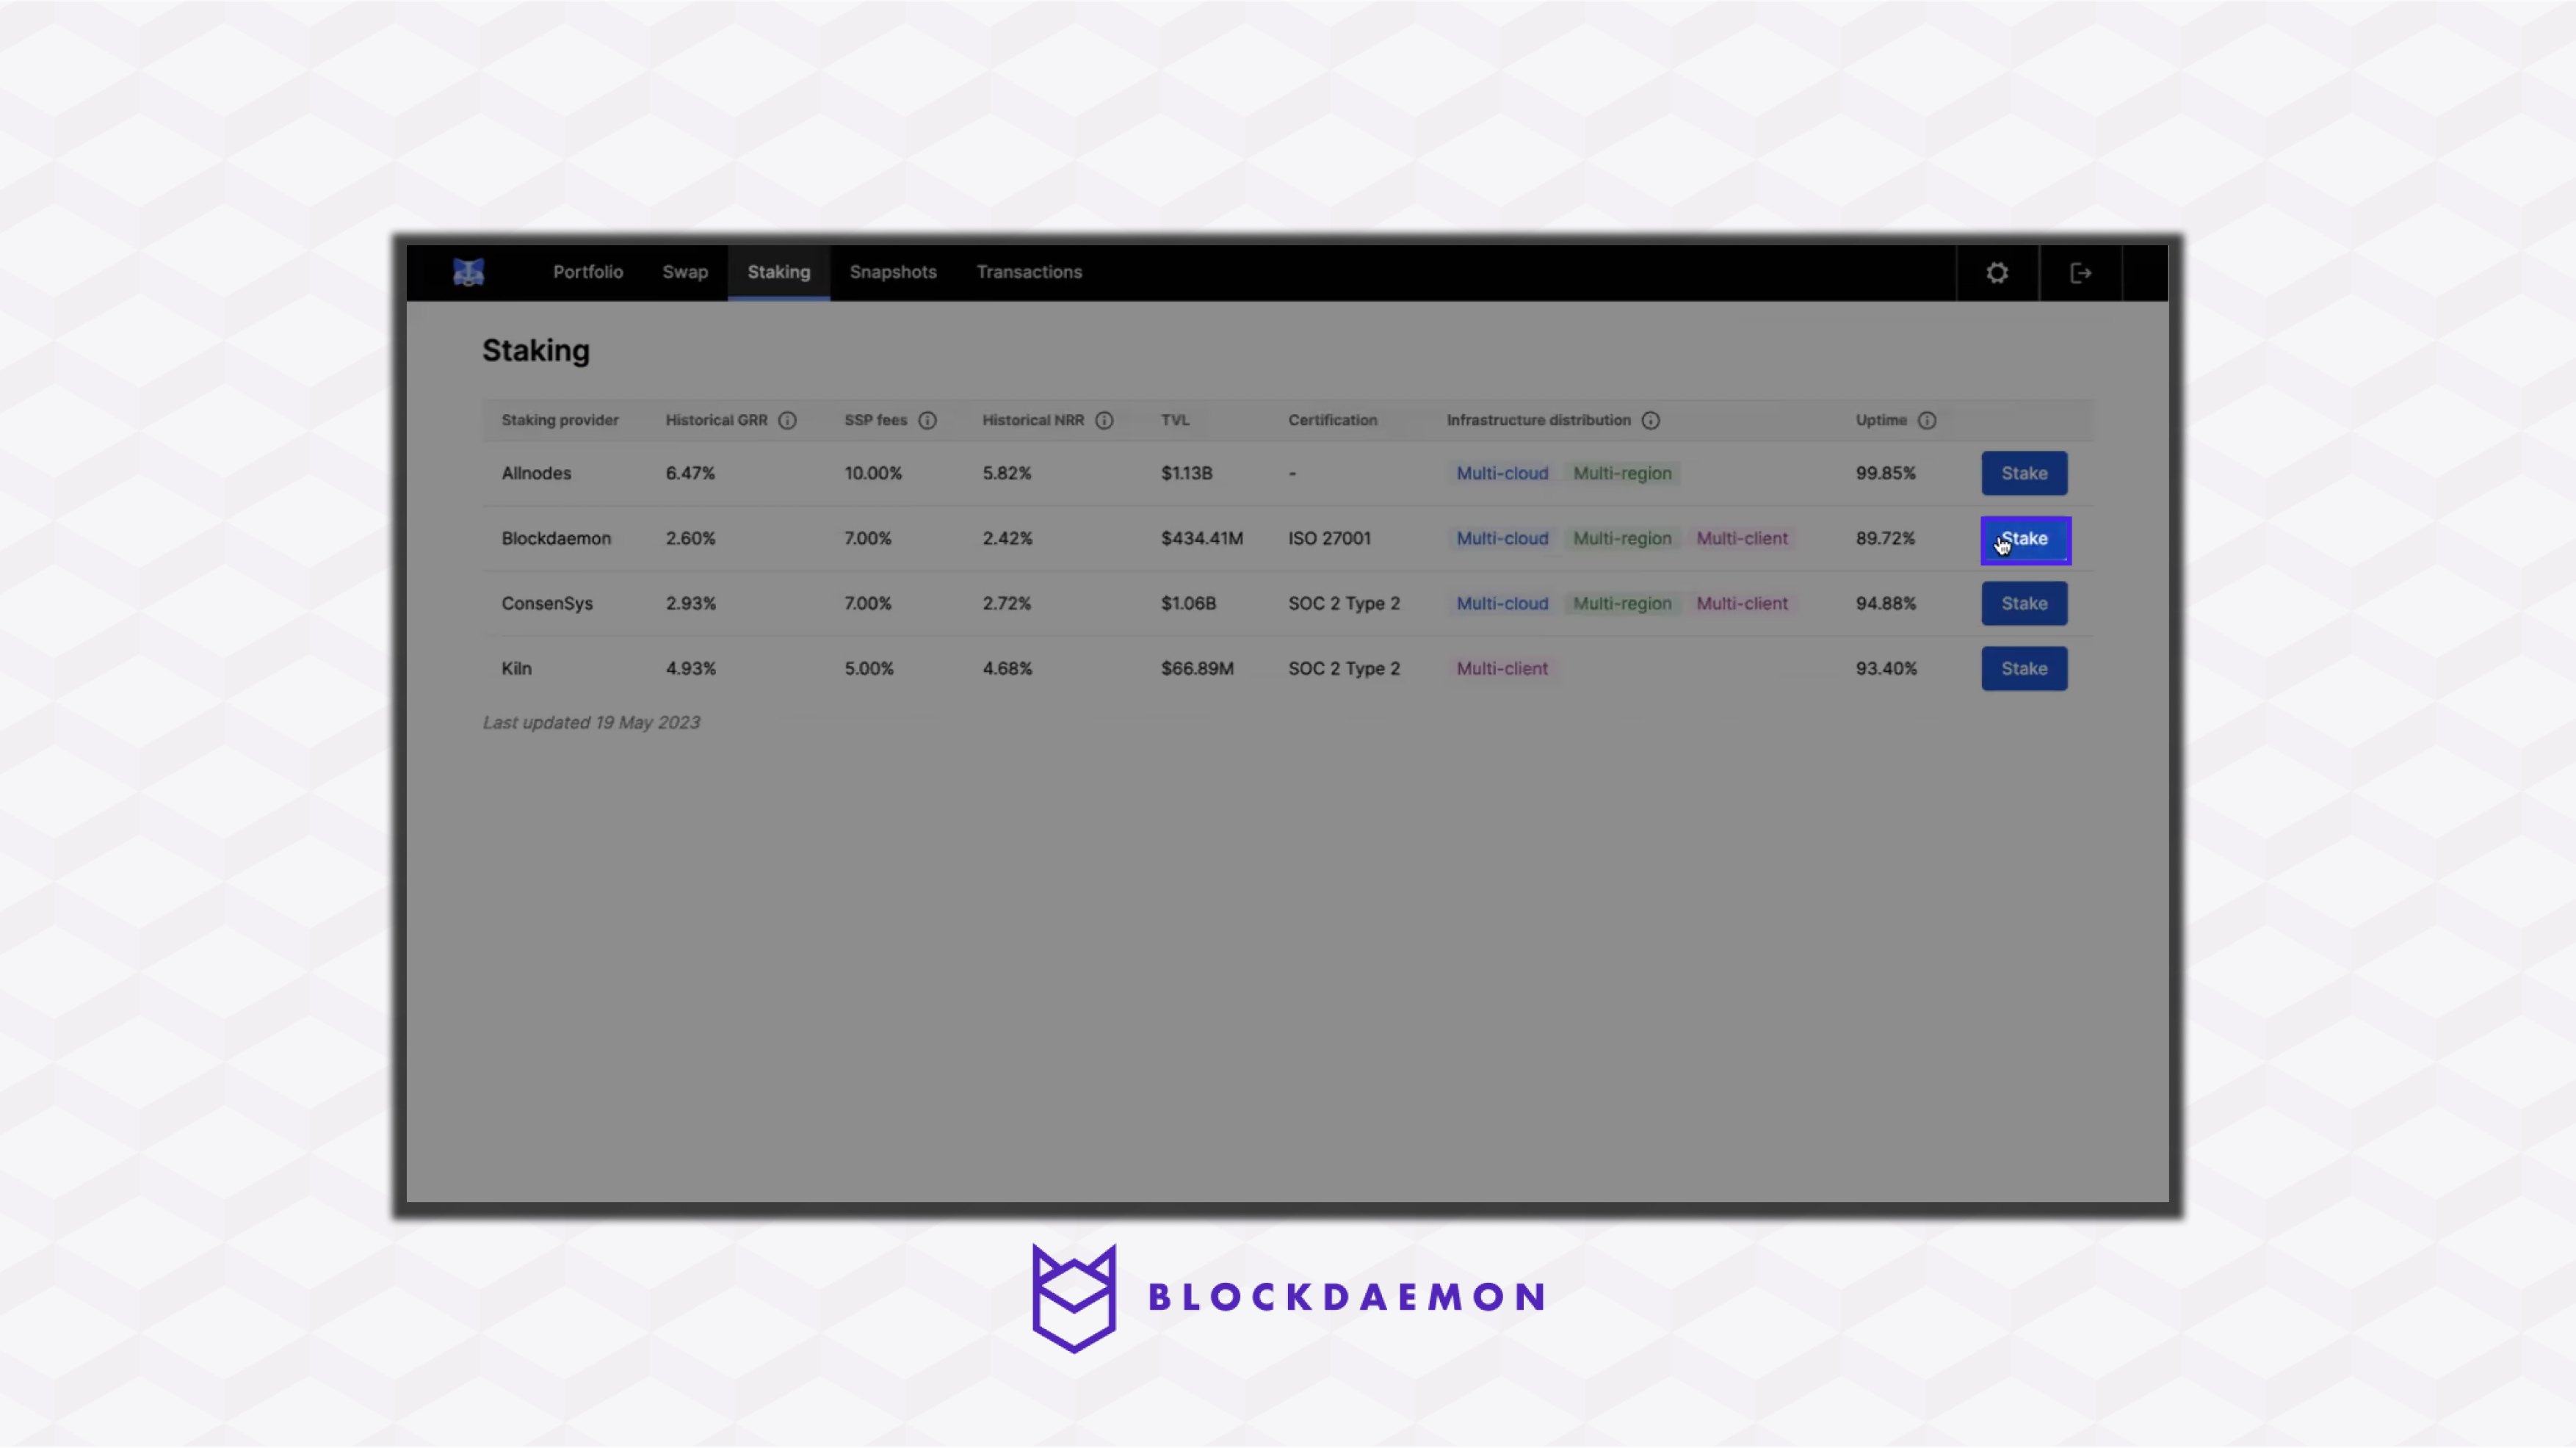
- Click the Staking tab on the main navigation menu.
- To select Blockdaemon as the staking provider, click the Stake option adjacent to Blockdaemon.
- Populate the mandatory fields required for staking:
- Choose the account you wish to stake from.
- Define the amount of ETH you want to stake.
- Read and accept the terms & conditions.
- Click the Confirm stake button. This will prompt you to authorize this transaction on both your wallet and with your custodian.
Step 2: Approve the Transaction From Your Wallet
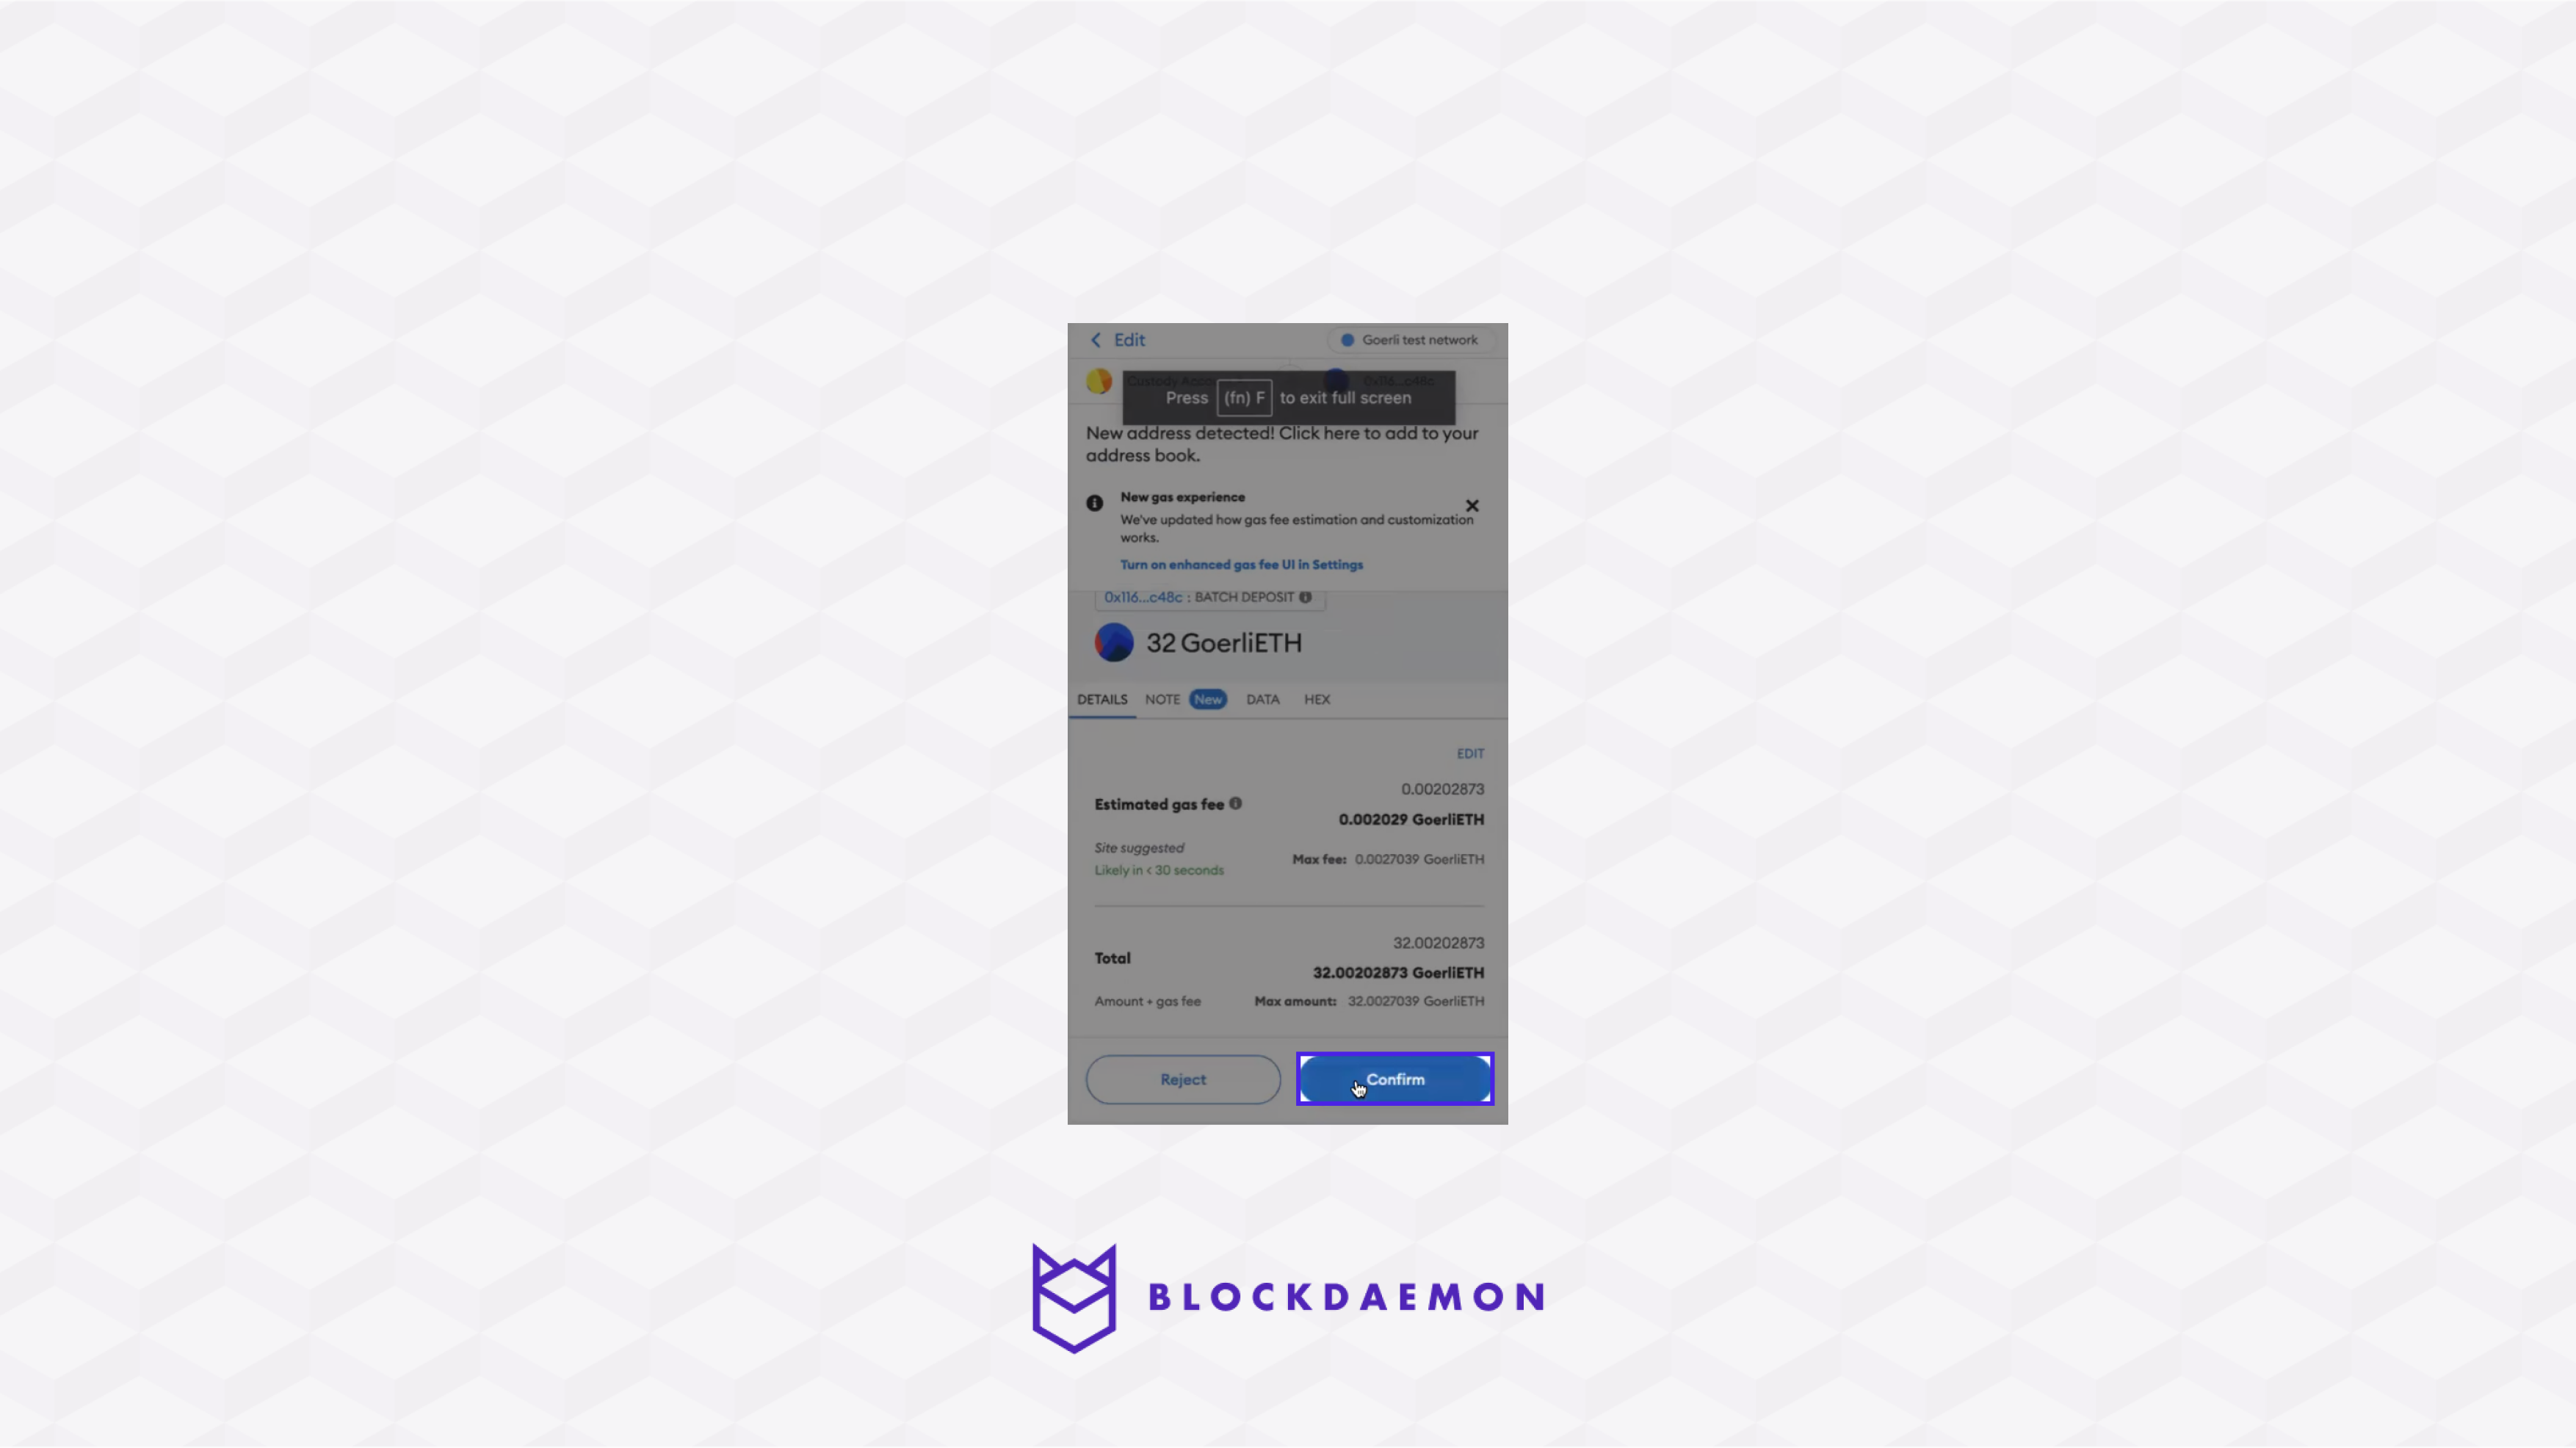
- Go to your MetaMask wallet.
- Review and Confirm the corresponding transaction on your wallet.
- Wait for the transaction to be processed.
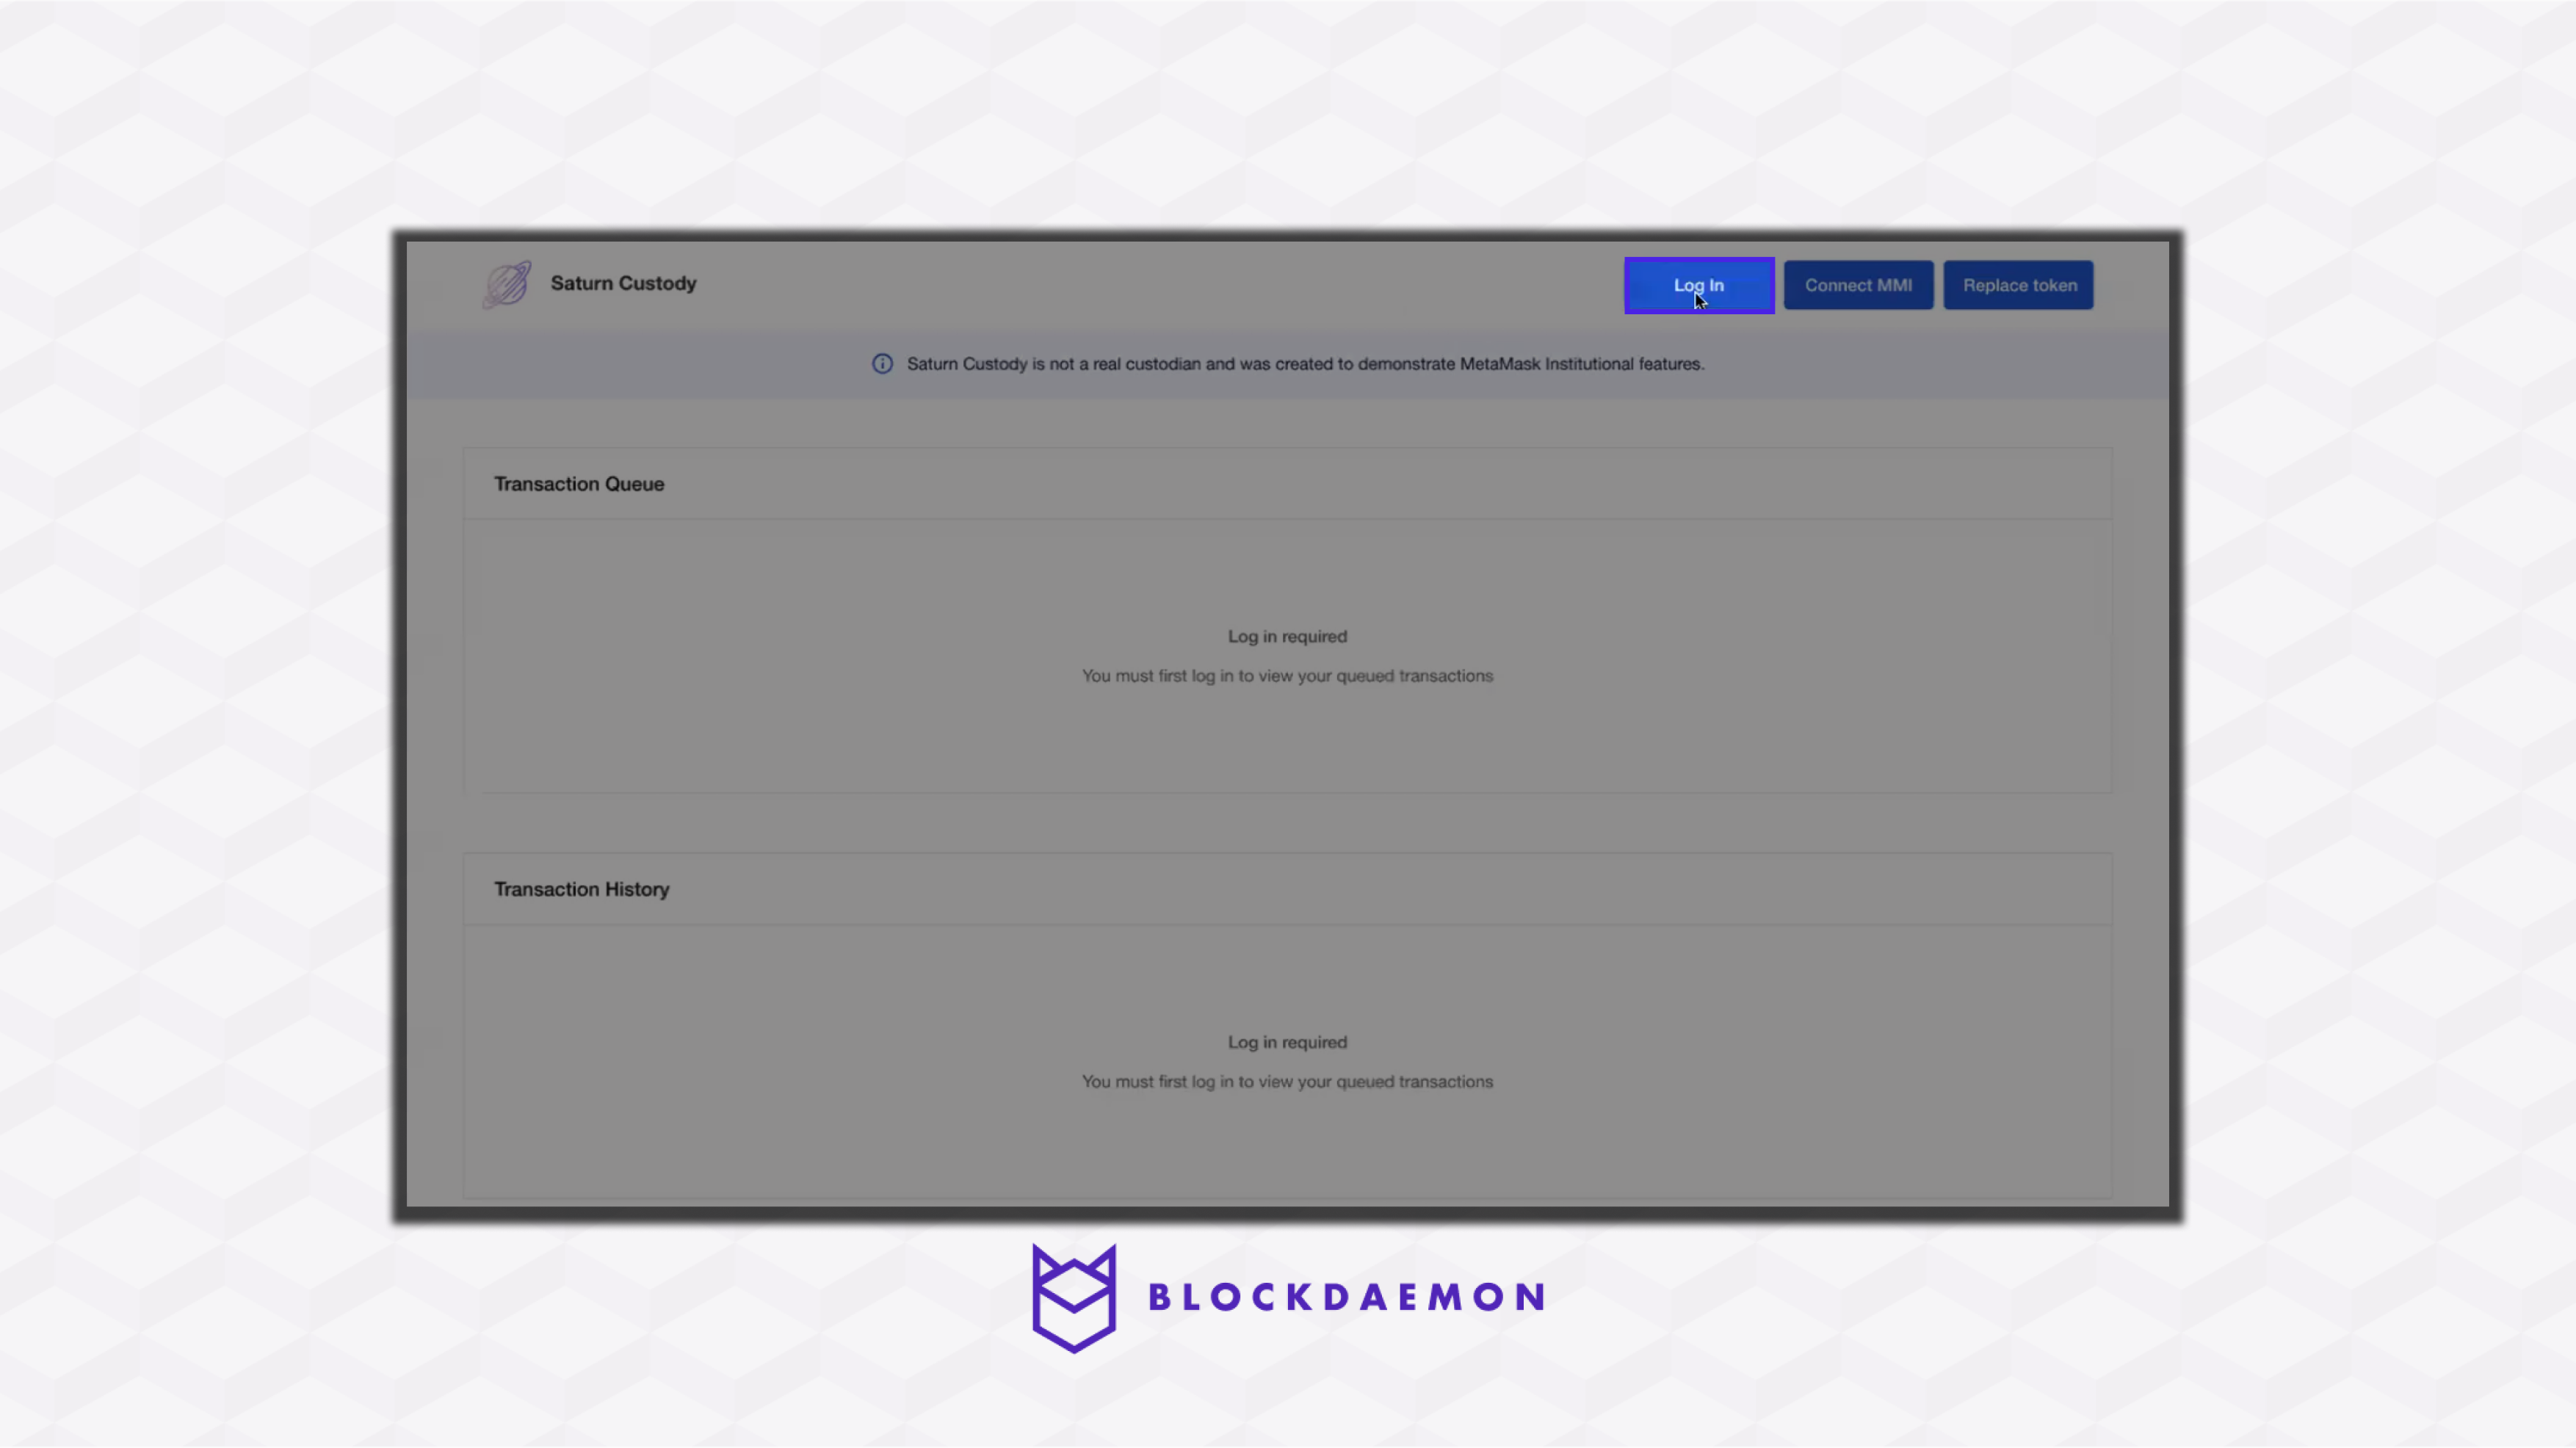
Step 3: Sign Using Your Custodian
Note:
This guide will use Saturn Custody as our demo custodian to sign the operation. It was created to demonstrate MetaMask Institutional features.
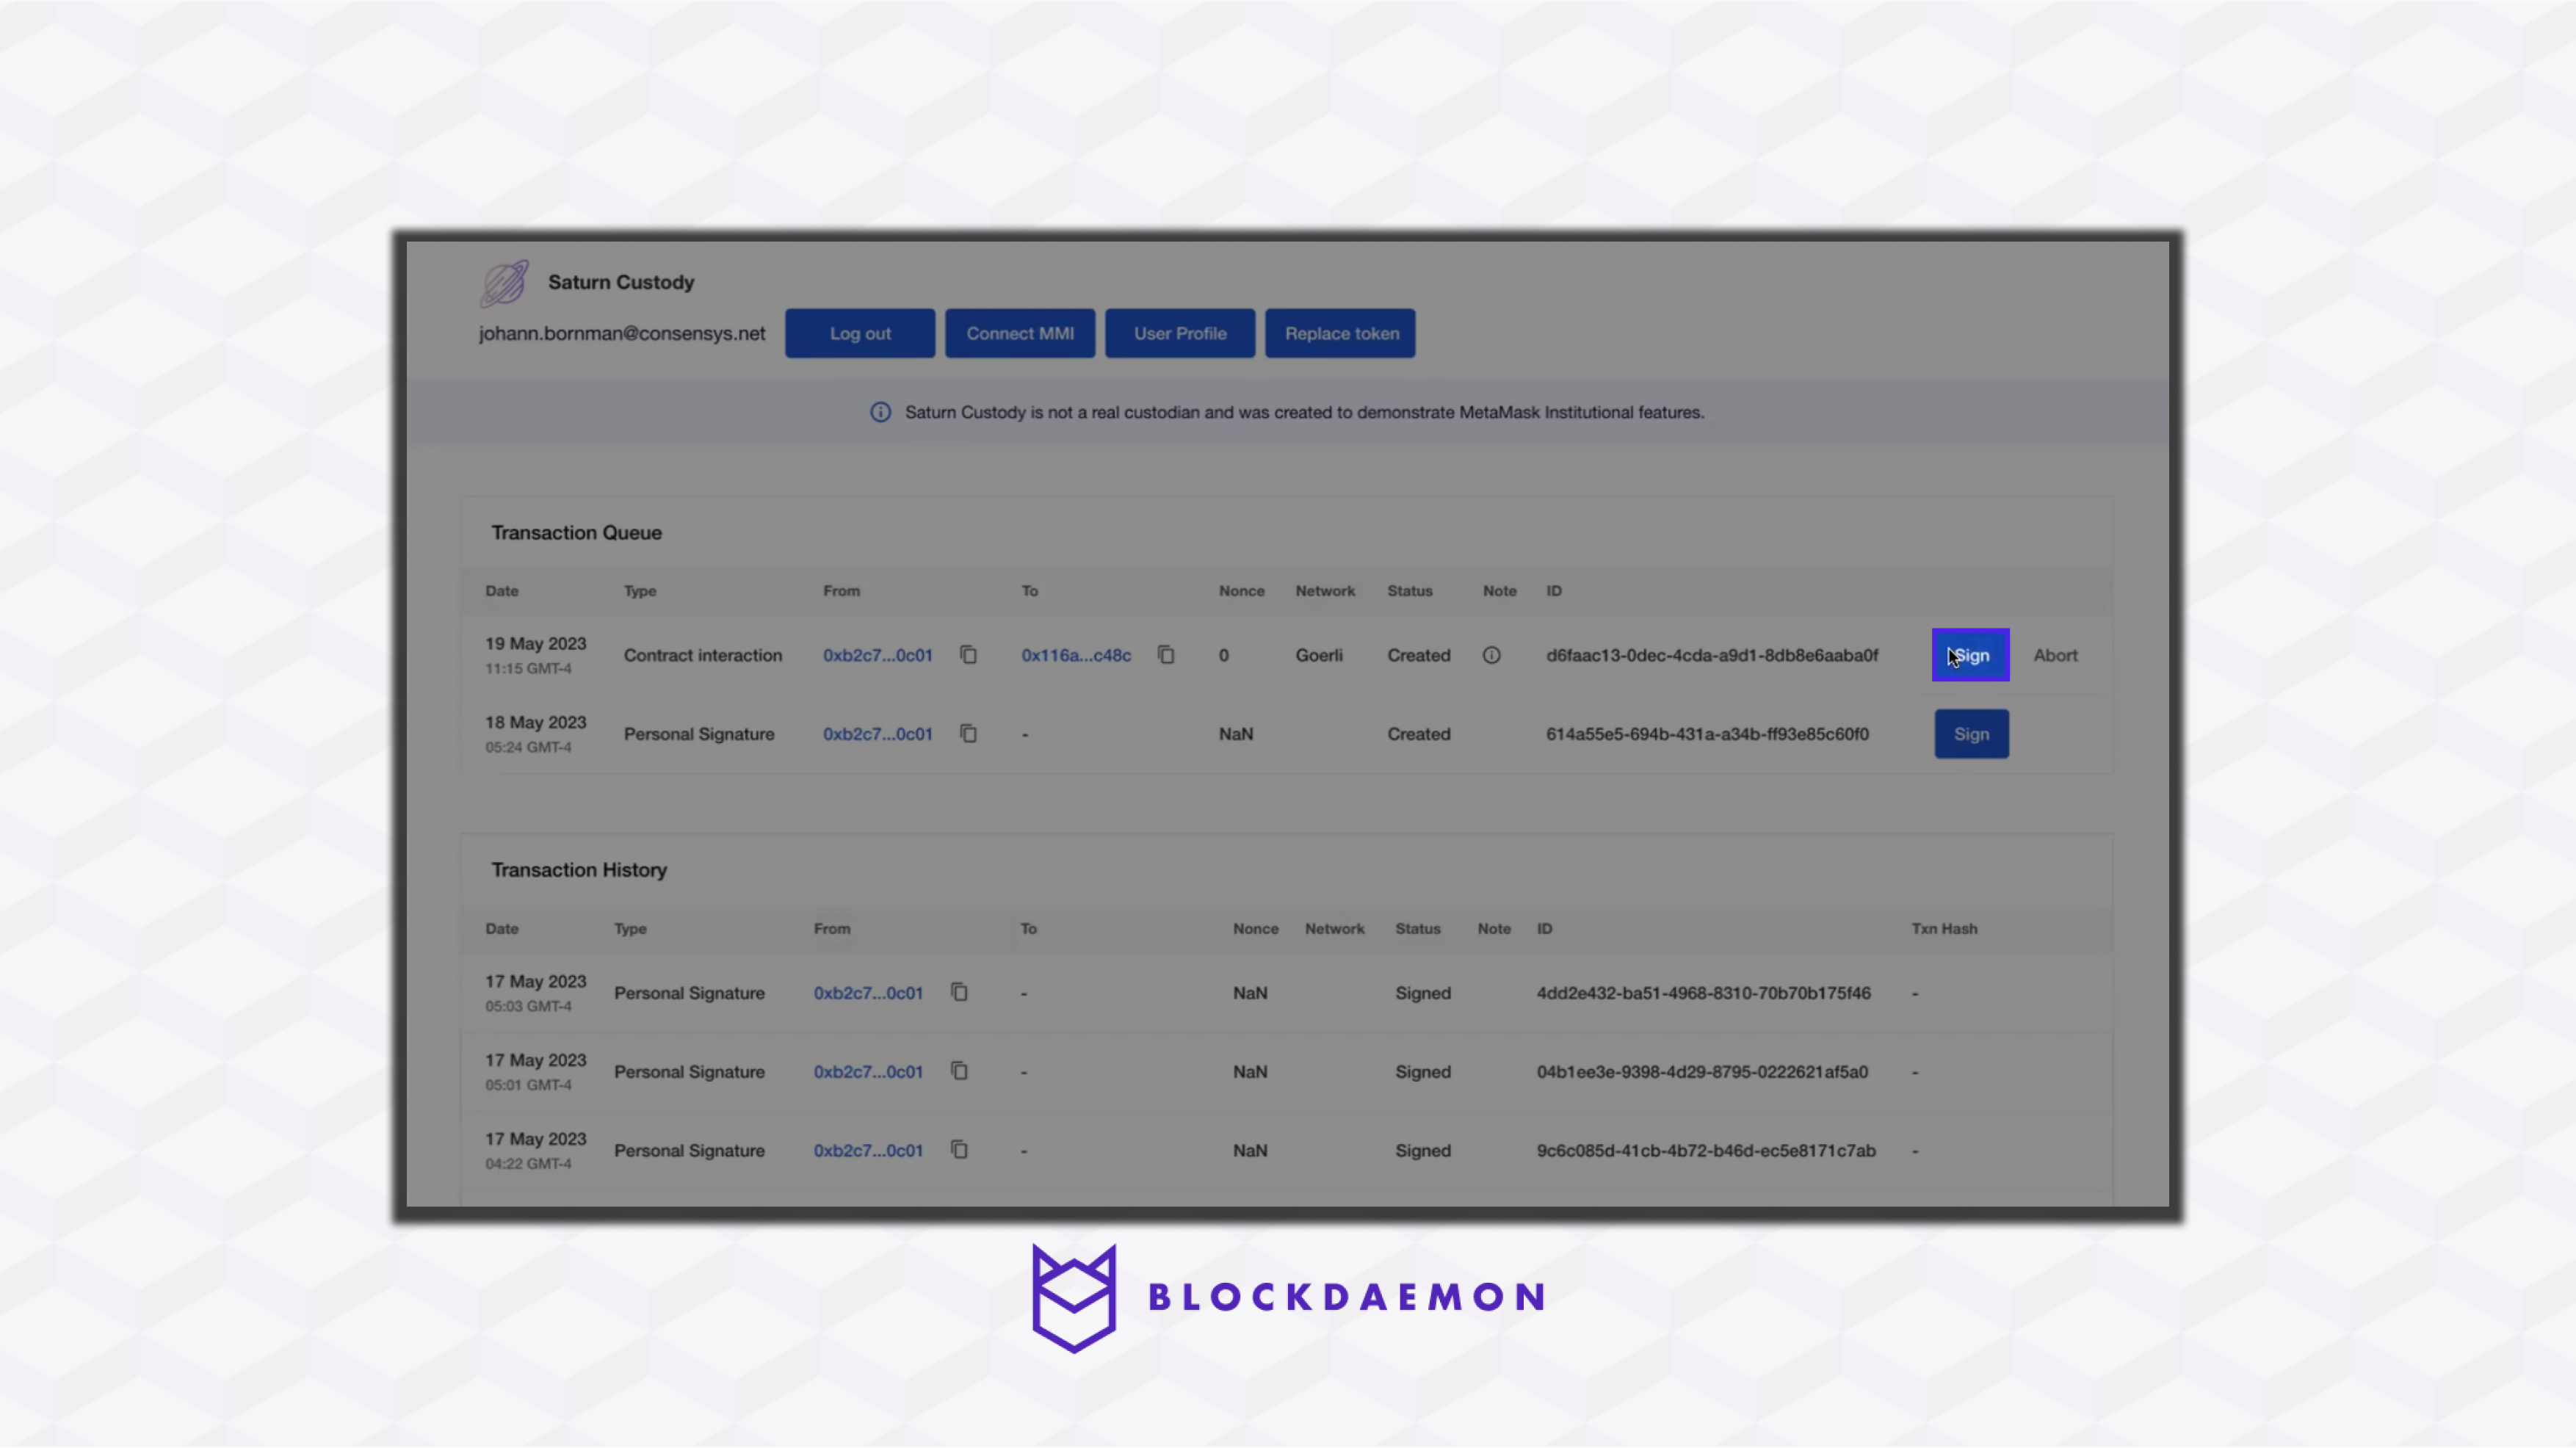
- Log in to your custodian. In this case, we logged in to Saturn Custody. Upon logging in, your queued transaction will be visible.
- Click the Sign option in the Transaction Queue section.
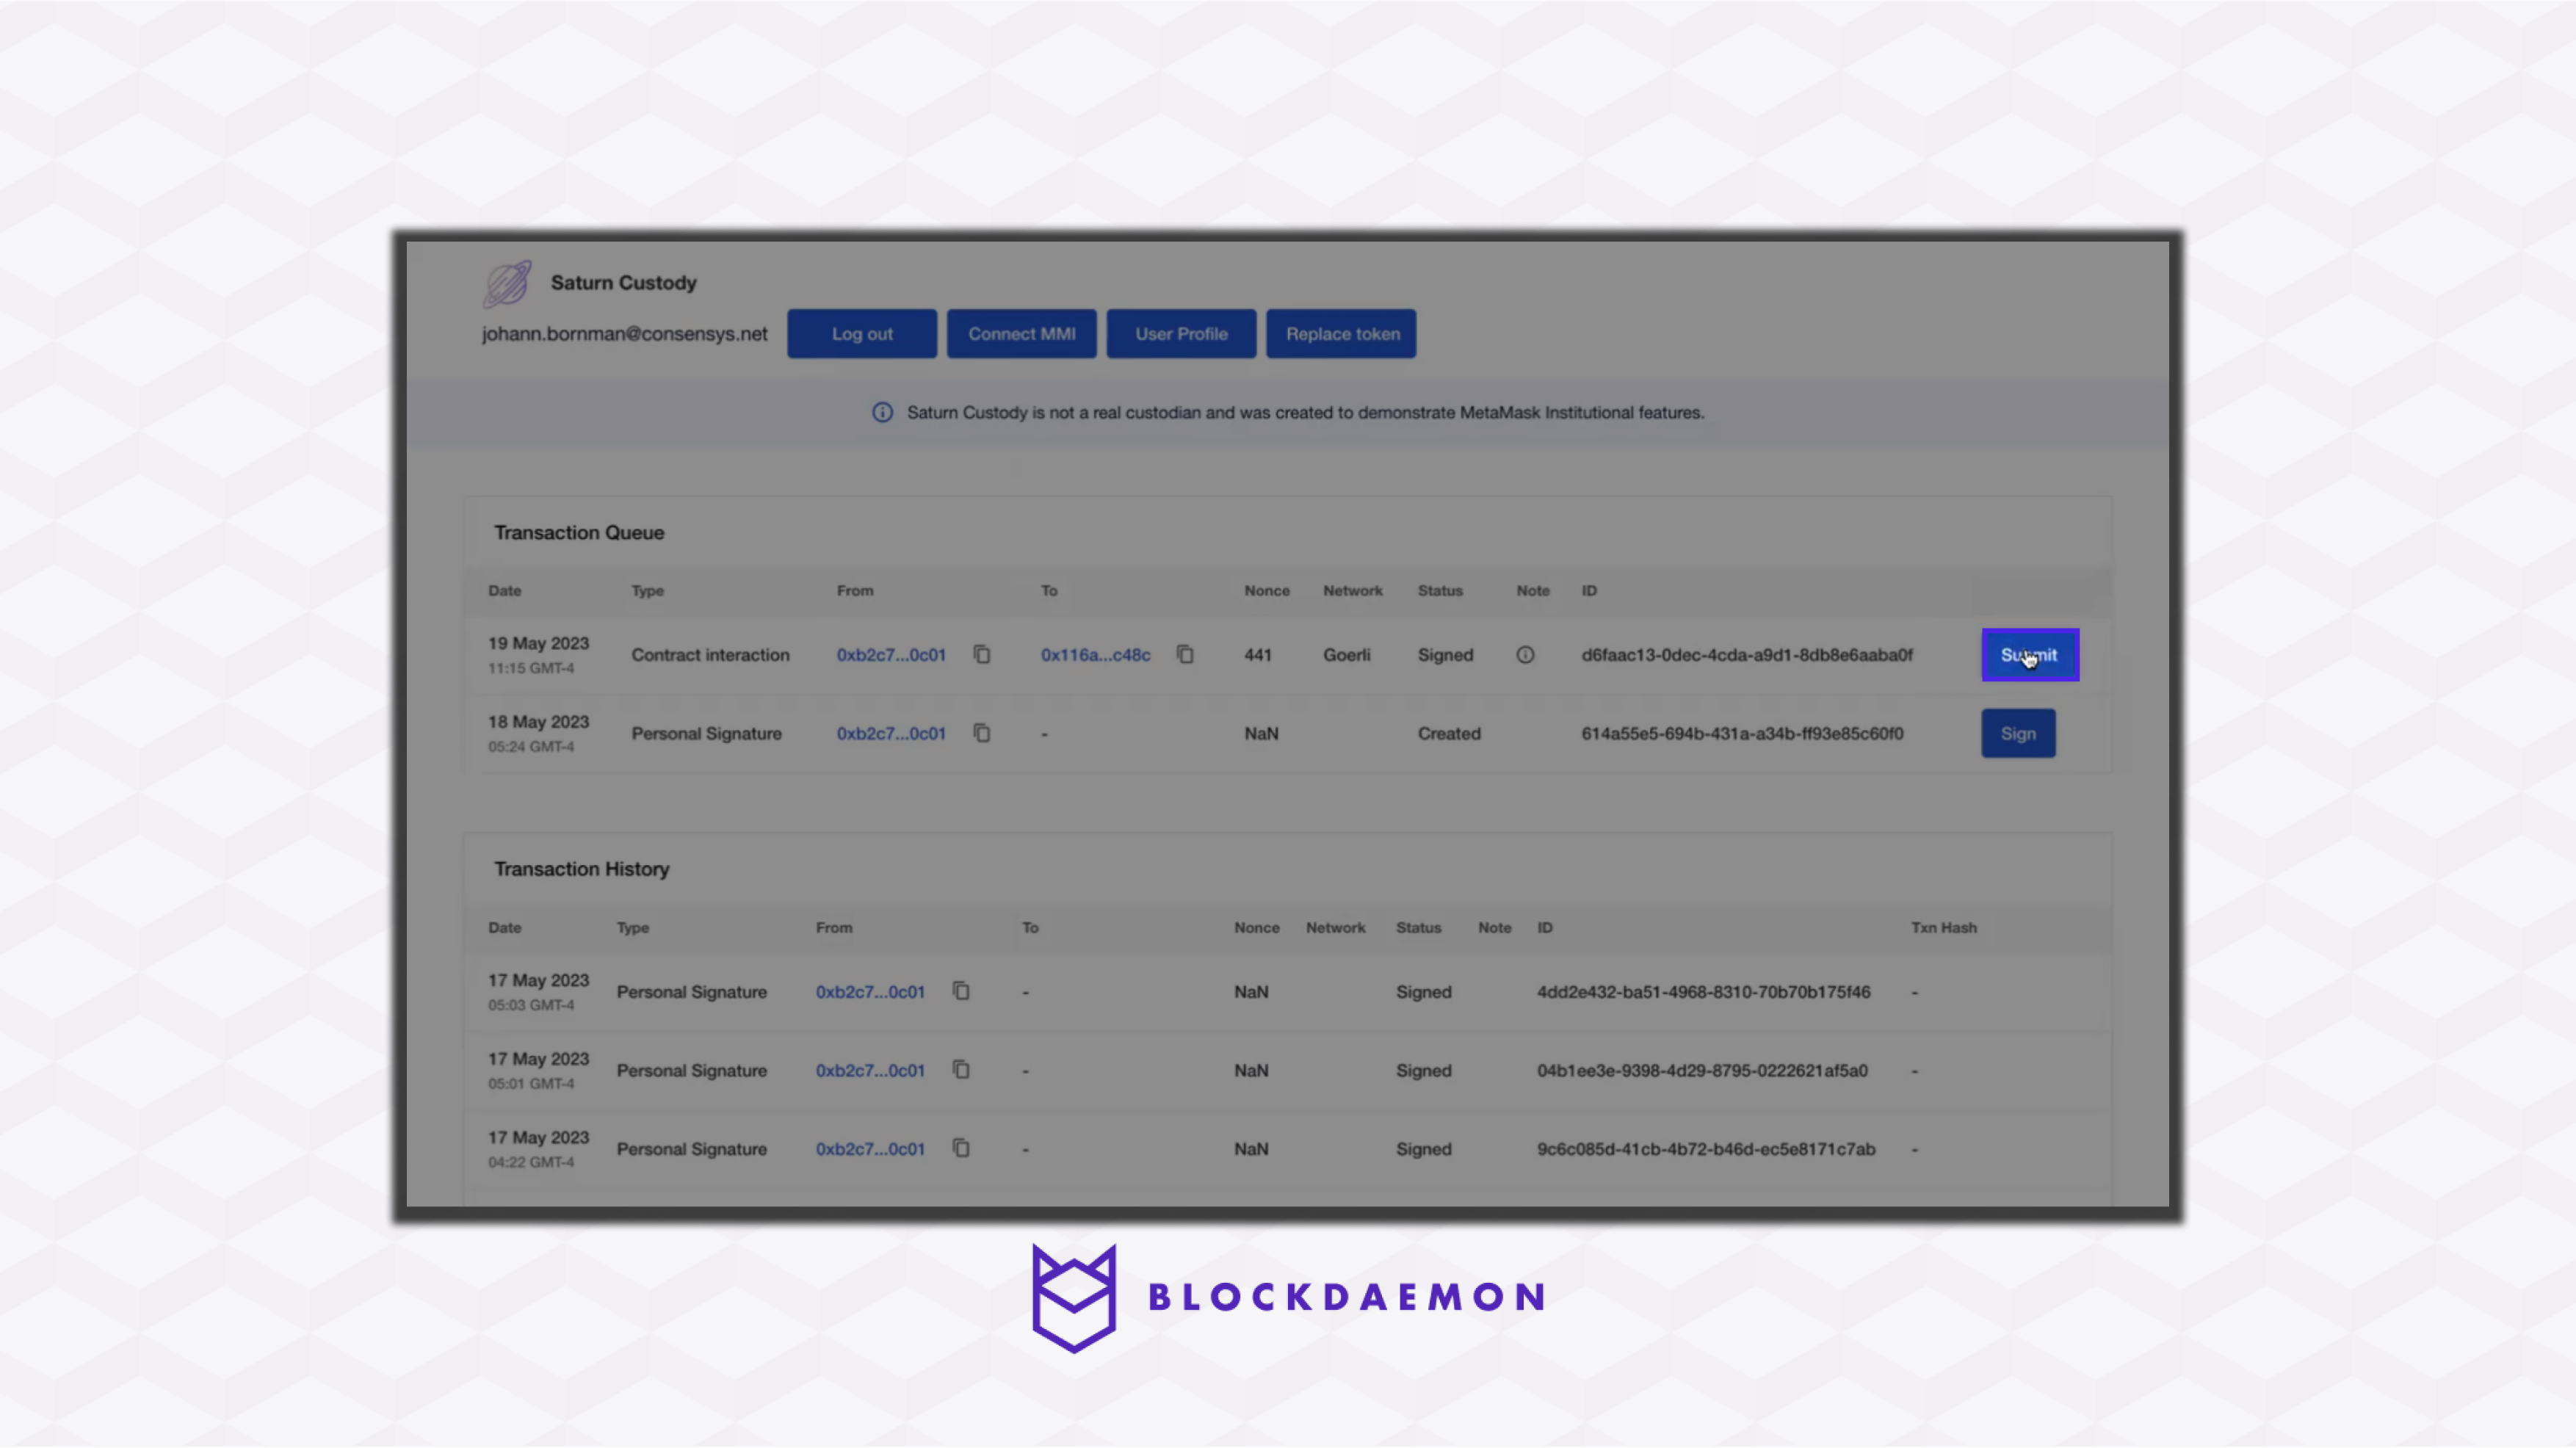
- Then, confirm the signing by clicking Submit.
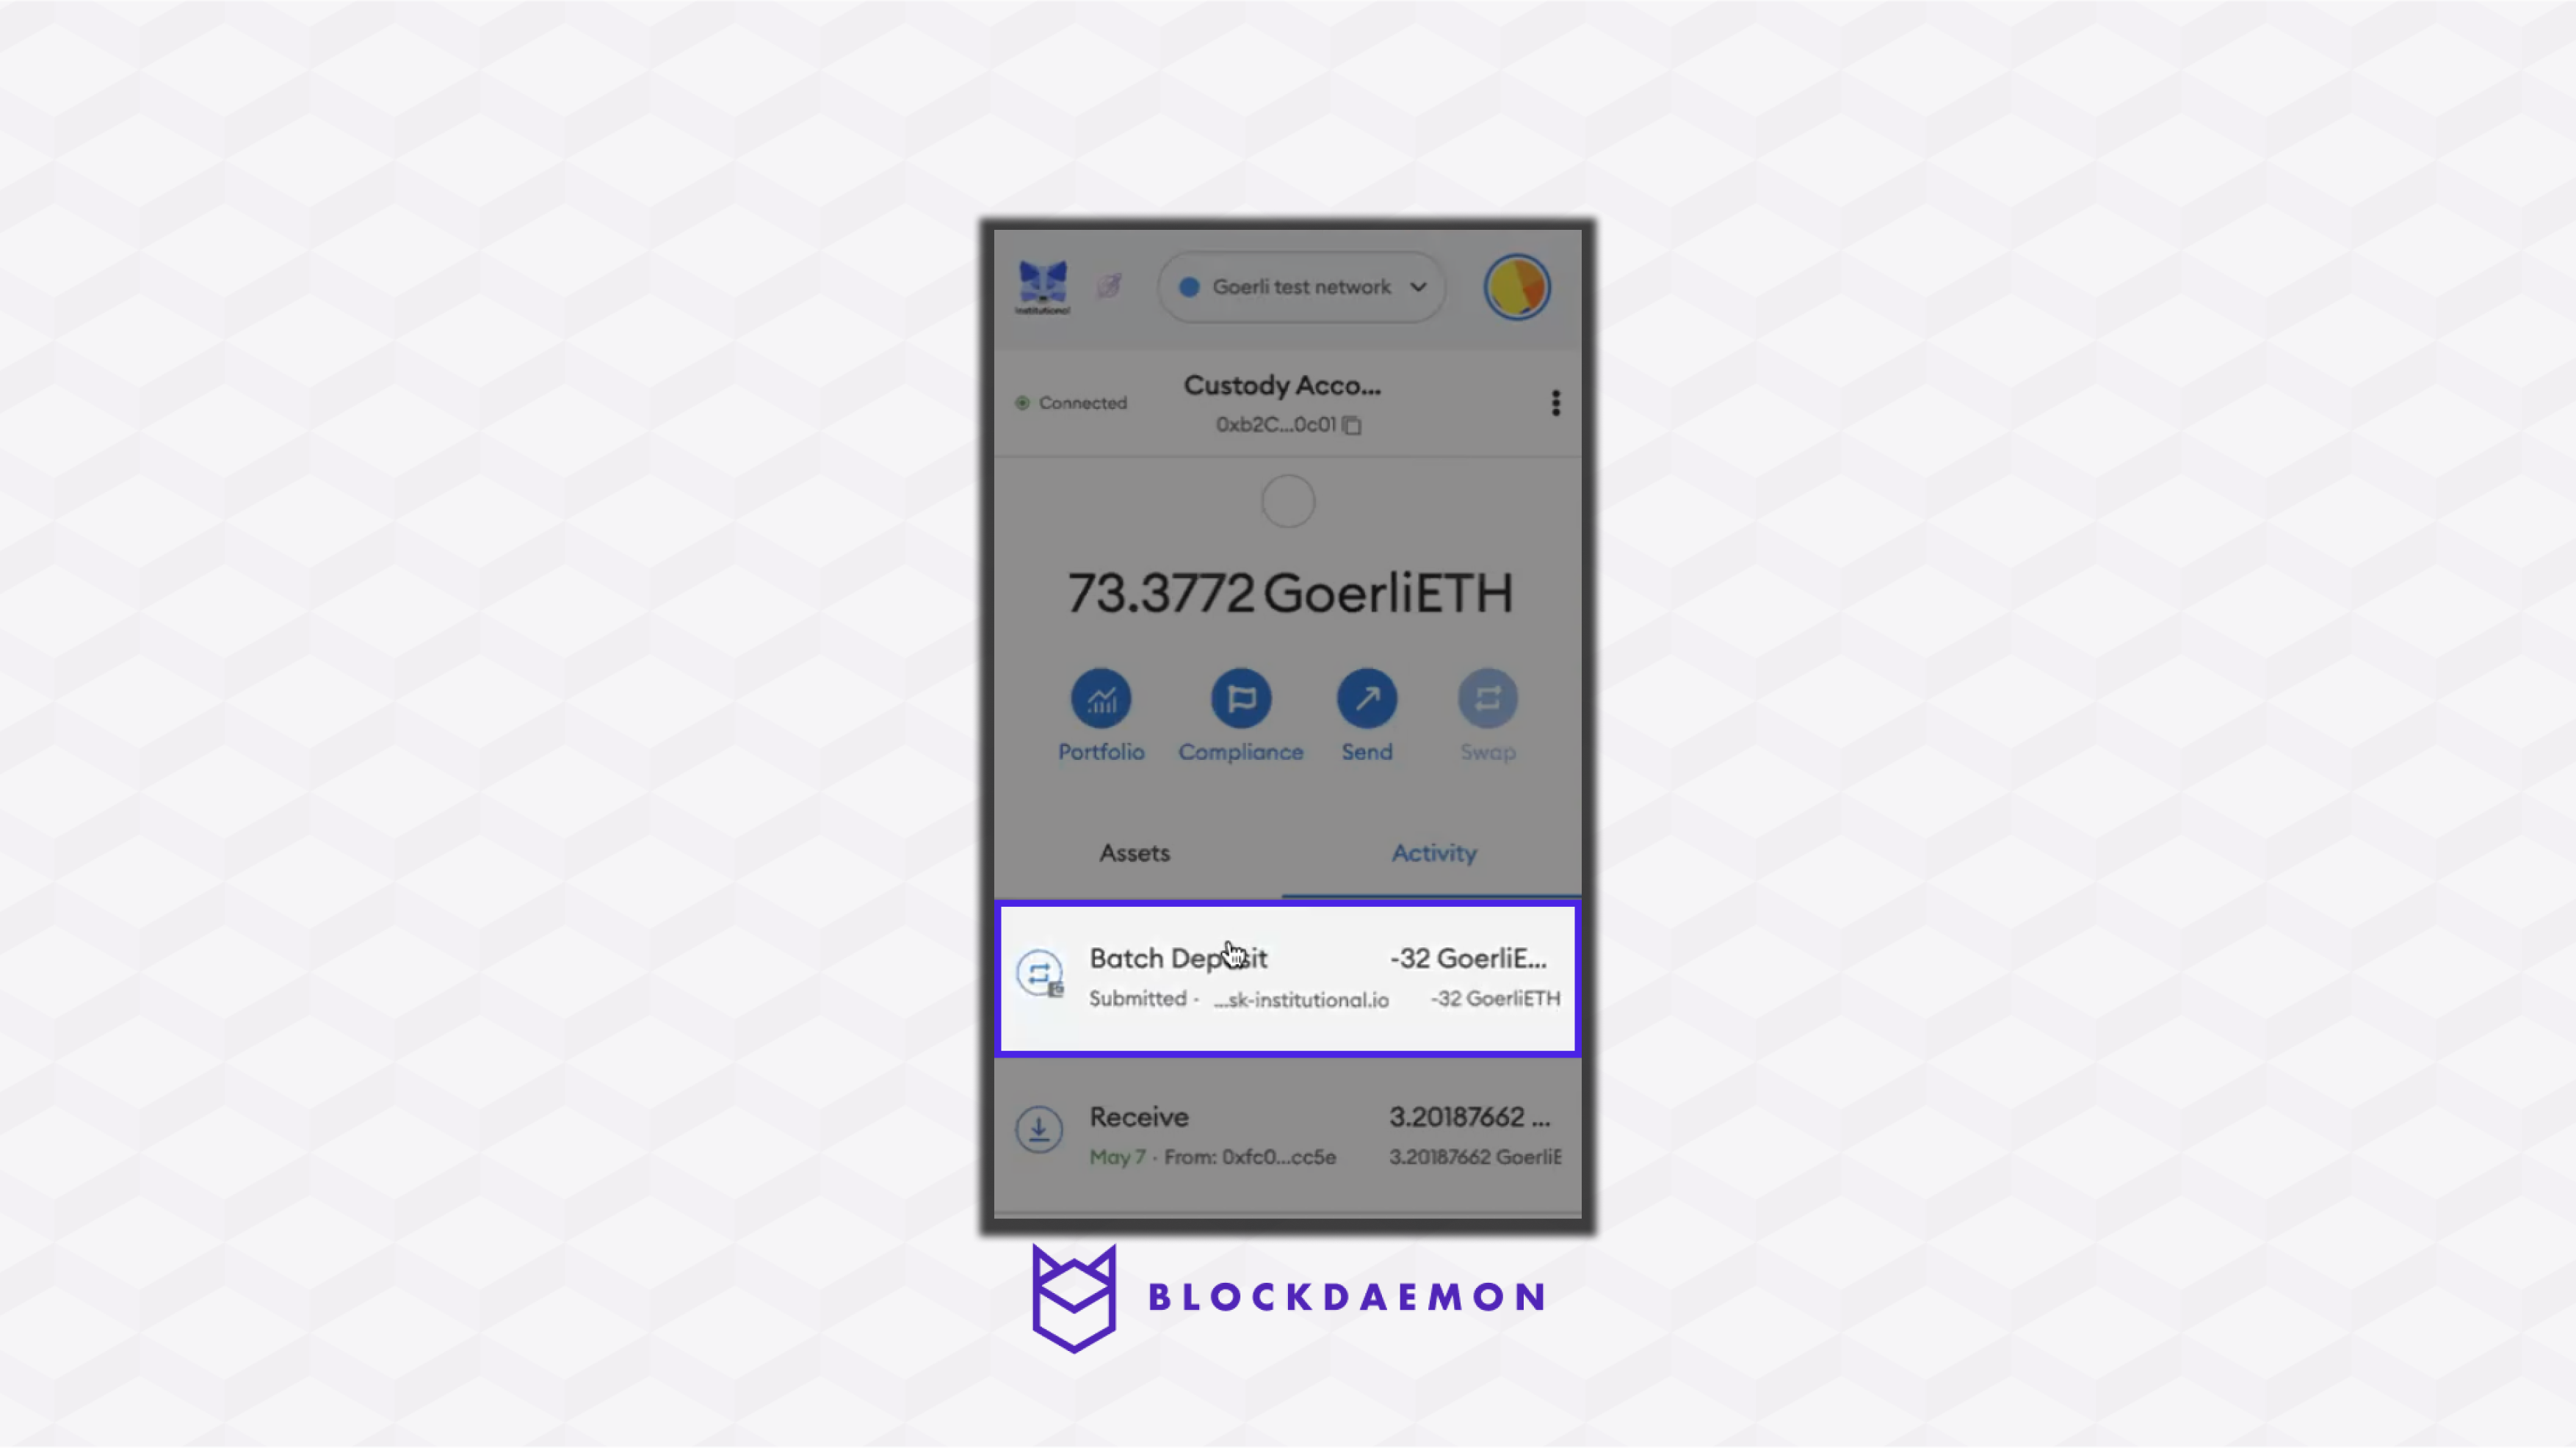
Step 4: Wait for Approval
- Click on the MetaMask wallet extension on your browser.
- Select the Activity tab.
- Click the recent transaction.
- Click View on the block explorer; it will redirect you to etherscan.io to check the transaction status.
Note:
It is recommended to wait for transaction confirmation as it may still be broadcasting on the Ethereum network. The time it takes for confirmation can vary, typically a few minutes, depending on network activity.
Step 5: Check for Confirmation
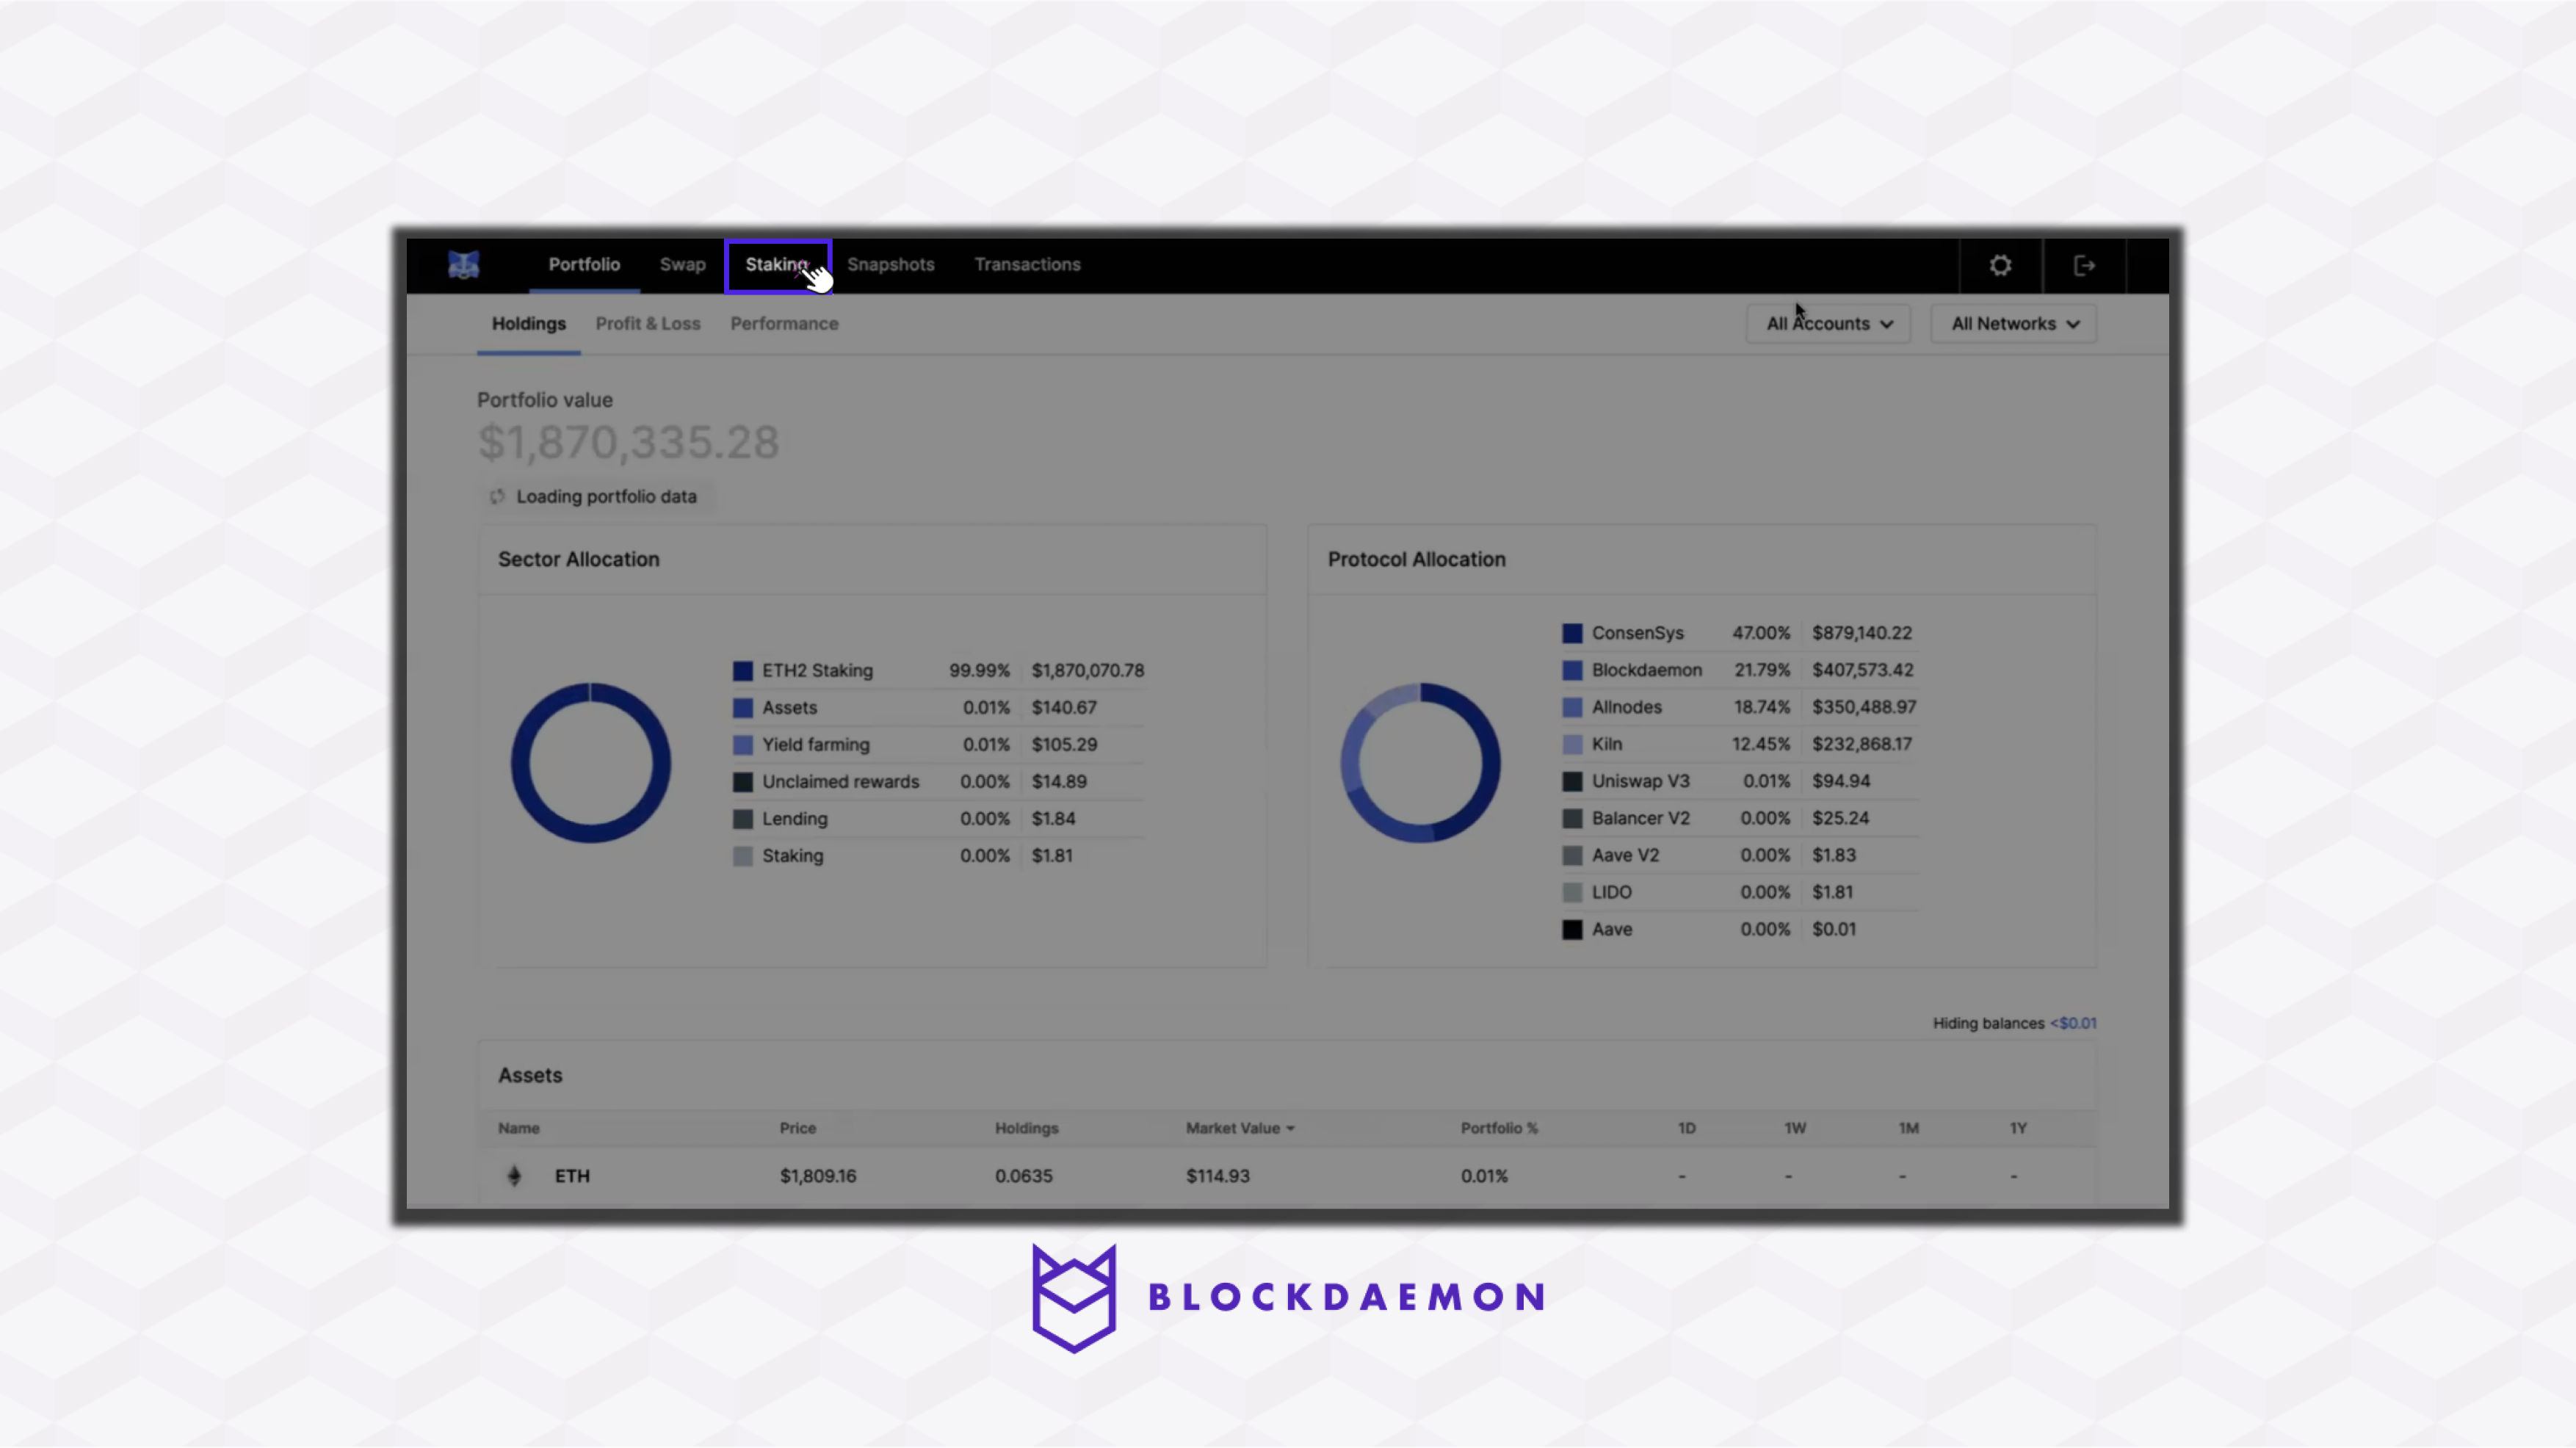
- Navigate back to your MetaMask Institutional dashboard.
- Click the View staked position on the transaction complete pop-up window.
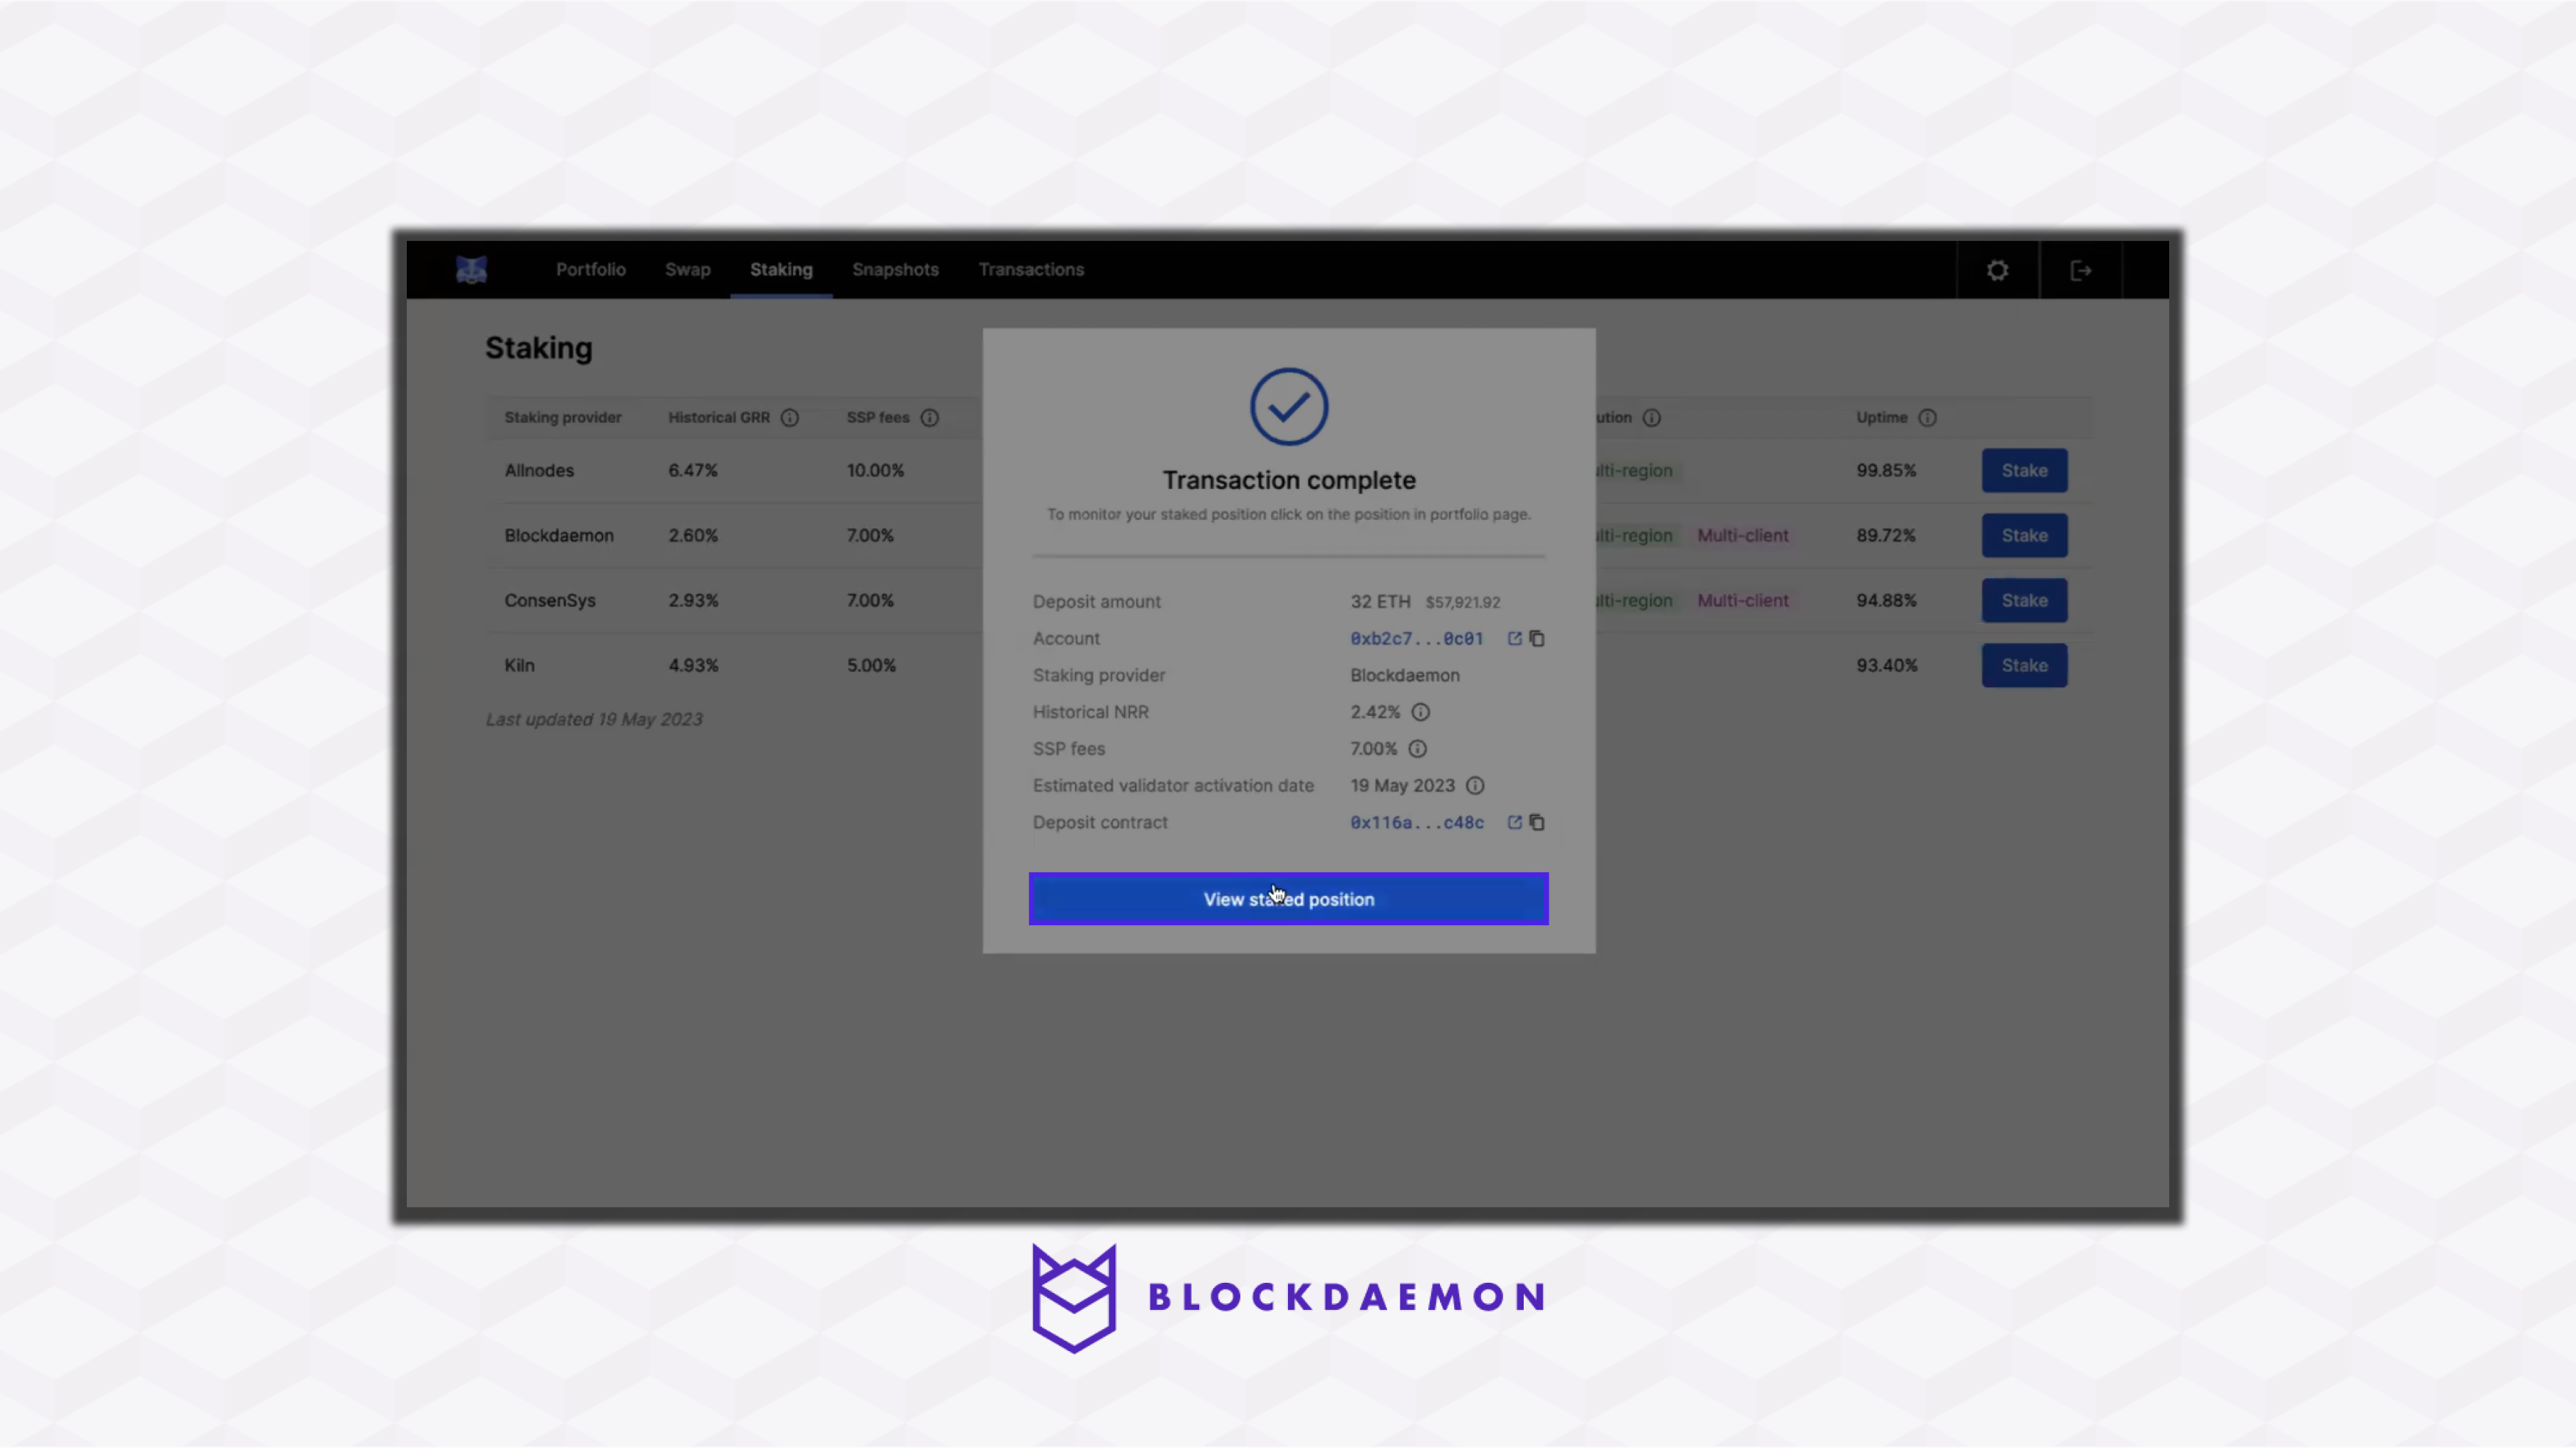
- The button will redirect you to the Portfolio tab. You can view a comprehensive dashboard that allows you to monitor and manage your transactions. The newly created transaction will appear on top, and simultaneously, you can confirm that the staking service, Blockdaemon, is correctly attributed as your chosen Staking Provider.
👋 Need Help?
Contact us through email or our support page for any issues, bugs, or assistance you may need.
Updated about 2 months ago